Onboarding
Guide and best practices for Blueprint Developers on both Project Teams and Tech Team. We recommend reading this if you are new to any Blueprint role: E-Board Member, Technical Lead, Product Manager, Designer, and Developers!
- Onboarding for Tech Team
- Contributing to Blueprint - Git/GitHub
- Agile/Scrum at Blueprint
- Introduction to Node.js
- Developer Best Practices
- Blueprint Learn
Onboarding for Tech Team
Onboarding
Quick Links:
How does the Tech Team work?
Git/Github
Making Your First Contribution!
This will be instructions on how to make your first contribution, with the example of adding John Doe to the list of contributors.
-
Cloning the repository.
- Open a new terminal and type the
git clonecommand followed by the GitHub repository you want to clone. In this case, it would begit clone https://github.com/stevensblueprint/blueprint_website.git. This should create a new folder on your computer with the name of the repository. - Cloning the repository creates a local copy of all the code that you can edit on your computer. This only needs to be run once and from here, you can keep editing this local copy and updating it from the GitHub repository when needed.

- Open a new terminal and type the
-
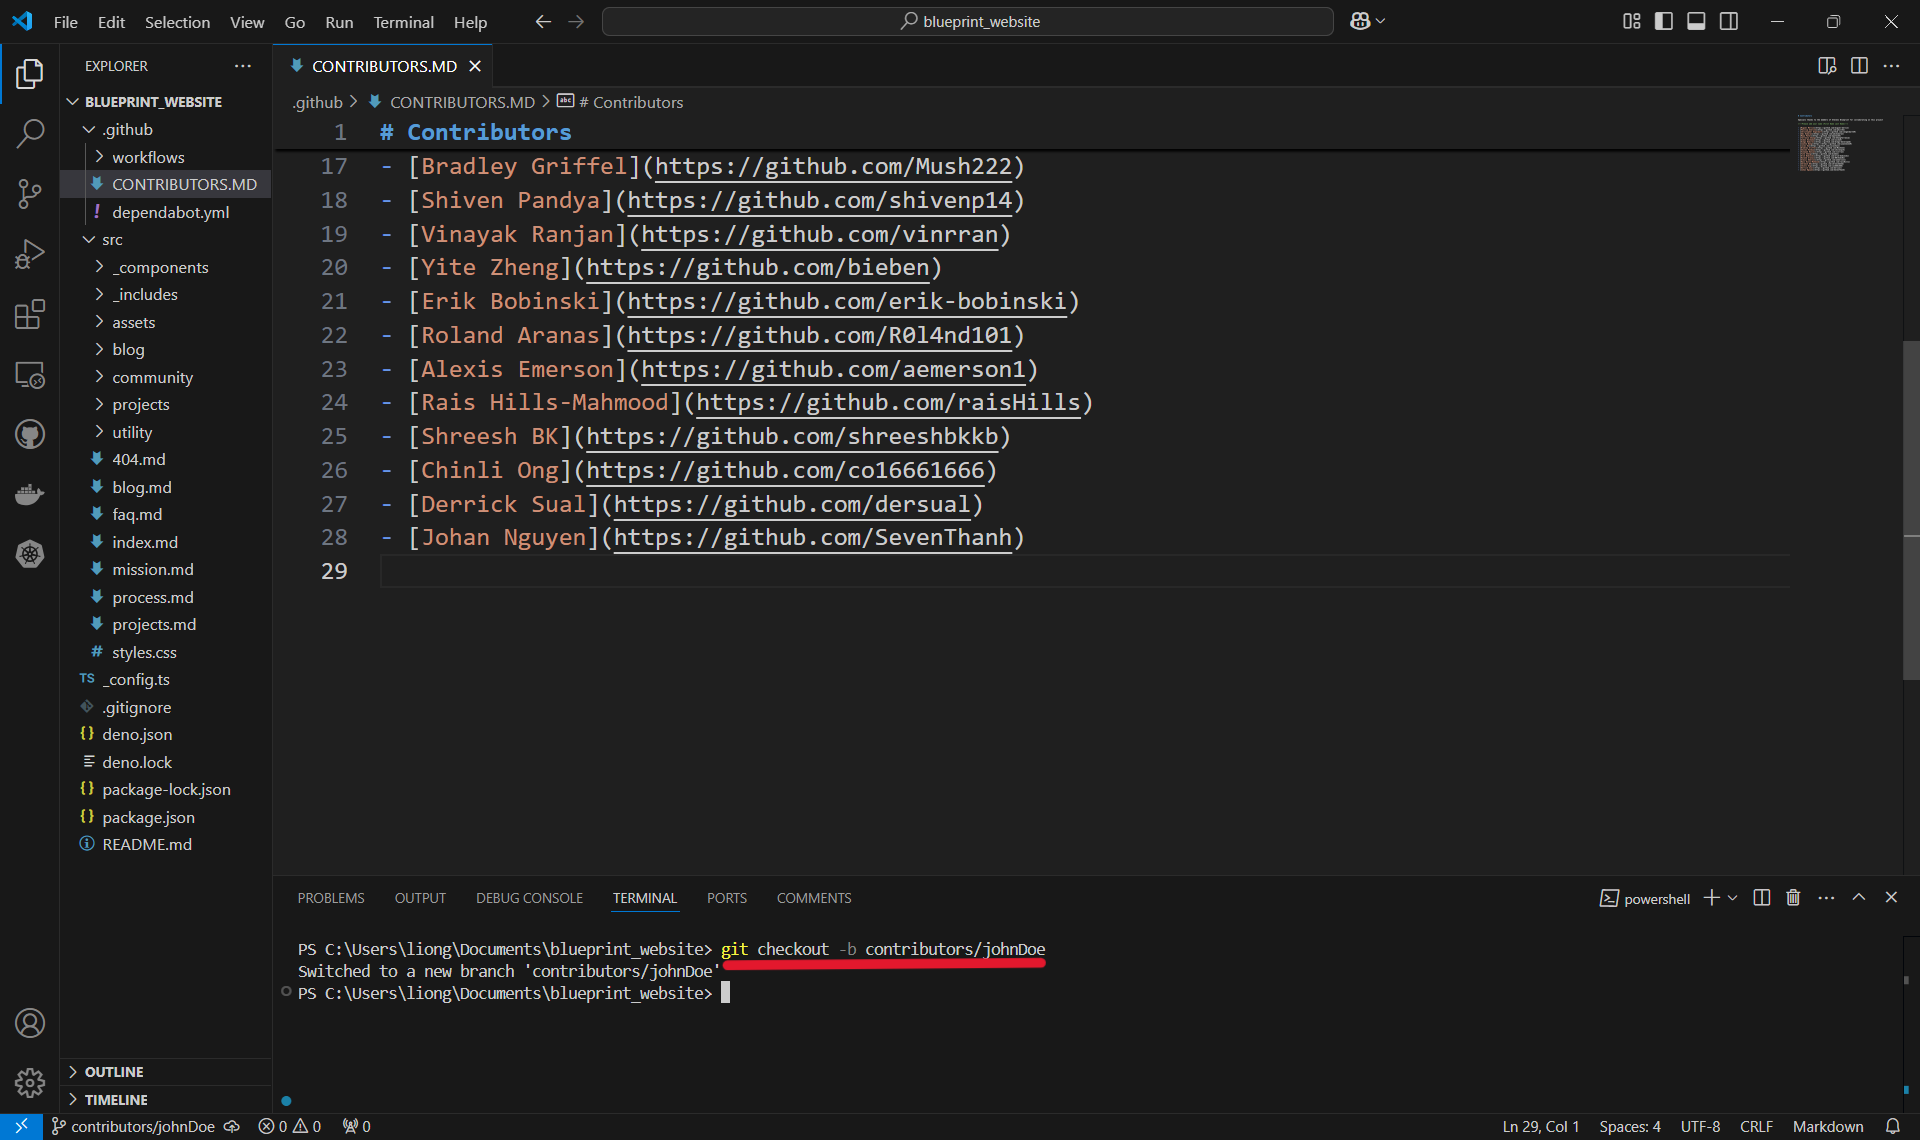
Creating a new branch.
- Open the folder of the local repository and run the
git checkoutcommand followed by the name of the branch. When naming a branch, it's good to pick a short, descriptive name. In our case, we are adding a contributor, so we'll typegit checkout -b contributors/johnDoe. - Notice the
-b? That's used to create a new branch as opposed to checking out a branch that already exists. - Creating a new branch makes a new version of the code that is isolated from the main code. This means changes can be made without affecting the main code (in case something goes terribly, disastrously wrong).

- Open the folder of the local repository and run the
-
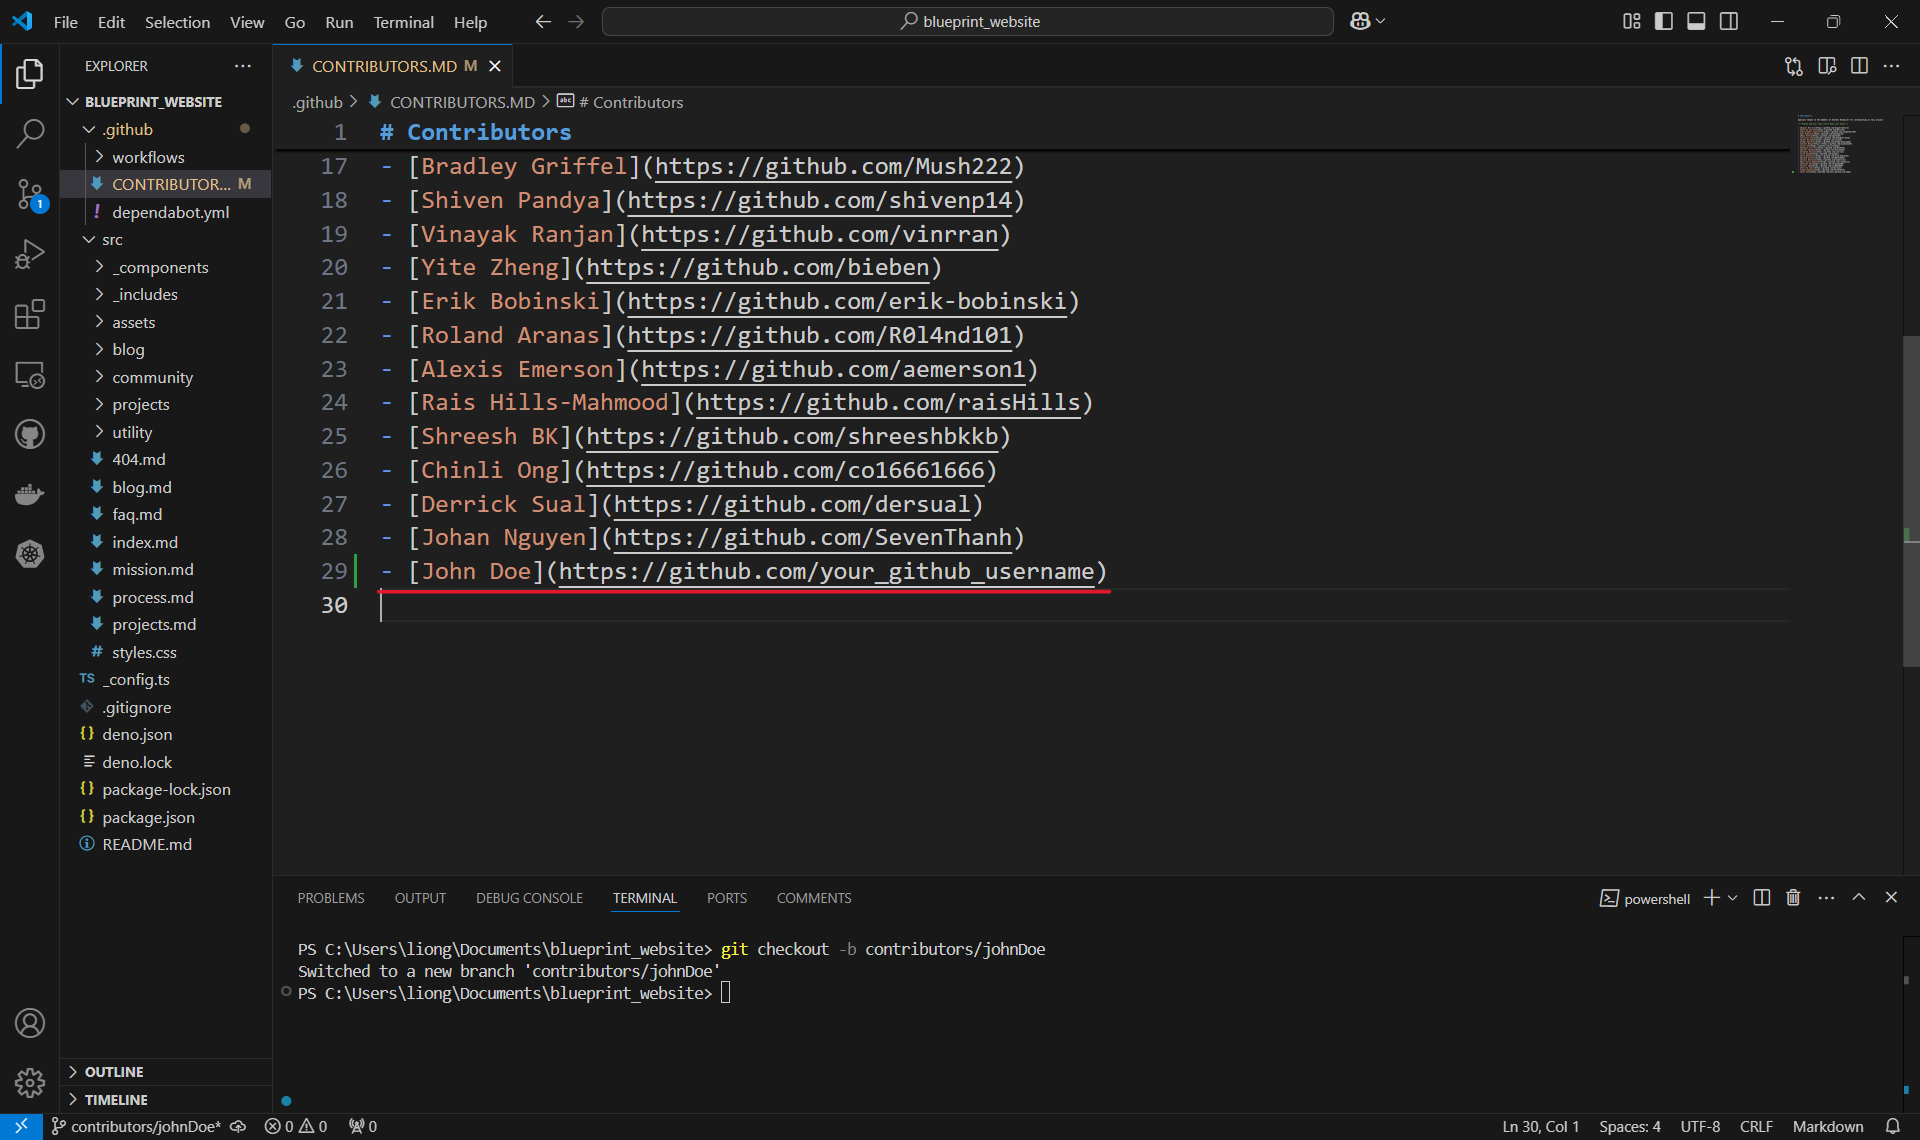
Making the change!
- Open the file you want to edit and make the necessary changes. In this case, we will be adding John Doe to the list of contributors.

-
Make sure to save the file!
- Open the file you want to edit and make the necessary changes. In this case, we will be adding John Doe to the list of contributors.
-
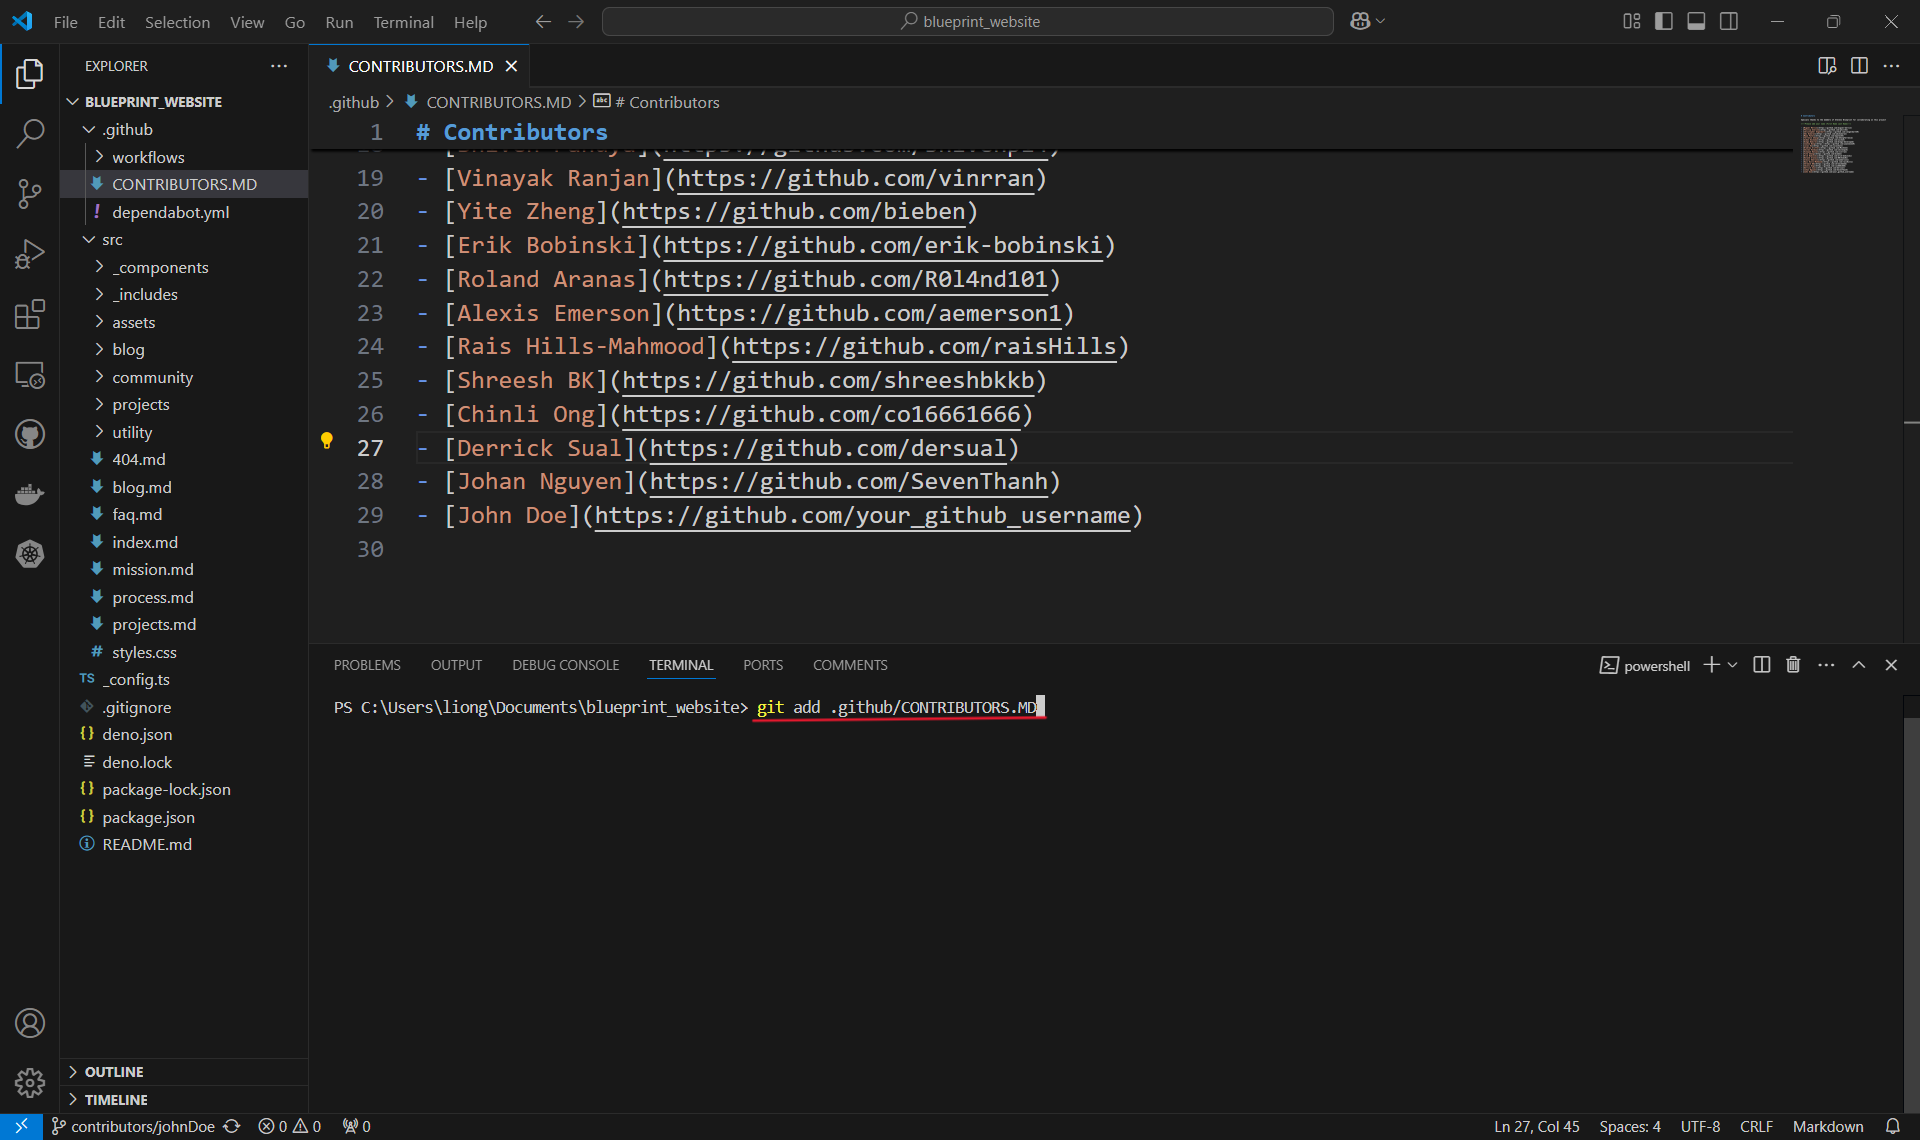
Adding a file to a commit.
- Once the change is made, use the
git addcommand followed by the local file path to the changed file, in order to include or 'stage' the change them for the next commit. Commits can be thought of as checkpoints; more on that later. - In this case, we made changes to the
CONTRIBUTORS.MDfile in the .github folder, so our file path is.github/CONTRIBUTORS.MDand we type ingit add .github/CONTRIBUTORS.MD. - You can use
git addmultiple times to add as many files as you need. - Another option is to use
git add .to add all files with changes.
-
Note that the file path is case sensitive.
- Once the change is made, use the
-
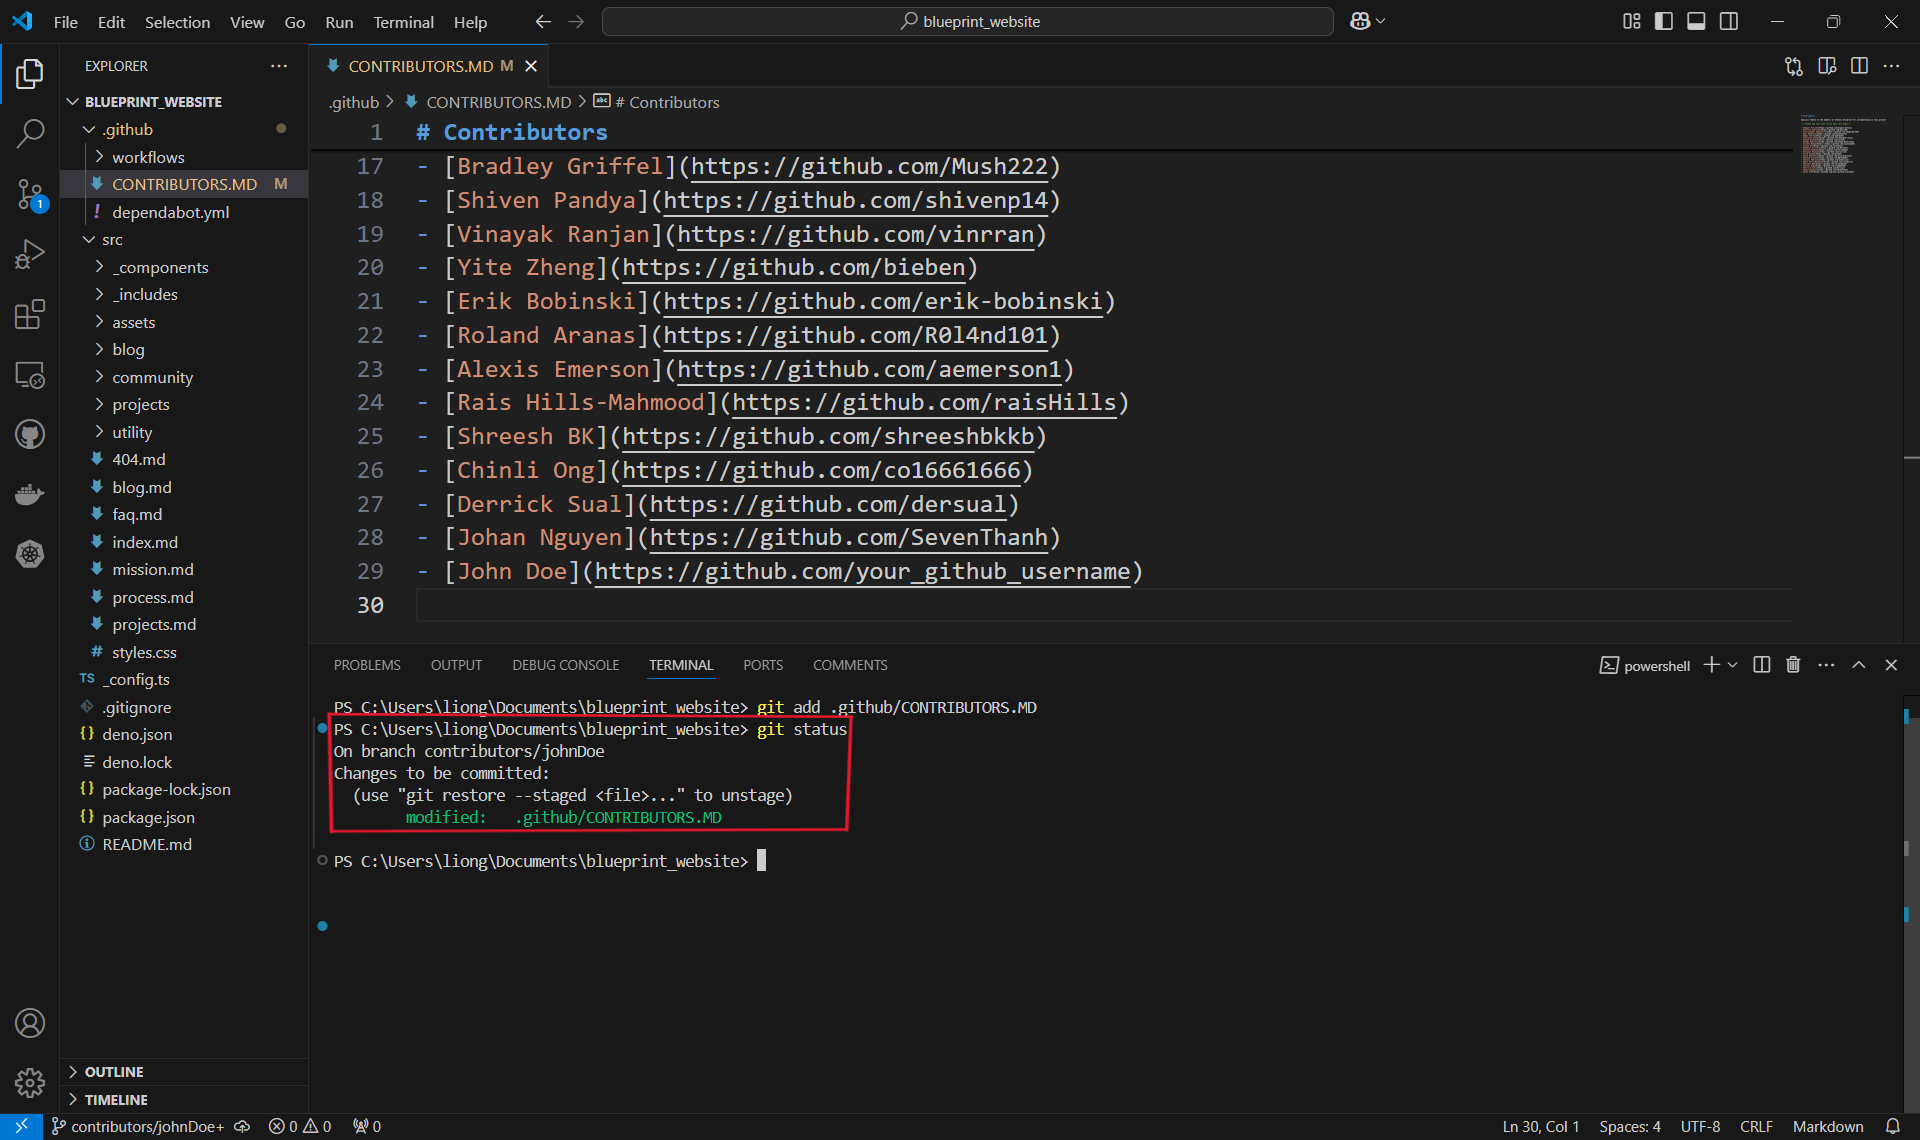
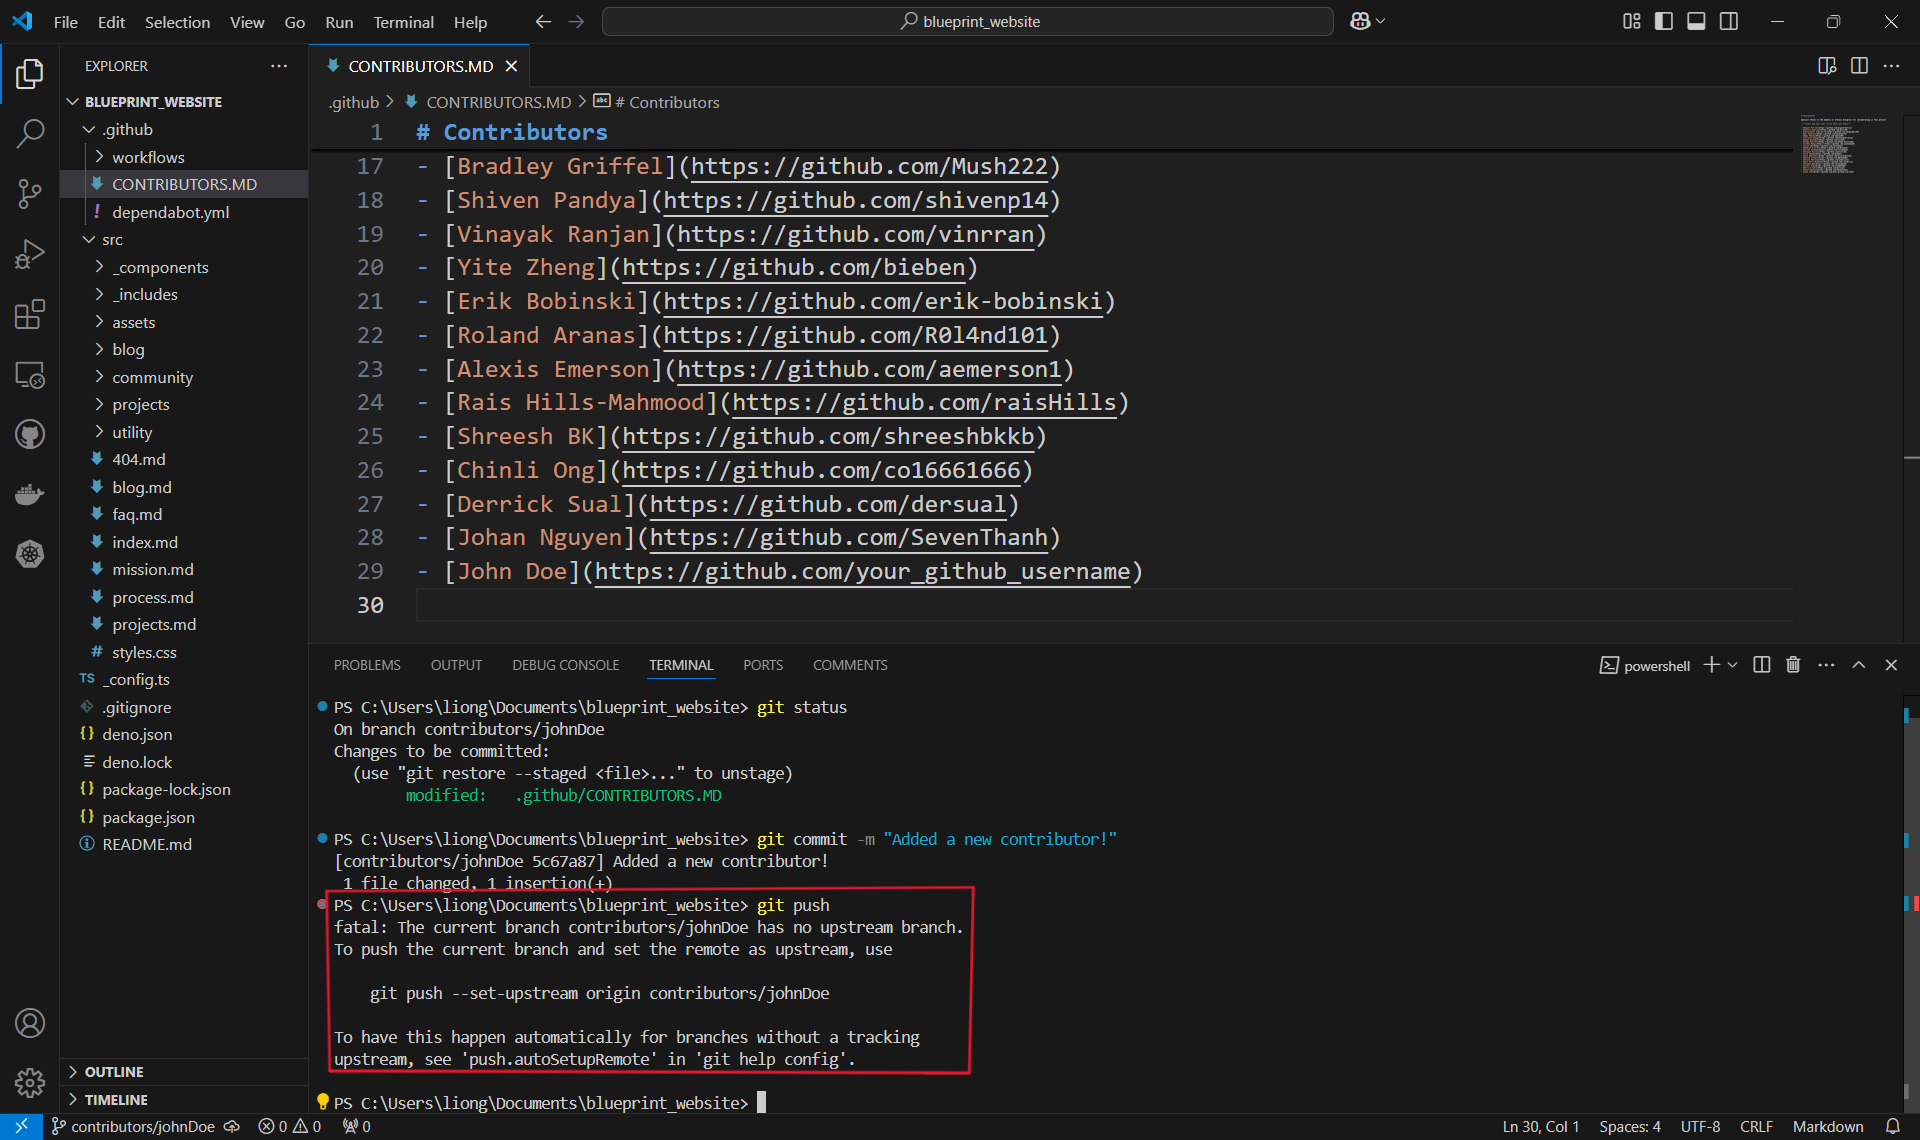
Checking changes to be committed.
- You can use the
git statuscommand to check what files have been added or "staged" for a commit. In this case, it's only the one contributors file that we added.
-
You can see here that our file is under changes to be committed and is in green text. Changes not staged for commit will be in red.
- You can use the
-
Committing changes.
- With our changes made and staged, we can create a commit which is basically a checkpoint for our code. We can revert to this point if we make mistakes or need to look at the version of the code at this point in time.
- It is also good practice to include a commit message by using the
-mflag to describe what changes were made. For us, we will just say that we are adding a new contributor, like so:git commit -m "Added a new contributor!".
- Commit Messages: When writing a commit, it is usually good practice to follow a convention. At Blueprint, we use the Conventional Commits specification: www.conventionalcommits.org
- Most basic form:
<type>: <decscription>, two common types are feat (feature) or fix (bug-fix)
- Most basic form:
- Commit Messages: When writing a commit, it is usually good practice to follow a convention. At Blueprint, we use the Conventional Commits specification: www.conventionalcommits.org
- We can commit as often as we want, or when we feel it is necessary before making big changes.

-
Pushing the commit.
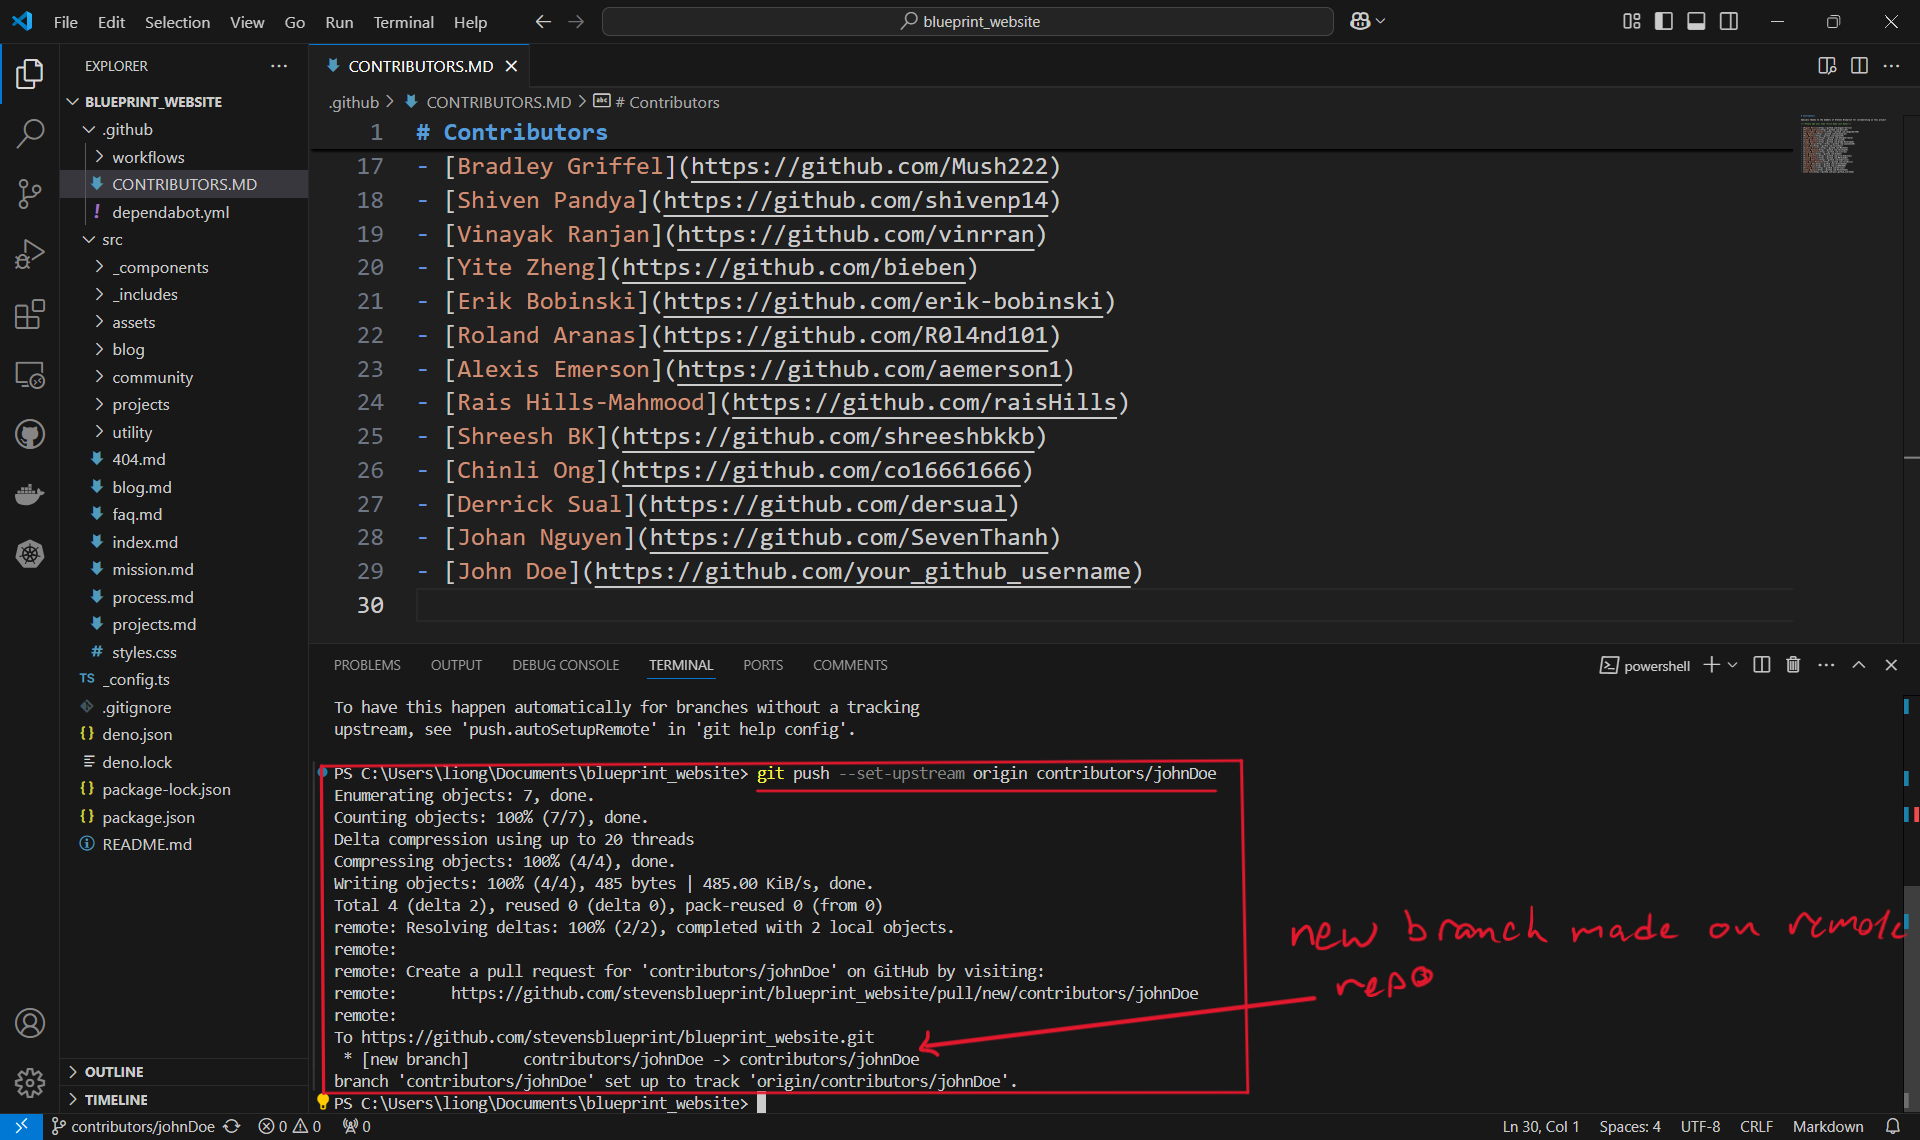
- In order for our changes to appear on the remote repository (the one on Github), we need to push our changes using the
git pushcommand. If we run it as is, however, we will encounter an error:
- This is because when we create the branch contributors/johnDoe, we only created it locally and it does not exist on the Github repository. Therefore, we must run the command shown:
git push --set-upstream origin contributors/johnDoe.
- Once the branch is set up remotely, or if the branch already existed remotely and was not created locally, we can simply use
git push.
- In order for our changes to appear on the remote repository (the one on Github), we need to push our changes using the
-
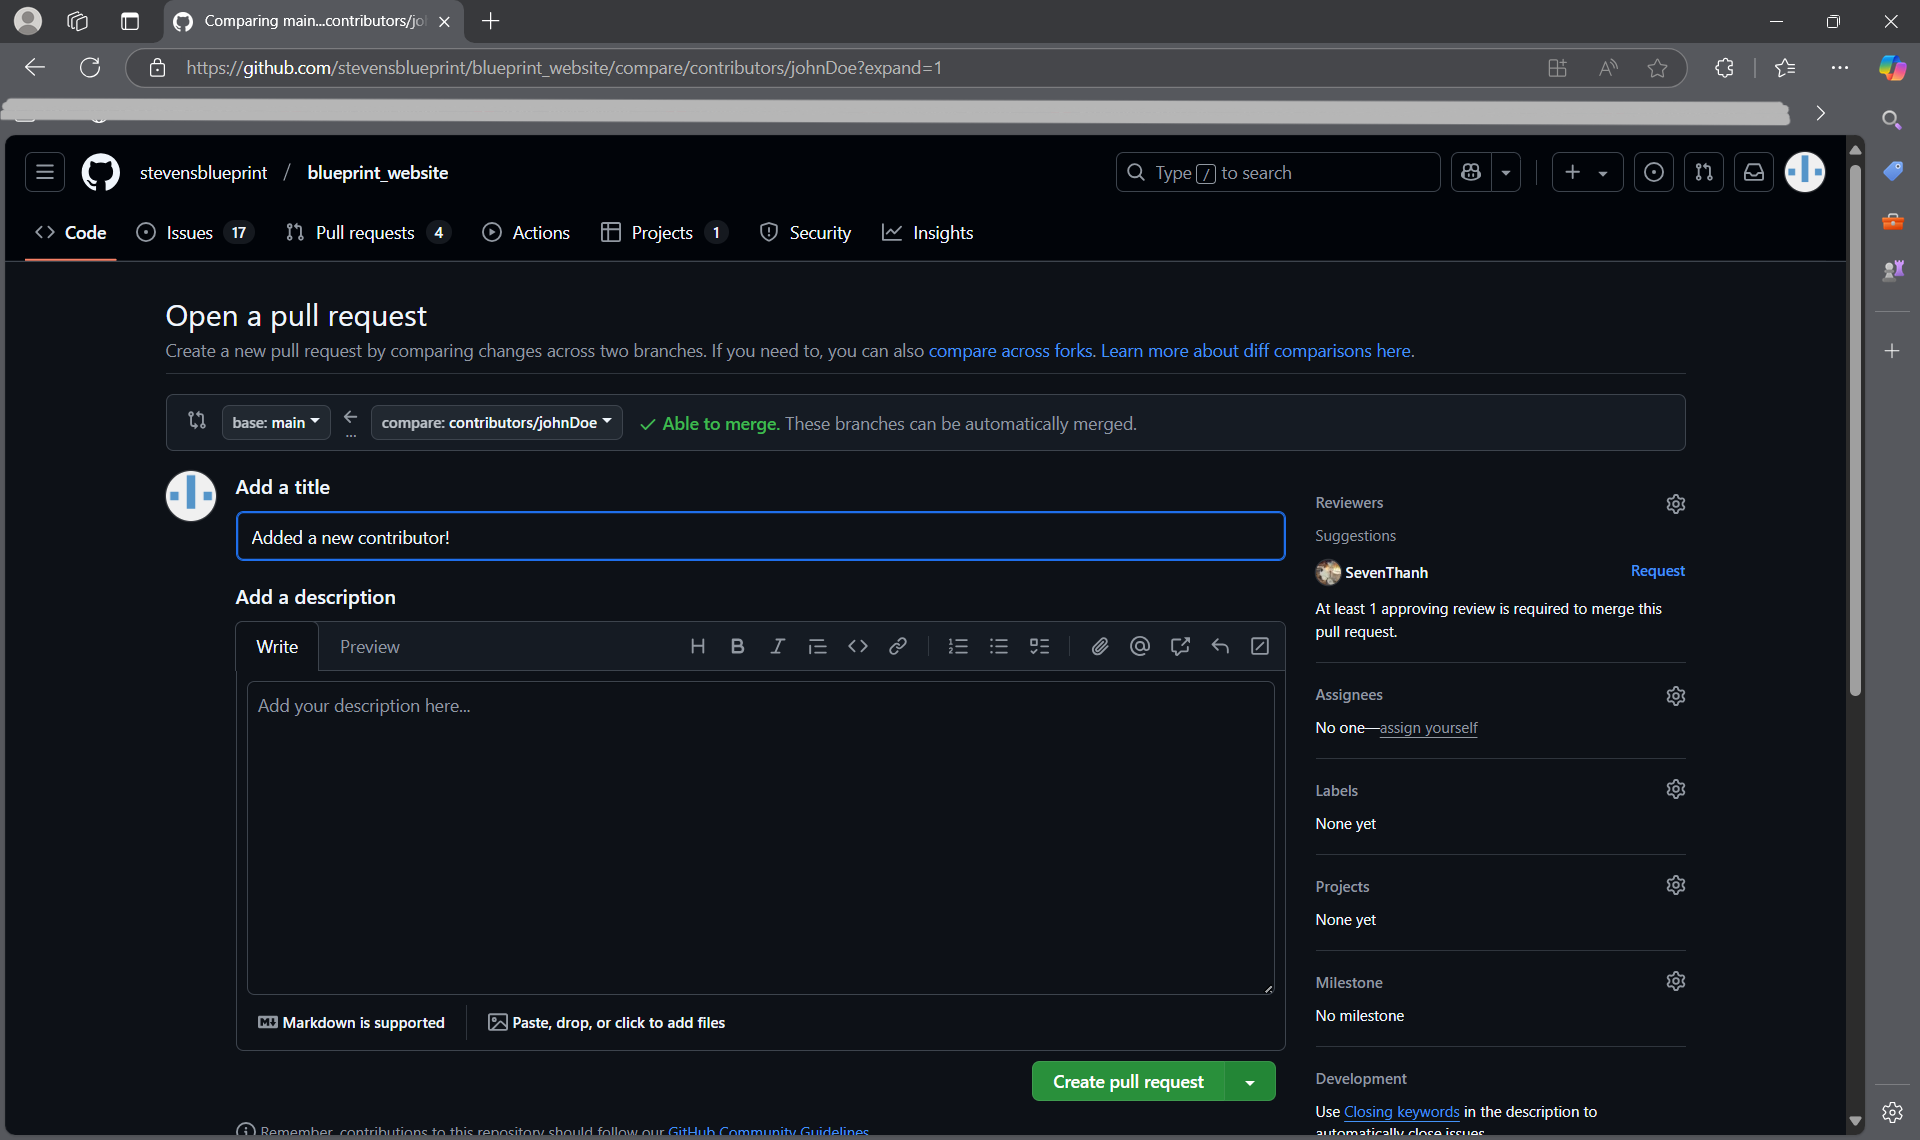
Creating a pull request.
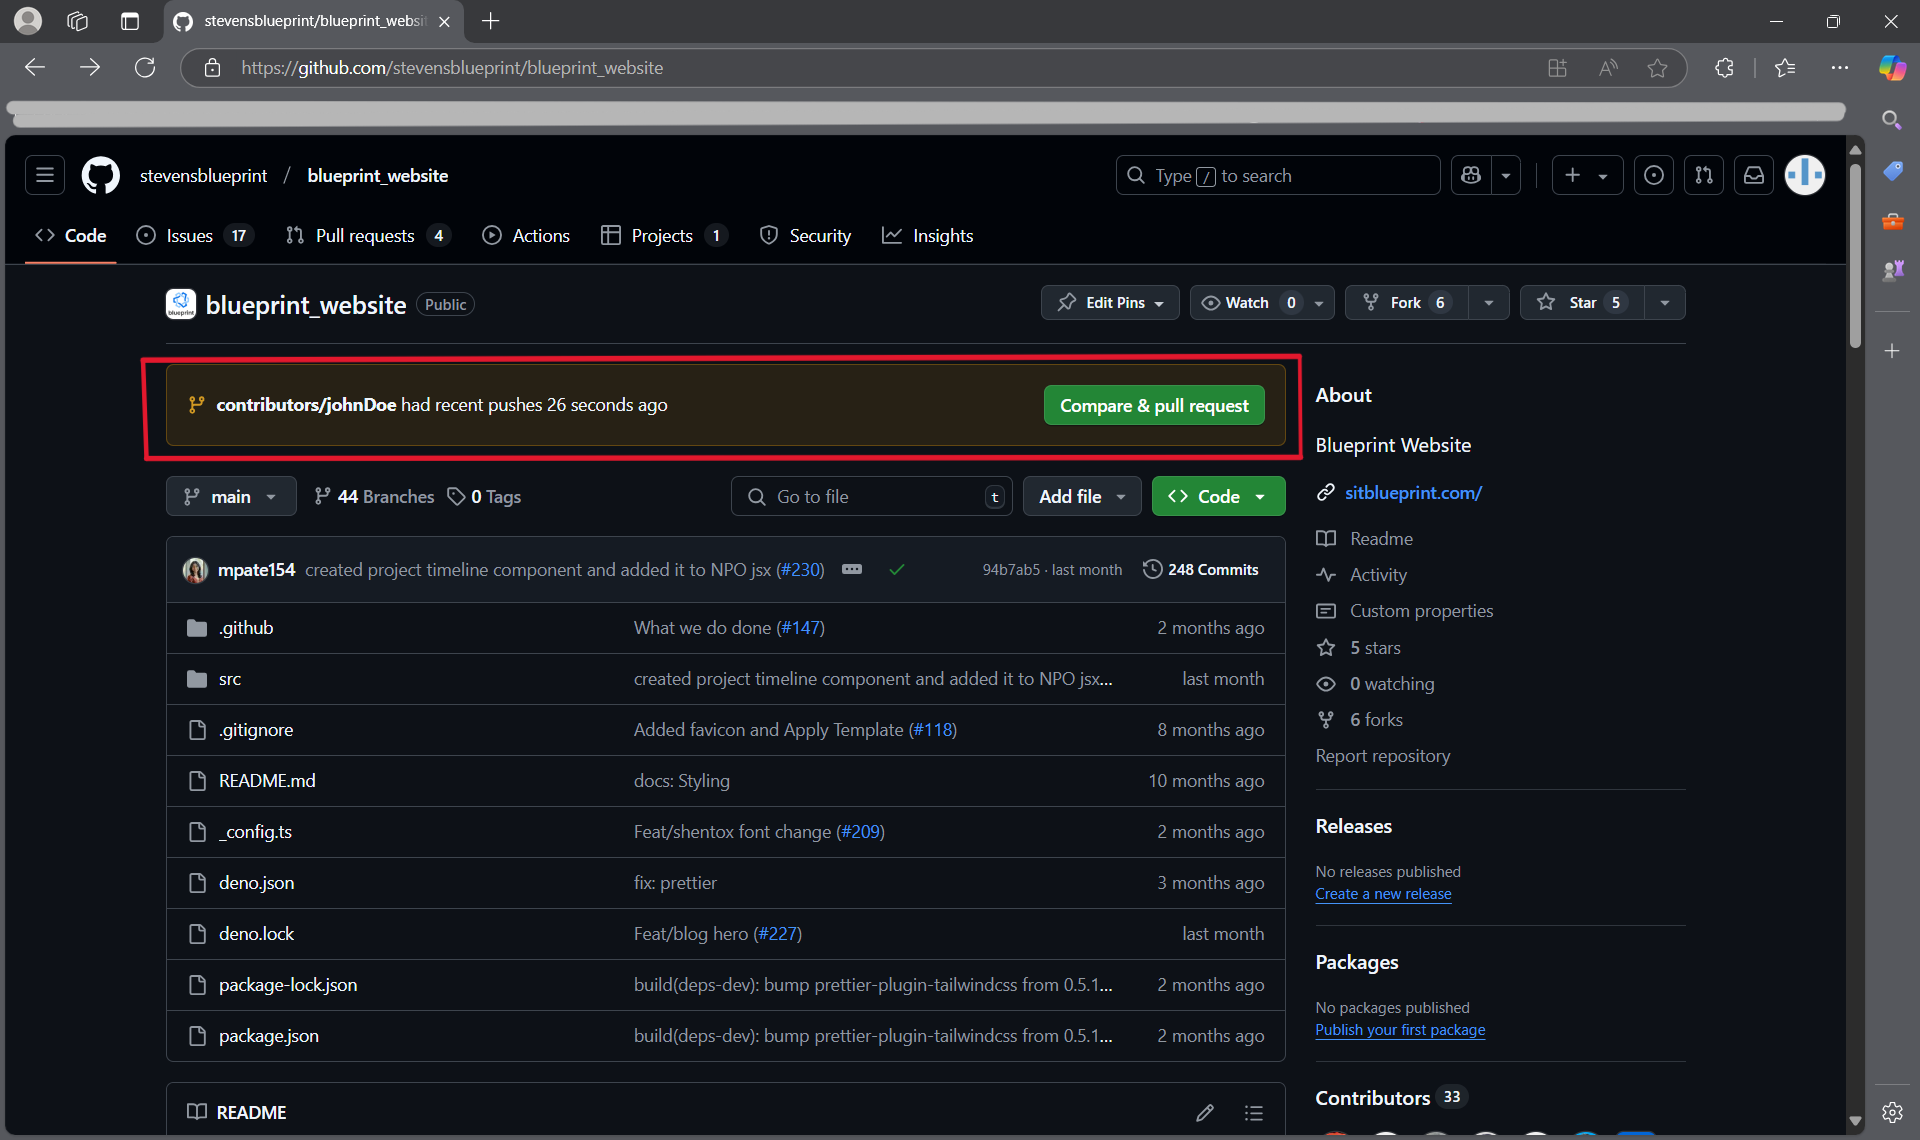
- Once we have completed our task and pushed the changes, we can work on merging the changes back into the main code. To do this, we can create something called a pull request (PR for short) where we essentially propose the changes we made.
- Going onto Github, you will likely see a pop-up asking if you want to create a pull request for your branch. If so, press "Compare & pull request".

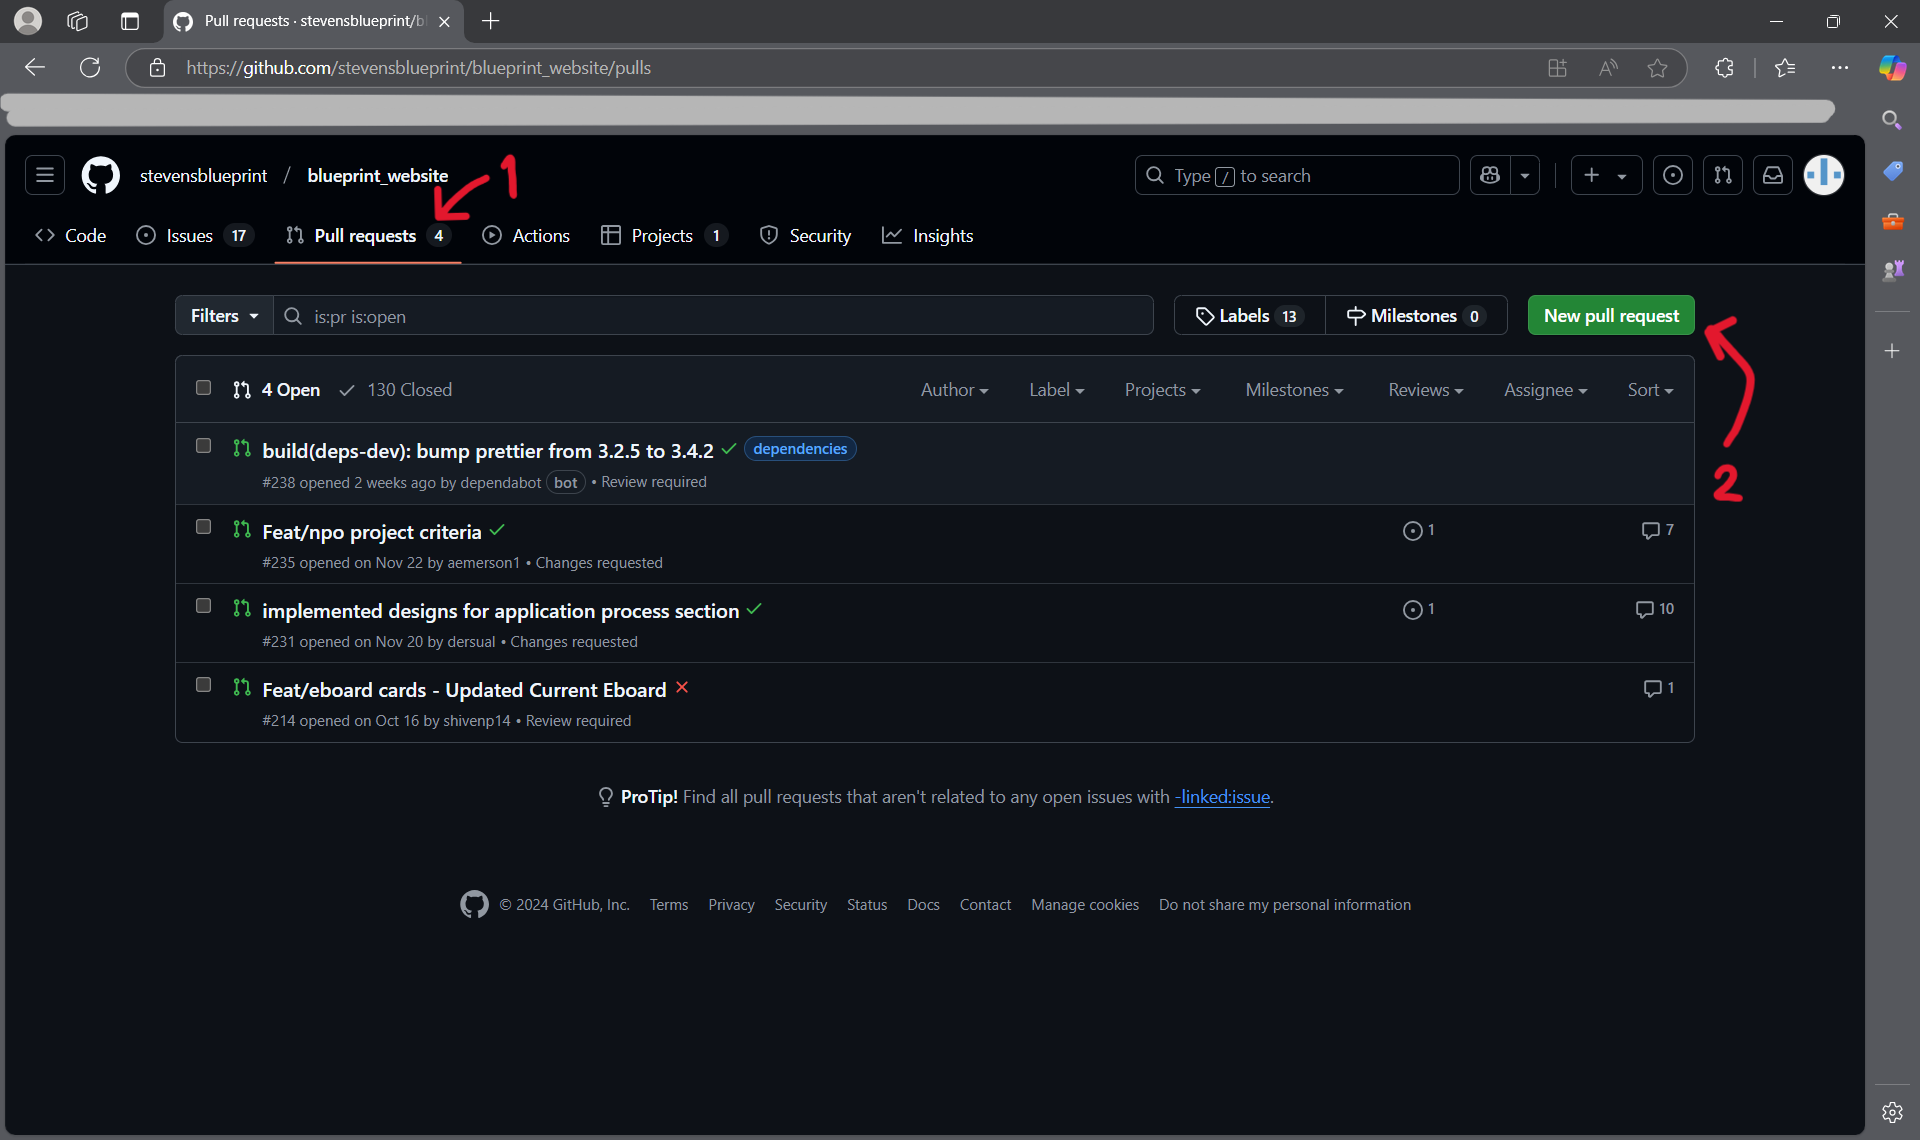
- If you don't see it, you can also create a new pull request by navigating to the "Pull requests" tab and selecting "New pull request".

-
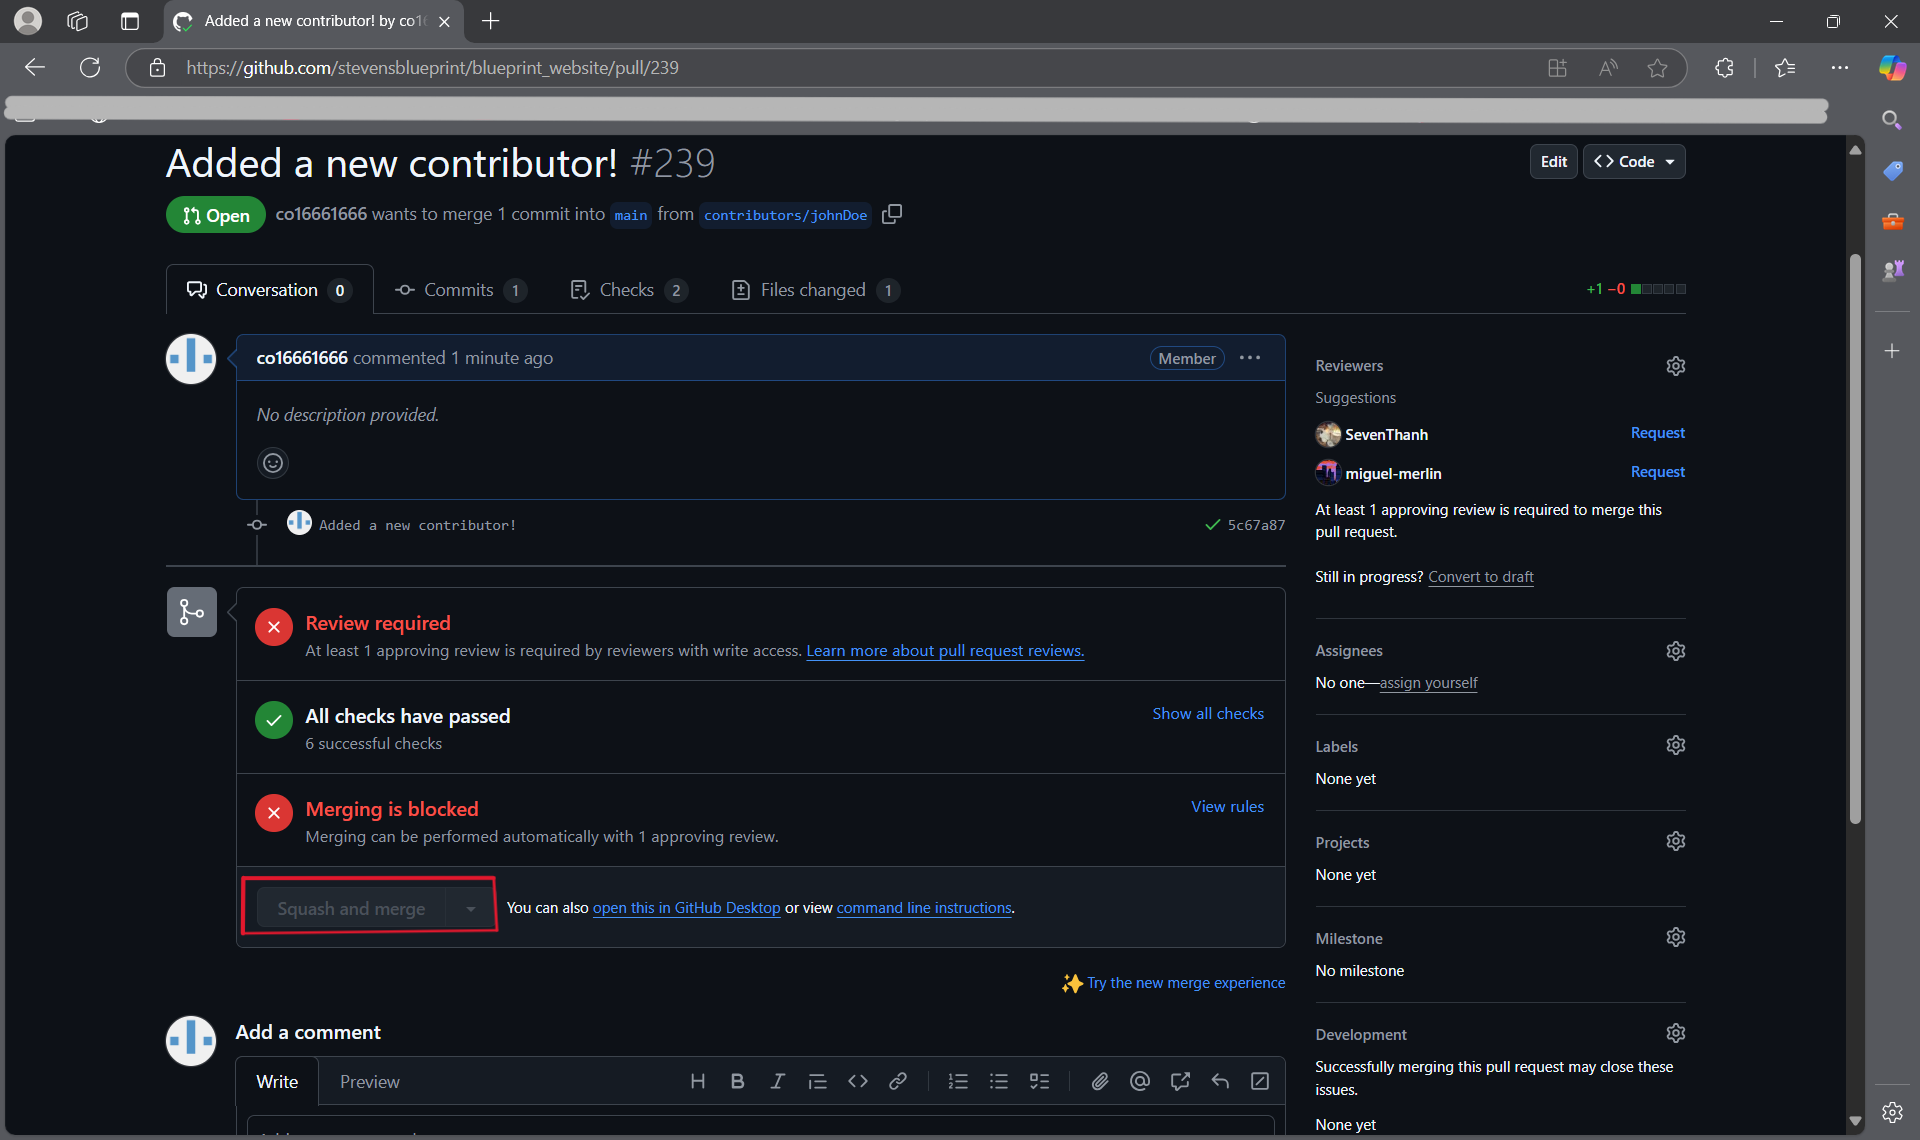
Approvals and Merging.
- Next, you can put in details for your pull request such as a title and detailing what changes were made on your branch.

- You will also see a list of approvals, some of which are run automatically. It is also necessary for at least one person to review your pull request before you can merge it with the main branch. Once your pull request is approved, hit "Squash and merge". You're done!

- Next, you can put in details for your pull request such as a title and detailing what changes were made on your branch.
-
What Now?
- In order to keep your local copy updated with the remote repository (on GitHub), you can run the
git pullcommand. This pulls all the changes made by other people.-
Pulling changes can sometimes result in merge conflicts which is when the changes on the remote repository don't work well with your local version. See the Merge Conflict section below for more details.
-
- For each task, your process should be something like this:
-
- Step 2, create a new branch
- Repeat Steps 3-7 as you work on your task and make changes
- Steps 8-9 when you complete your task
- Make revisions as needed.
-
- In order to keep your local copy updated with the remote repository (on GitHub), you can run the
-
Merge Conflicts
- What is a merge conflict?
- When different versions of the code are combined, the changes don't always align well. For example, if you have a version where you changed a line of code, but the same line of code was removed in a different version, this could create a conflict.
- How to fix?
- Fixing conflicts isn't always straightforward, but here's a guide to get started on it: https://code.visualstudio.com/docs/sourcecontrol/overview#_merge-conflicts
- What is a merge conflict?


Project Board and Tasks
Now that you know how to make changes, there's the questions of what to change.
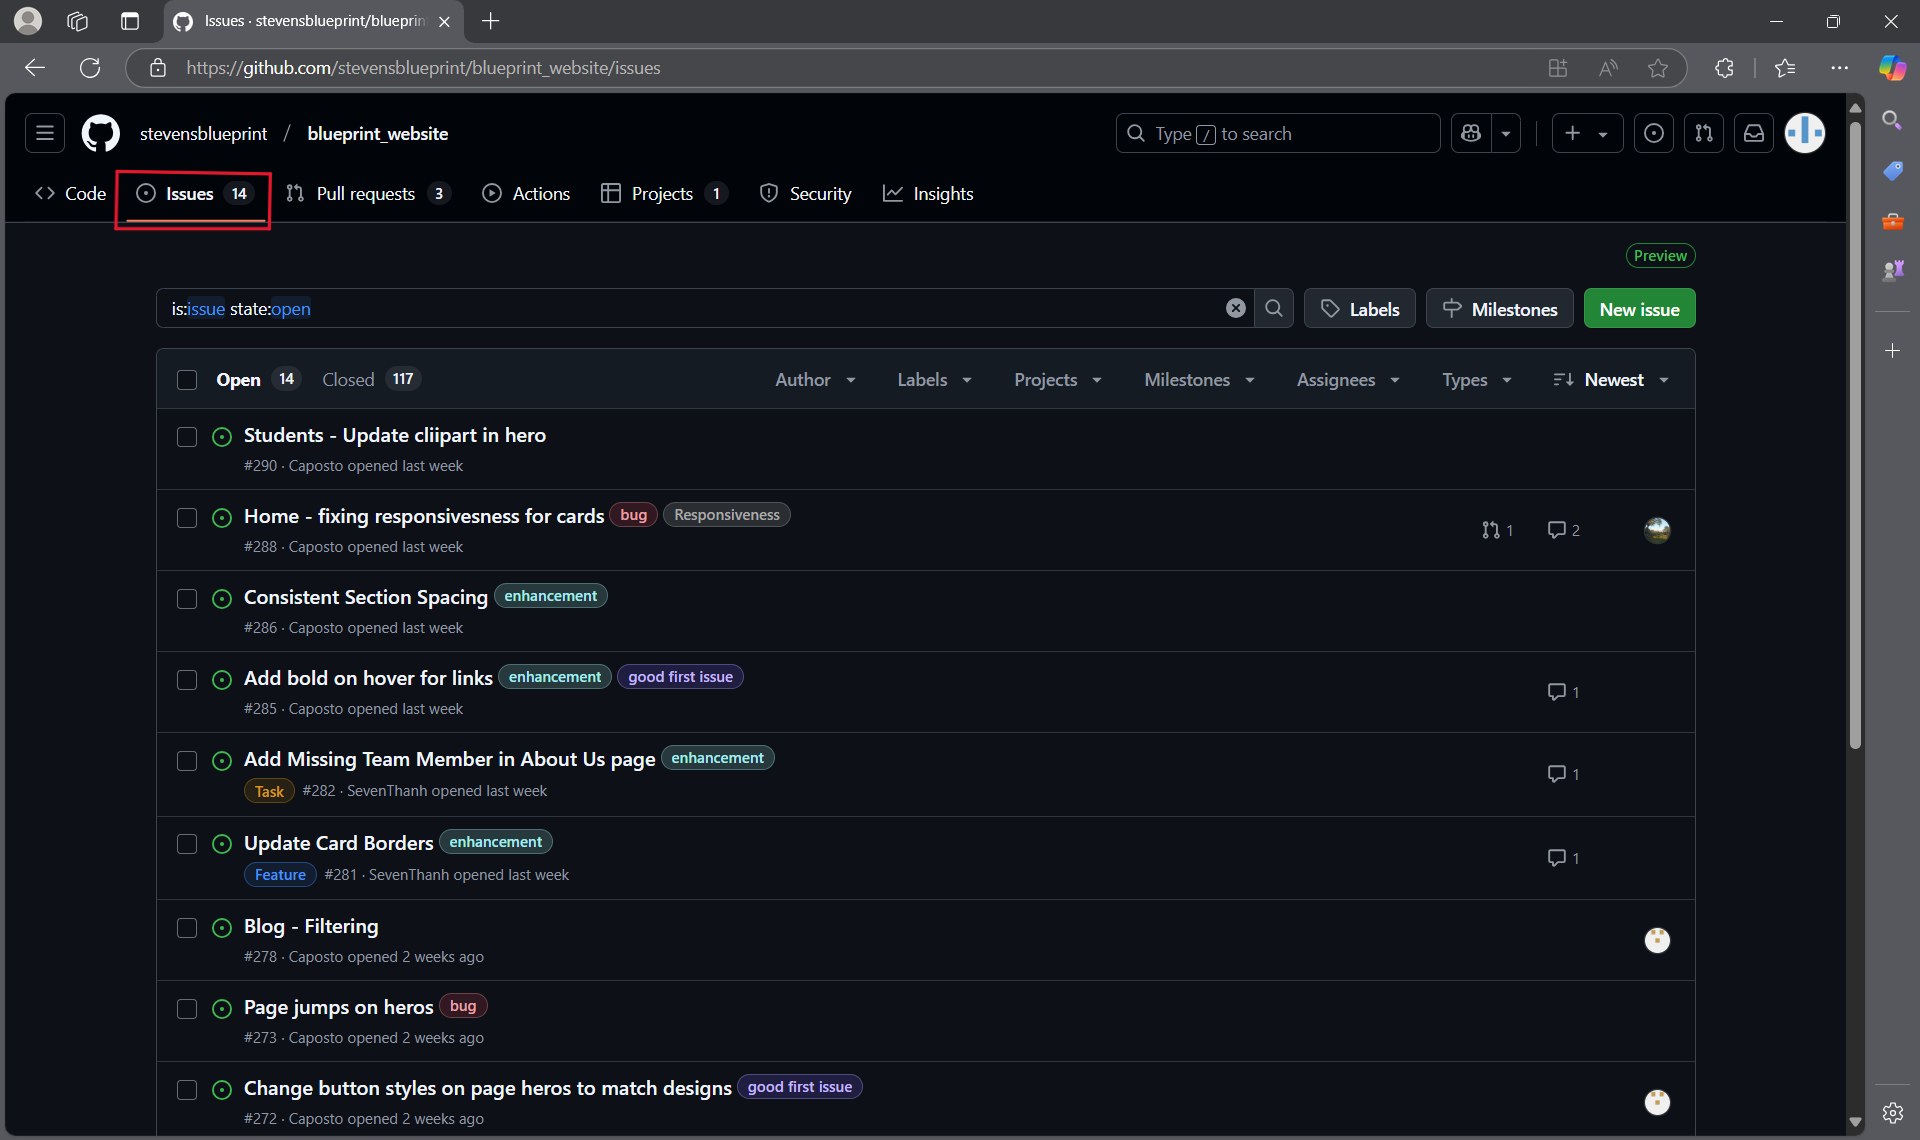
Tasks
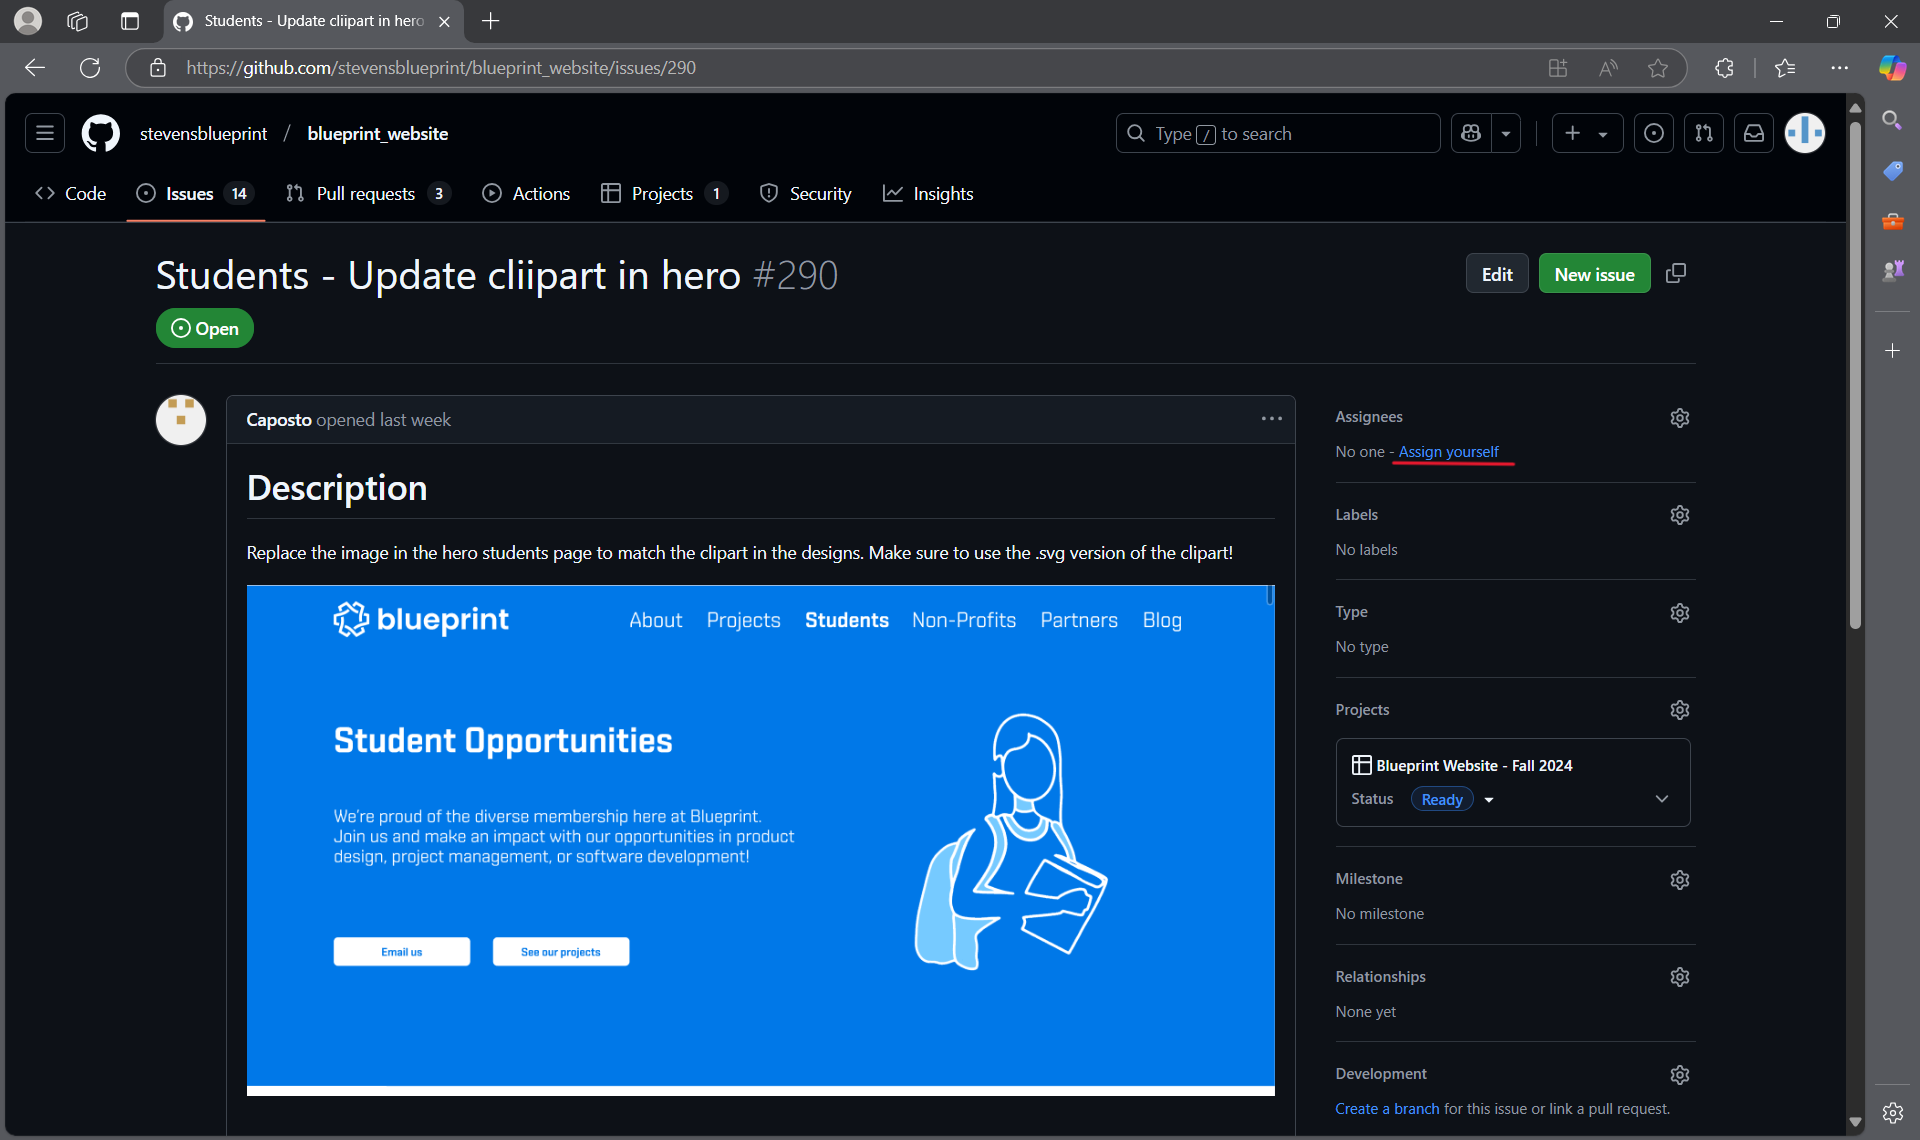
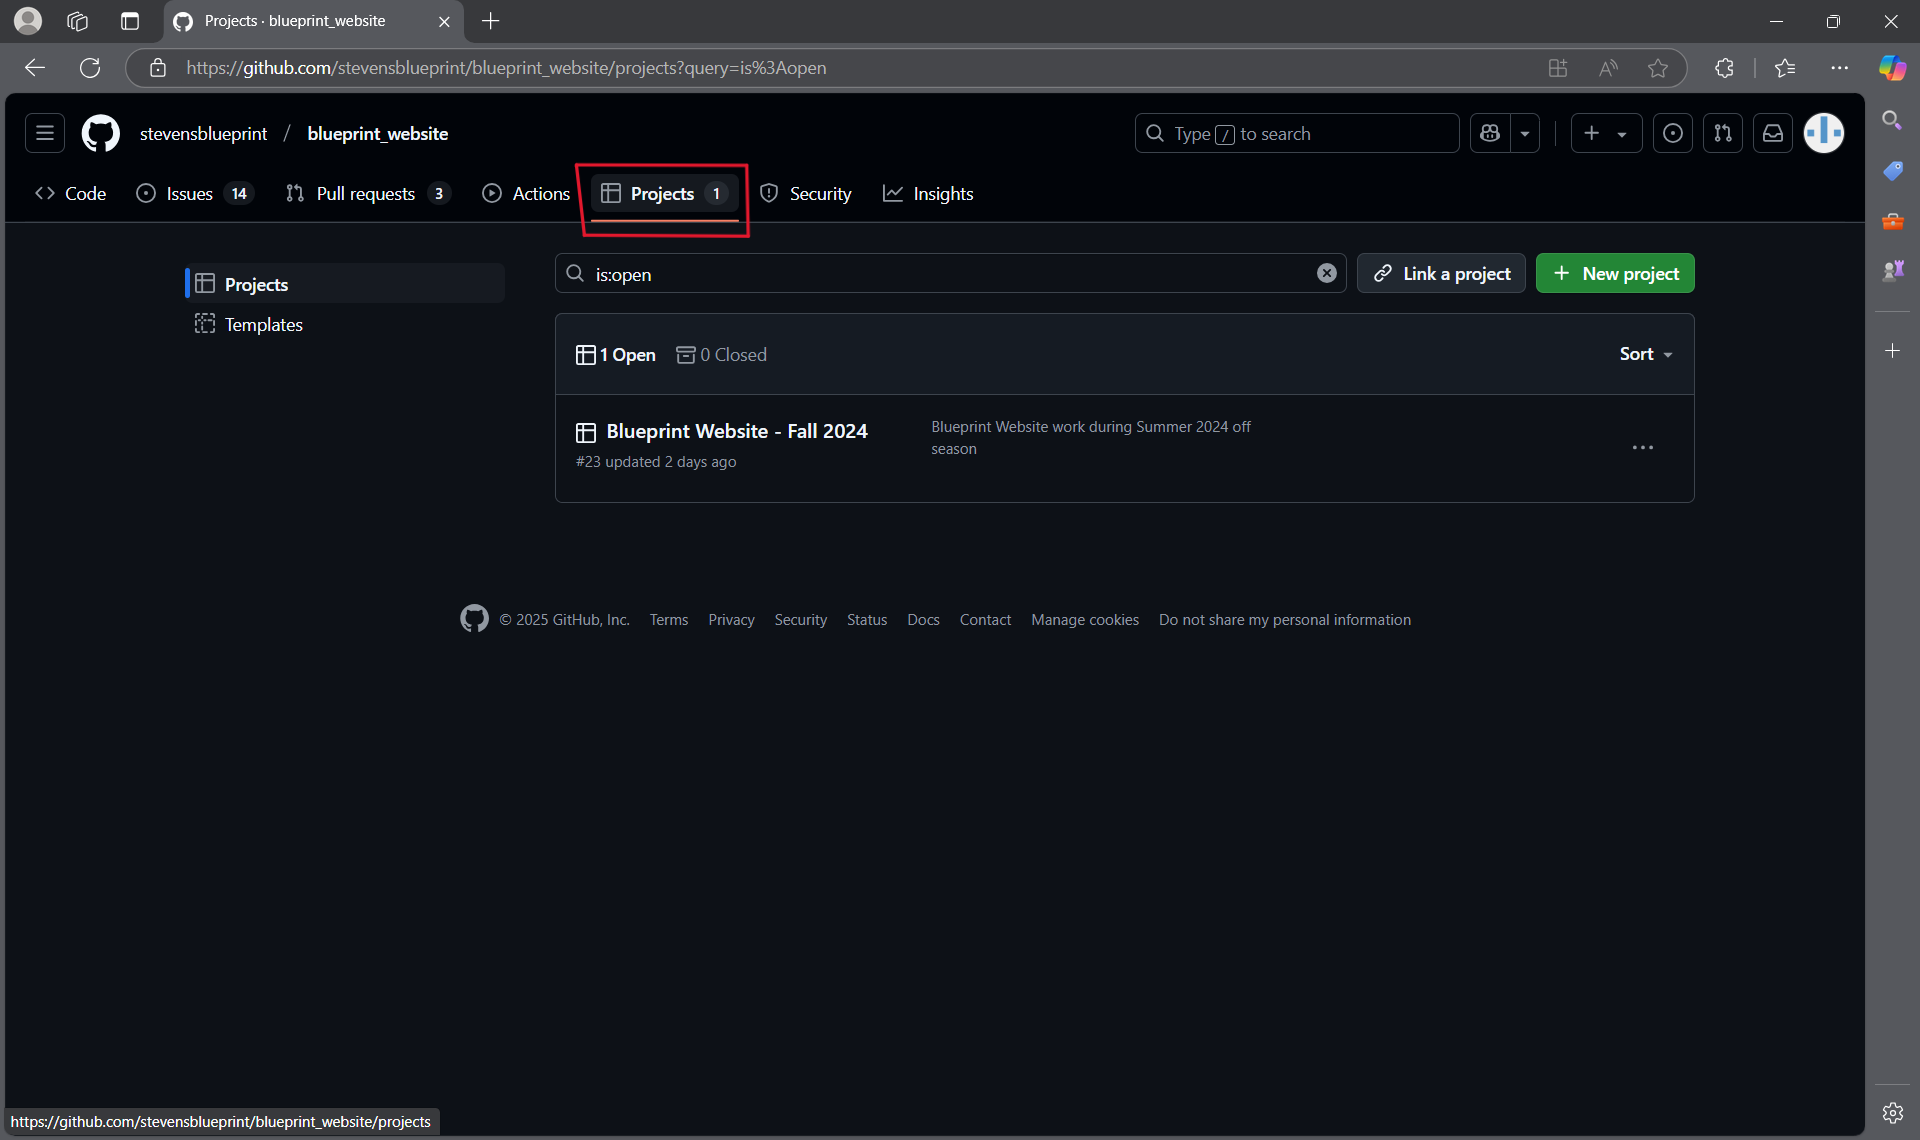
- If you navigate to the Issues tab on GitHub, you will be able to see what needs to be done for a specific repository. Let's take a look at the blueprint website for example:

- If you click on one of the tasks, you will be able to assign it to yourself; this way, there aren't multiple people trying to fix the same thing at the same time.

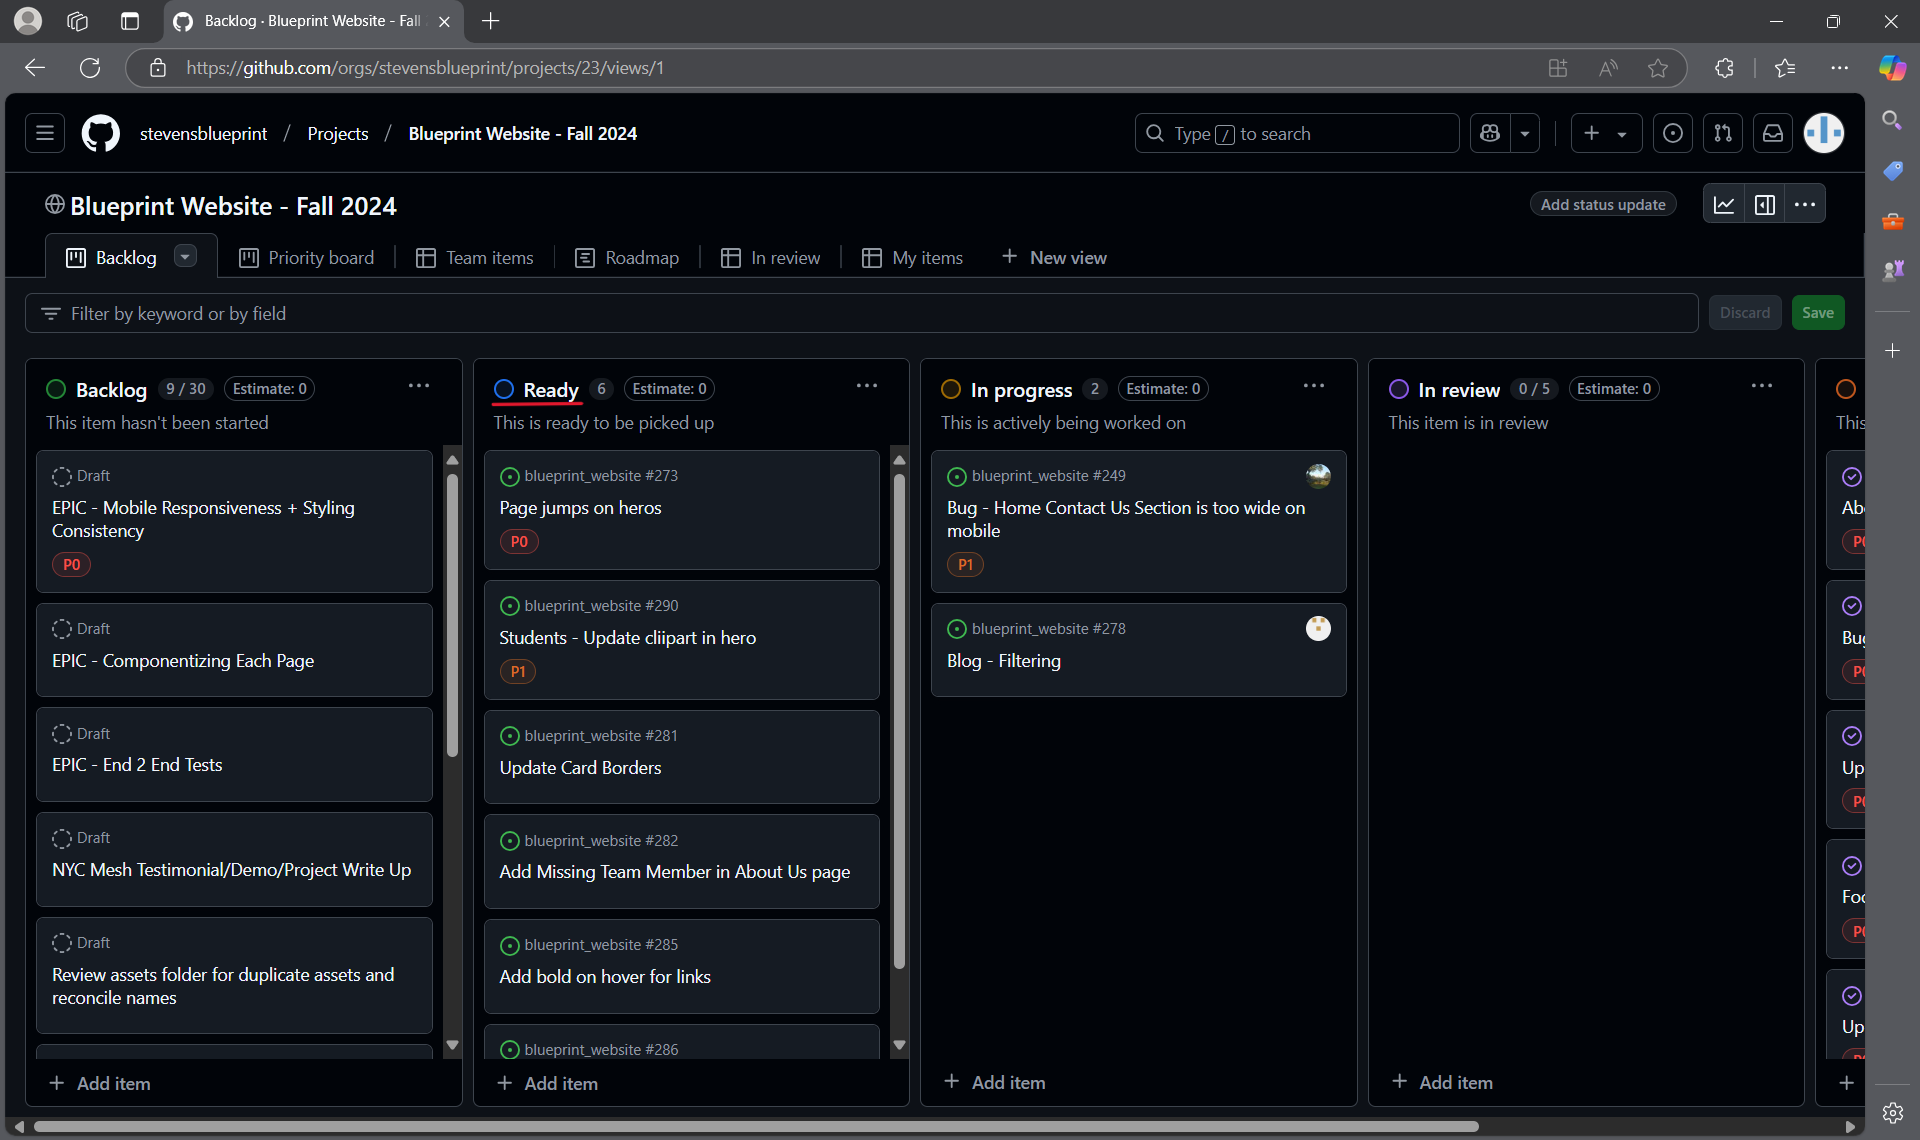
Project Board
- There is also the project board where you can see an organized summary of all the tasks and get a general idea of where the project is at.

- The items in the Ready section are available to be worked on.

If you're ever unsure of which task to pick up or having difficulty completing a task, drop by a Tech Team meeting and ask!
Git/Github Quick Reference
New to Git and Github? Checkout these resources:
Overview of Git and Github: https://wiki.sitblueprint.com/books/onboarding/page/contributing-to-blueprint-gitgithub
Full comprehensive guide/walkthrough of Git and Github: GitHub Foundations - Training | Microsoft Learn
If you prefer a comprehensive book: https://git-scm.com/book/en/v2
Or comprehensive video: Git Tutorial for Beginners: Learn Git in 1 Hour
Git Clone
git clone [<repository>]
-
Creates local copy of the repository stored on Github
-
<repository>the repository you want to clone
Git Pull
git pull
-
Runs
git fetchandgit merge -
Pulls code from the remote repository (on Github) to your local repository and merges into your local repository
Git Checkout
git checkout [-b <branch>]
-
Used to switch branches
-
<branch>to specify which branch you want to switch to-
Switches branch to
feat/carousel -
E.g.,
git checkout feat/carousel
-
-
[-b]to create a new branch-
feat/used for feature branches (e.g., feat/carousel) -
bug/used for bugs (e.g., bug/navbar-text-resizing) -
Naming conventions:
-
E.g.,
git checkout -b feat/carousel -
Creates a new branch called
feat/carouseland switches to that branch
-
Git Add
git add [<path>]
-
Used to ‘stage’ or add contents of file to next commit
-
<path>path of the file to be added-
E.g.,
git add myFile.txt -
Adds all changes made to myFile to the next commit
-
Git Commit
git commit [-m <message>]
-
Used to create a commit
-
-m <message>message to be included with commit-
E.g.,
git commit -m “changes made to formatting” -
Creates a commit with staged changed with the message “changes made to formatting”
-
- Conventions for commits: https://www.conventionalcommits.org/en/v1.0.0/
Git Push
git push
-
Used to push committed changes to remote repository on GitHub
-
If it's your first time pushing to a remote repository, you will need to specify the remote with
git push -u origin name/of/branch
Git Merge
git merge [<branch-name>]
-
Merges one or more branches into your current branch
<branch-name>specifies which branch to merge into the one you have checked out- Merging can also be done from the command line
- Guide for resolving merge conflicts: https://code.visualstudio.com/docs/sourcecontrol/overview#_merge-conflicts
Contributing to Blueprint - Git/GitHub
How to contribute?
All of our projects are hosted on GitHub. Being able to contribute to any GitHub is an essential skill for any developer; let's learn how to do it. If you would like a more in depth guide on contributing in GitHub, refer to the Tech Team Onboarding Guide
Click here to view the Stevens Blueprint GitHub.
What are git and GitHub? What are their differences?
Check out these resources for more detail on how to use the technologies:
Git and GitHub are essential tools in the world of software development, used for version control and collaboration. They serve related but distinct purposes, and understanding their main features and differences is key to utilizing them effectively.
Git
Git is a free, open-source version control system designed to handle everything from small to very large projects with speed and efficiency. It was created by Linus Torvalds in 2005 to support the development of the Linux kernel. Git operates on your local computer and allows you to keep track of changes to your files and code. Its main features include:
- Branching and Merging: Git makes it easy to branch off your main project to experiment or work on different features simultaneously. You can then merge these changes back into the main project when they're ready.
- Distributed Version Control: Every Git directory on every computer is a full-fledged repository with complete history and full version-tracking capabilities, independent of network access or a central server.
- Speed and Efficiency: Git is designed to handle large projects like the Linux kernel efficiently, making it fast and scalable.
- Snapshot System: Instead of saving changes as a list of file-based changes, Git takes a snapshot of all files and stores a reference to those snapshots. If files have not changed, Git only stores a link to the previous identical file it has already stored.
GitHub
GitHub is a web-based hosting service for version control using Git. It provides a cloud-based platform for developers to store, manage, and track changes to their code projects. GitHub was launched in 2008 and has become one of the most popular platforms for code hosting and collaboration. Its main features include:
- Repository Hosting: GitHub allows users to upload their Git repositories to a cloud-based platform, making it easier to share code with others.
- Collaboration Features: It includes tools such as issue tracking, feature requests, task management, and wikis for documentation.
- Pull Requests: One of GitHub's standout features, allowing developers to discuss and review changes before they are merged into the main project.
- Forking: Users can fork a repository, creating a personal copy where they can make changes without affecting the original project. Later, they can submit a pull request to merge their changes.
- Integration with other services: GitHub integrates with various third-party tools and services, enhancing its capabilities for continuous integration/continuous deployment (CI/CD), project management, and more.
Main Differences
- Scope: Git is a version control system that manages and tracks code changes on your local computer. GitHub is a hosting service that uses Git for version control, providing a cloud-based platform for storing, sharing, and collaborating on code projects.
- Functionality: Git focuses on version control and code management. GitHub extends Git's capabilities with additional features for collaboration, such as pull requests and issue tracking.
- Usage: While Git is a tool you install and run on your local machine, GitHub is a service you access through a web browser (though it integrates closely with Git).
Joining Blueprint's GitHub Organization
In order to join the Stevens Blueprint GitHub organization you must do the following:
- Install Git
- Create a GitHub Account (Instructions here)
- Send your GitHub username or email associated with your GitHub account to a member of the Stevens Executive Board. Once they said the invite it will appear in your email inbox and you must accept the invitation.
Once you are part of the GitHub organization you can begin working on your respective project!
Agile/Scrum at Blueprint
This article explores how effective communication and streamlined meetings, leveraging platforms like Discord and GitHub (focusing on Issues and Project Boards) within Agile Project Methodology, can significantly enhance software development collaboration. Our goal is to provide strategies to optimize these tools, improving team efficiency and project outcomes.
Teamwork makes the dream work!
Using Agile/Scrum in Blueprint Teams
Agile
Agile Methodology is a project management approach used primarily in software development. It focuses on delivering value through flexible, iterative progress rather than following a fixed plan. Agile emphasizes collaboration, customer feedback, and small, rapid releases of software.
Key Concepts:
- Iterative Development: Software is developed in small pieces, allowing for frequent feedback and the ability to adapt to changes quickly.
- Collaboration: Teams work closely with each other and with stakeholders, fostering better communication and more tailored solutions.
- Flexibility: Agile teams are ready to respond to changes in requirements, technology, and methods at any point in the project.
Scrum
Scrum is a framework that implements Agile principles. It provides a structured, yet flexible way to manage projects.
Key Concepts:
- Roles: Scrum defines specific roles - Product Owner, Scrum Master, and Development Team - each with its own responsibilities.
-
Product Owner: The Product Owner is responsible for maximizing the value of the product resulting from the work of the Development Team. This role involves managing the product backlog, defining product features, and prioritizing work based on business value.
-
Scrum Master: The Scrum Master serves as a facilitator and coach for the Scrum Team, ensuring that Scrum practices are followed. The Scrum Master helps remove impediments that obstruct the team's progress and works to ensure a smooth, productive environment for the team.
-
Development Team: The Development Team consists of professionals who do the work of delivering a potentially releasable Increment of "Done" product at the end of each Sprint. Development Teams are cross-functional, meaning the members have all the skills necessary to create a product Increment, and they are self-organizing, with no one (not even the Scrum Master) telling the team how to turn Product Backlog into Increments.
-
- Sprints: Work is divided into sprints, typically 2-4 week periods, during which a potentially shippable product increment is developed.
- Scrum Events: Regular meetings such as Sprint Planning, Daily Stand-up, Sprint Review, and Sprint Retrospective help teams to plan, coordinate, review, and adjust their work.
-
Sprint Planning: A meeting at the beginning of each Sprint where the team selects work from the product backlog to commit to completing during the Sprint. The outcome is a Sprint Goal and a Sprint Backlog.
-
Daily Scrum (Stand-Up): A short, daily meeting (typically 15 minutes) where each team member discusses what they did the previous day, what they will do today, and any impediments to progress.
-
Sprint Review: Held at the end of each Sprint to inspect the Increment and adapt the Product Backlog if needed. This is a time for the Scrum Team and stakeholders to collaborate about what was done in the Sprint.
-
Sprint Retrospective: Occurs after the Sprint Review and before the next Sprint Planning. This is a meeting for the Scrum Team to reflect on their processes and make improvements for the next Sprint.
-
This is a VERY brief and general introduction to Agile and Scrum. Please refer to the additional resources for more information.
How Blueprint Developers can Follow These Principles and Frameworks (Scrumprint)
Given the unique structure of Blueprint, adhering strictly to a traditional Scrum framework is not feasible for us. Our commitment to academic and extracurricular activities, alongside the absence of a standard 9-5 work schedule, necessitates a more flexible, hybrid approach to project management. Consequently, we are tasked with tailoring industry-standard methodologies to accommodate the diverse schedules of our student team members. Recognizing the dynamic nature of this adaptation, we remain open to continuous feedback and anticipate that our approach will evolve over time. The following outlines an adapted framework we encourage teams to implement
Roles
-
Technical Lead/Scrumprint Master: Oversees the project's technical direction and ensures adherence to the Blueprint Agile practices. Acts as a facilitator for the team, assisting with obstacle removal and process guidance.
-
Product Manager: Similar to the Product Owner role in Scrum, manages the product backlog, crafts user stories, and ensures tasks align with the non-profit organization's (NPO) requirements.
-
Designer: Collaborates closely with the Product Manager and NPO to iterate on designs throughout the project lifecycle.
-
Development Team: Comprises students who execute tasks, contribute to design and implementation, and participate in Blueprint Agile events.
Events
Weekly In-Person/Discord Meeting: Weekly in-person meetings will be held, and will alternate between the two following events:
- Week 1 - Sprint Review & Planning: During this meeting, the team will select items from the backlog to focus on for the next two weeks. If a previous sprint was just completed, the team will do a quick review to reflect on the progress made.
- Week 2 - Stand-up: During this meeting, the team will report the progress made on their assigned tasks, along with anything preventing them from completing their tasks.
Goals and Additions:
-
Limit Meetings: Restrict to one team meeting per week and one NPO meeting every two weeks to minimize disruption to student schedules. Use this time efficiently to cover planning, review, and immediate actions.
-
Office Hours: Held weekly by the Eboard Blueprint, providing an open forum for questions, guidance, and additional support outside of scheduled meetings.
-
Continuous Feedback Loop: Encourage ongoing feedback through a dedicated channel or form.
The next sections will show how tools like GitHub and Discord can be used to encourage this framework.
Joining & Interacting in Discord
Discord is our primary mode of communication used for project teams, tech teams, and general blueprint announcements. You can join Discord using this link: Blueprint Discord Link. Upon joining the server, you will be prompted to change your username to [FIRSTNAME] [LASTNAME] ['YEAR]. For example: "Attilla Duck '25". There are a lot of users on the Discord, so please do this as soon as possible.
If you are on a Project Team or a Tech Team project we kindly ask that you leave the notifications on for your respective channel.
Make Use of Discord Features
There are several features that you can make use of in Discord to help organize channels.
Pinning Messages: Use this to save the most important messages in your channel for quick access. This can include Project Proposal Documents, Links to specific resources, or important channel guidelines that you want to save in the channel.
Threads: Use threads to manage conversations on a specific topic. Perhaps their is a bug that someone needs help with or the Project Leader would like to collect team members opinions on a new feature. Using threads leaves the main channel less cluttered. Threads can be used for the Async Stand up events from the Scrumprint framework.
@People: Use the @ feature in your messages to get the attention of specific users or roles. Do not be afraid to make use of this feature if you need help with something or if someone has been unresponsive. "@here" is a good way to get the attention of everyone in a respective channel.
Reactions: It's respectful to acknowledge your teammates messages! Thankfully discord makes this easy so you can throw a quick thumbs up without having to type anything.
Webhooks
Webhooks make it easy way to get automated messages and data updates sent to a text channel in your server. Each project team and tech team project channel will be accompanied by another "-hooks" channel. This channel connects to the team's repository on GitHub. Whenever someone makes a contribution (commits code, opens a Pull Request (PR), comments on an issue, etc.) the "-hooks" channel will be notified. Currently, the Webhooks are configured to output the results of certain tests whenever you commit code. This makes it easy for you to see the activity going on in your project!
GitHub Project Boards & Issues
GitHub offers more than just hosting our repositories. There are two features that we can make use of to help organize tasks and adhere to the Scrumprint framework.
Project Boards
Project Boards on GitHub offer a dynamic and intuitive interface for managing the various stages of our tasks. By creating Kanban boards, we can streamline our workflow into three fundamental columns, which simplifies the process of tracking progress throughout the development cycle. This method not only aids in maintaining organization but also ensures that our team remains aligned with the goals of each sprint. Here's how Project Boards can be utilized effectively:
-
Visual Task Management: The Kanban board's visual nature allows team members to quickly understand the status of tasks at a glance, facilitating easier prioritization and allocation of work.
-
Guided Standups: Utilizing the board during standups helps the team focus on progress, identify bottlenecks early, and discuss solutions for any impediments, making these meetings more efficient and productive.
-
Sprint Planning and Review: During sprint planning, the board serves as a tool for selecting and assigning new tasks for the upcoming sprint, based on the team's capacity and project priorities. For sprint reviews, it provides a clear overview of what was accomplished, enabling a constructive discussion on completed work and areas for improvement.
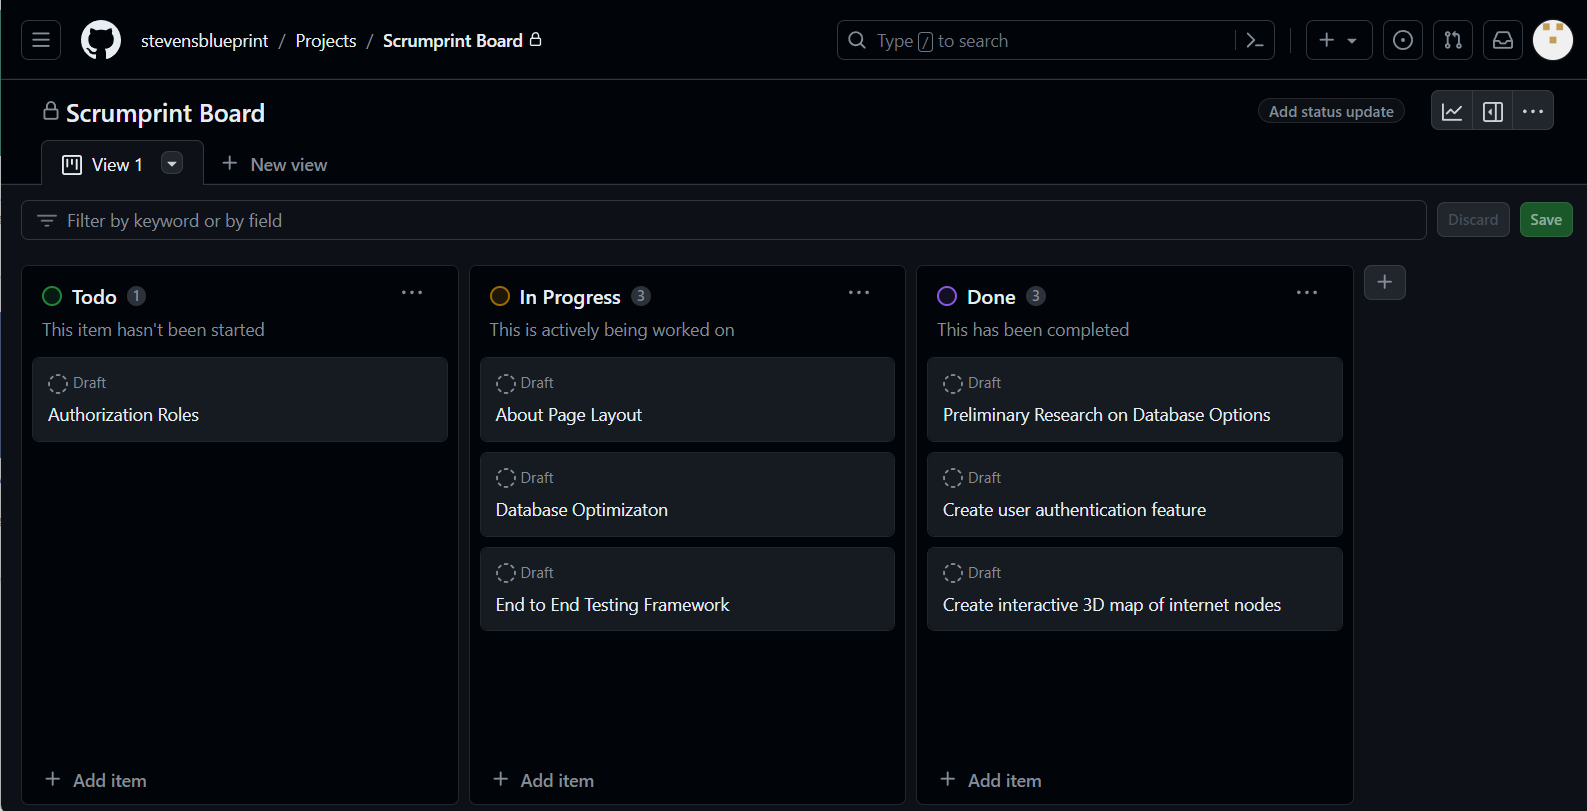
Follow this guide to create a project.
Issues
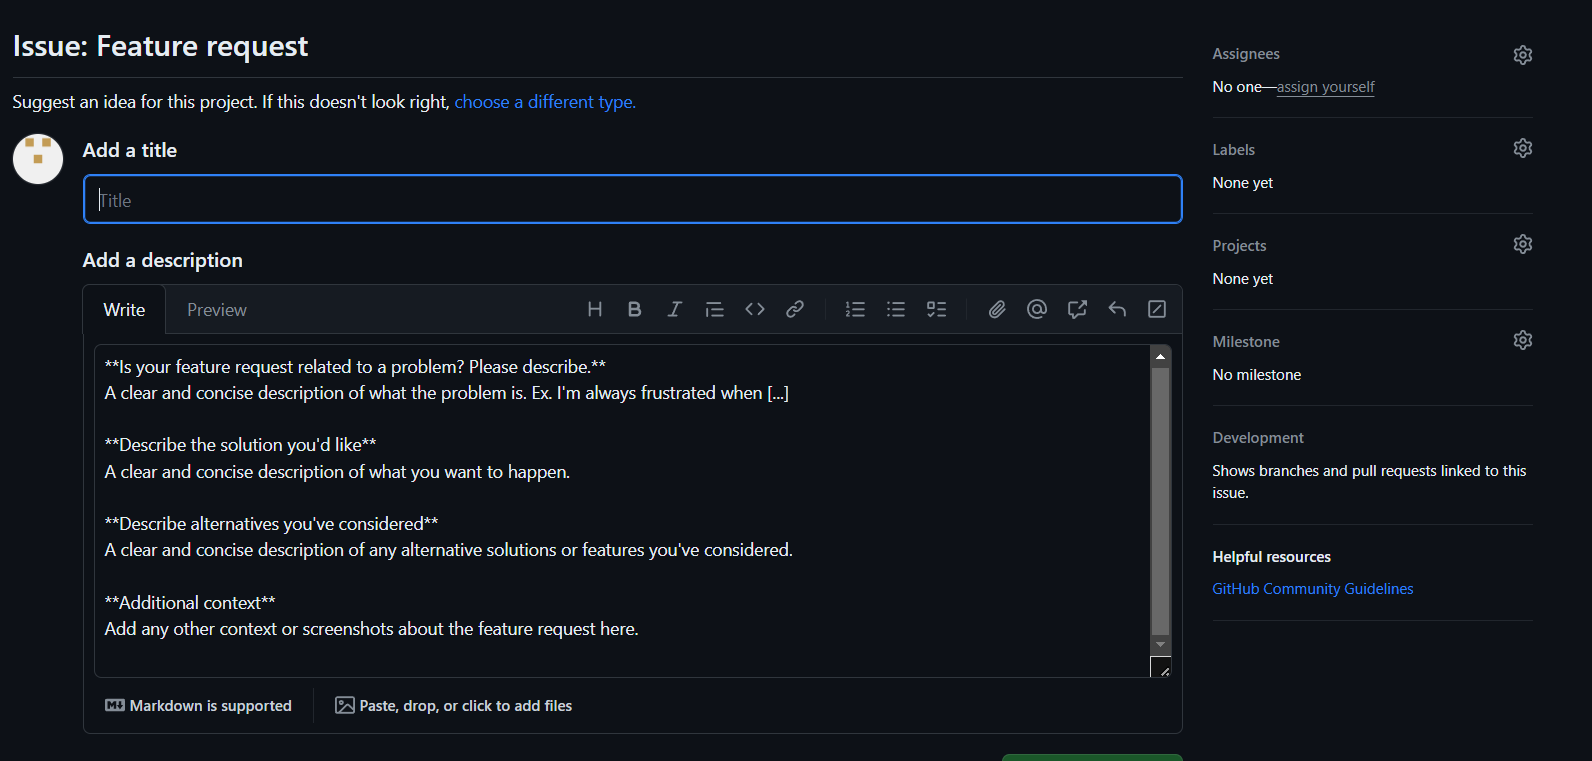
GitHub Issues are a powerful tool within GitHub's ecosystem, designed to facilitate collaboration and communication on projects hosted on the platform. They serve as a primary method for tracking various tasks related to software development, including bug reports, feature requests, enhancements, and general questions or discussions. Here's a closer look at how GitHub Issues can be utilized:
-
Task Tracking and Organization: Issues provide a structured way to track work items, allowing team members to categorize tasks through labels, assignees, and milestones. This organization aids in prioritizing work and keeping projects on schedule.
-
Collaboration: They offer a centralized platform for discussion, where team members can comment, share insights, provide updates, and collaborate effectively on solutions. This open dialogue ensures that everyone involved has a clear understanding of the issue at hand and the proposed resolutions.
-
Integration with Project Boards: GitHub Issues can be seamlessly integrated with GitHub Project Boards, enhancing project management capabilities. This integration allows for the visual representation of tasks within the project's workflow, facilitating better planning and tracking of progress.
-
Customization: GitHub allows for the customization of labels and milestones, enabling teams to tailor their issue-tracking process to fit their specific project needs and workflows. Custom labels can categorize issues by type, priority, or any other criteria relevant to the project.
Issues should be descriptive and it should be clear what the requirements and scope of the task are.
Additional Resources
- GBM #3_ Product Manager Workshop (1).pdf
- 125 Project Management Buzzwords
- Principles Behind the Agile Manifesto
- The Scrum Framework
- Product Manager Discord
- Agile vs. Scrum: What’s the Difference?
- Scrum Team Roles & Responsibilities
-
User Story Mapping: Discover the Whole Story, Build the Right Product Book by Jeff Patton [BOOK]
-
Continuous Discovery Habits by Teresa Torres [BOOK]
-
Inspired by Marty Cagan [BOOK]
-
Sprint by Jake Knapp et l [BOOK]
Introduction to Node.js
What is Node.js?
Node.js is an open-source, cross-platform, JavaScript runtime environment that allows developers to run JavaScript on the server side. It is built on Chrome's V8 JavaScript engine, and it enables the execution of JavaScript code outside a web browser. This capability makes it possible to use JavaScript for server-side scripting and building fast and scalable network applications. Node.js comes with a rich library of various JavaScript modules, which simplifies the development of web applications.
What is npm?
npm stands for Node Package Manager. It is the default package manager for Node.js and is used for managing and sharing JavaScript packages. It comes bundled with Node.js, which means when you install Node.js, you automatically get npm installed on your system. npm makes it easy for JavaScript developers to share and reuse code, and it's a vital tool for managing project dependencies.
How to Install Node.js and NVM
You can install specific versions of node individually, however we recommend making use of a tool called Node Version Manager (NVM). NVM allows you to change and install new versions of Node on your device easily. When working with multiple node projects that may rely on features from certain versions, NVM is extremely helpful.
For Mac:
If you have brew installed, you run
brew update
brew install nvm
mkdir ~/.nvm

# Using zsh
echo "export NVM_DIR=~/.nvm\nsource \$(brew --prefix nvm)/nvm.sh" >> .zshrc
source ~/.zshrc
For Windows
Credit: https://www.freecodecamp.org/news/node-version-manager-nvm-install-guide/
-
Click on Download now
In the nvm-windows repository Readme, click on "Download Now!":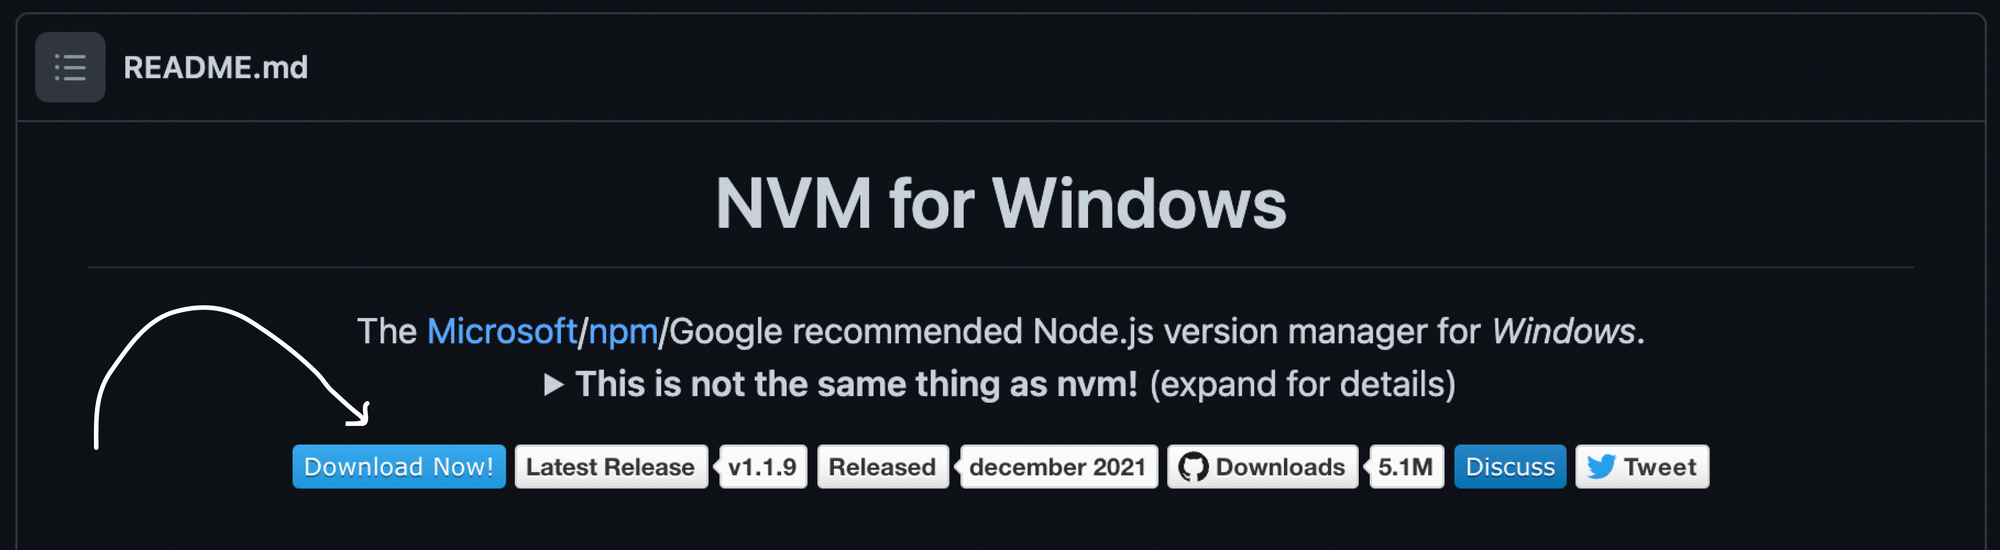
This will open a page showing different NVM releases.
-
Install the .exe file of the latest release
In the latest release you'll find different assets. Click on the nvm-setup.exe asset which is the installation file for the tool
-
Follow the Installation Wizard
Installing node and npm with nvm:
Verify your installation with nvm -v in the terminal. Once nvm is installed, you can install specific versions of node:
nvm install 20.0.0 # Installs a specific version
nvm install --lts # Installs the latest Long Term Support Version

nvm ls # Shows all the version of node installed

# Switch to a specific node version
nvm use <VERSION_NUMBER>
nvm use 20.11.1

# Sets devices default node version to the specific version
nvm alias default <VERSION_NUMBER>
nvm alias default 20.11.1
To verify your installation type node -v and npm -v in the terminal.
If the instructions above don't work, check out these resources:
Developer Best Practices
Software Developer Best Practices
Getting Started
To expedite the learning curve of our developers, at Blueprint, we have a set of standarized frameworks projects teams use to develop solutions for the non-profits. You can find our list of frameworks here.
In every project you will find a README.md file that contains a basic description of the project and most importantly setup instructions to run the service. If you have any issues when following the steps or are missing environment variables, please contact your Tech Lead for further guidance.
Codebase
The structure of the codebase is very framework dependent, as different frameworks might need different directories. However, the structure most projects follow is the following:
/src # All the service code will be here
	/moduleA
    /moduleB
/config # Any env + infra configs
/docs # specs + diagrams
/tests # unit tests + integration tests
Development Workflow
Working in team can get messy and convoluted. Therefore we have the following development workflow.
- Our teams use the SCRUM methodology to assigns tasks to every member of the team. Each week, your Tech Lead will assign an issue to you with a description of what has to get done (See example).
- Create a branch for the issue you are working on. We have the following branch naming conventions
- `feat`: Branch has new feature work
- `fix`: Branch is fixing a bug
- Write your code. Commit and Push your changes. We have the following commit naming conventions.
- Create a Pull Request
- Request review from your Tech Lead and Coding Buddy
- Address any feedback and comments
- Merge once your PR is approved
CI/CD
Whenever you push code to a repository, there might be some workflow setup to help us automate some tasks that include:
- Deployments: Update the code in prod or staging environments
- Testing: Running integ and unit testing on new changes to make sure tests are updated or not broken
- Linting: Make sure everyone follows the same language conventions
Blueprint Learn
Intro to Git
Join the assignment: https://classroom.github.com/a/vRTyz5vB
Portfolio Website
Join the assignment: https://classroom.github.com/a/jAi-dseV
Data Fetching and APIs
Join the assignment: https://classroom.github.com/a/yUH26JVF