Tech Team (FA26)
Setup
Bring a laptop and charger. Try these steps before the meeting so we can spend the hour writing code. If you get stuck, come anyway and we can help you set things up.
Before Week 1
We need an editor to write code and a browser to see what it does. We'll use VS Code as the editor.
- Download Visual Studio Code for your computer and install it. Open it once to make sure it works.
- Create a folder called
practice-page, somewhere you can find it again. Documents is fine. - In VS Code, open File > Open Folder and select
practice-page. - Save avatar.svg in that folder. If the link opens the picture, use your browser's Save As option. Keep the filename
avatar.svg.
This picture is the only file you need before Week 1. We will create the HTML and CSS files during the meeting. You can use your usual browser to open the page.
Before Week 3
This week, we will use Git from VS Code and its terminal. We will sign in with GitHub CLI, turn the practice-page folder into a repository, save its first version, and publish it from VS Code. Do not create a repository or upload the files on GitHub beforehand. We will do that together.
Install Git and GitHub CLI
VS Code has a Source Control view, but it uses Git installed on your computer. GitHub CLI, whose command is gh, will connect Git on your computer to your GitHub account.
- Follow the Git installation instructions for your operating system. On Windows, keep the installer's default choices. On macOS, run
git --versionand accept the developer tools installation if macOS asks. - Follow the GitHub CLI installation instructions for your operating system.
- Close and reopen VS Code after both installations.
- Open the
practice-pagefolder in VS Code. Choose Terminal > New Terminal. - Enter both commands, pressing Enter after each one:
git --version
gh --version
Each command should show a version number. If the terminal says it cannot find git or gh, restart your computer and try once more. Bring the error to the meeting if it still does not work.
Tell Git who you are
Git stores a name and email with each commit. In the VS Code terminal, replace the example values below with your own name and an email connected to your GitHub account:
git config --global user.name "Your Name"
git config --global user.email "yourname@stevens.edu"
git config --global init.defaultBranch main
Git will use this name and email for your commits on this computer. The last command makes new repositories start with a branch named main. To check what you saved, run:
git config --global --get user.name
git config --global --get user.email
Your commit email can be visible in a public repository. If you do not want to use a personal address, copy the no-reply address from your GitHub email settings and use it in the second command.
Sign in through GitHub CLI
- Create a free GitHub account if you do not have one. Verify the email and sign in.
- In the VS Code terminal, run these commands:
gh auth login --hostname github.com --git-protocol https --web
gh auth setup-git
gh auth status
The first command opens a browser so you can approve the sign-in. Return to the VS Code terminal when it finishes. The second command tells Git to use that sign-in when you clone, push, or pull. The last command should show your GitHub username and say that you are logged in to github.com.
- In VS Code, open Extensions and install GitHub Pull Requests, published by GitHub. This extension may ask for its own account connection when we create a pull request. Git itself will still use the account shown by
gh auth status. - Open your Week 2 page and try the button. The folder should contain
index.html,styles.css,script.js, andavatar.svg. Use the Week 2 example if you need a copy. - Find a partner and exchange GitHub usernames. You will invite each other after the repositories are published during the meeting.
Desktop VS Code is required for this meeting because vscode.dev does not have a terminal or access to Git on your computer. If you cannot install VS Code, Git, or GitHub CLI, come anyway and work beside a partner. We will arrange time to help you finish your own setup.
The VS Code Git quickstart, GitHub CLI login guide, and Git credential setup guide cover these steps.
Schedule
Week 1
This week, we're starting with HTML and CSS. We'll use them to build a personal page with a heading, a picture, and some information about ourselves. We'll keep working on this page over the next few weeks, adding JavaScript and learning how to share changes through GitHub.
Later, we'll use what we've learned to build one shared Blueprint merch site. Teams will receive different tasks for that site. A product page needs a name, a picture, and a description, so a lot of what we do today will also apply there.

This is the page we'll be making. You can replace the example's name and interests with your own as we go.
HTML and CSS
HTML describes the content and structure of a web page. It tells the browser which text is a heading, which text belongs in a paragraph, and where to place an image. CSS controls how that content looks, including its colors, font, and spacing.
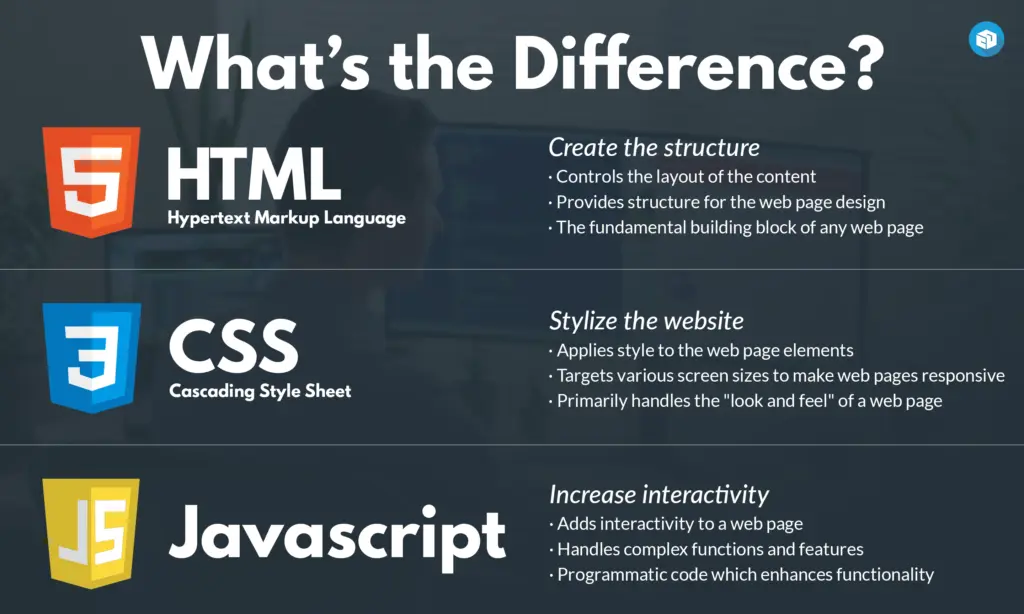
For example, if we wanted to add a button to our page, we would use HTML to create the button and give it a label. We could then use CSS to change its color. Next week, we'll use JavaScript to make something happen when a button is clicked.
Getting started
If you haven't set up your editor yet, follow the setup checklist. It also has a browser option if you can't install the editor.
- Create a folder called
practice-pagesomewhere you can find again. - Open the folder in your editor and create two empty files,
index.htmlandstyles.css. - Save the supplied avatar image into that folder as
avatar.svg. If the link opens the picture, use the browser's save option or ask for help downloading it.
The file endings matter. index.html contains our HTML, and styles.css contains our CSS. Make sure the editor hasn't added .txt to either name.
When you edit a file, you need to save it before the browser can see your changes. Then refresh the browser to reload the saved version.
An HTML document has a head and a body. The head contains information about the page, while the body contains what people will see. Add this to index.html:
<!doctype html>
<html lang="en">
  <head>
    <meta charset="utf-8">
    <meta name="viewport" content="width=device-width, initial-scale=1">
    <title>My first page</title>
    <link rel="stylesheet" href="styles.css">
  </head>
  <body>
  </body>
</html>
Here, title sets the text on the browser tab. The link line tells the browser to load styles.css, which is still empty. We'll add to it once we have some content on the page.
The other lines tell the browser how to read the document. <!doctype html> tells it to read the document as modern HTML, and lang="en" says that the page is in English. charset="utf-8" helps the browser read our letters, punctuation, and other text characters correctly. The viewport line makes the layout use the screen's width on mobile devices.
Save the file and open it in a browser. You should see a blank page with "My first page" on the tab. The page is blank because we haven't put anything inside the body yet.
HTML elements
We'll start with a heading and a paragraph. Add the following between <body> and </body>:
<main>
  <h1>Hello, I'm Alex</h1>
  <p>I'm a student at Stevens.</p>
</main>
In this example, main identifies the page's main content. Inside it, h1 marks the main heading, and p marks a paragraph. The spaces at the start of the lines make it easier to see that the heading and paragraph are inside main.
Headings also describe how the page is organized. We use h1 for the main heading, then h2 for headings within that page. This is helpful for screen readers, which read pages aloud. Someone using one can move between sections by their headings. If we want a heading to look different, we can change its CSS while keeping the right heading level.
Change Alex to your name, then save and refresh. You should see the heading change. Show the person next to you which part of the HTML you edited.
Images and links
An image needs a little more information than a paragraph. We have to tell the browser where to find the image and provide text that describes it. Add this after the paragraph, before </main>:
<img src="avatar.svg" alt="A blue smiling face" width="120" height="120">
<p>I like video games and photography.</p>
The extra information inside the opening tag is called an attribute. src gives the image's location. Since avatar.svg is in the same folder as index.html, we can use its filename. width and height set its dimensions.
The alt attribute provides a text alternative for the image. A screen reader can read it aloud, and the browser can display it if the image doesn't load. If you use a different picture, update this description to match. Unlike a paragraph, img doesn't need a closing tag.
We can also add a link to another page. After the new paragraph, still before </main>, add:
<a href="https://developer.mozilla.org/en-US/docs/Learn_web_development">MDN web development docs</a>The a element creates a link, and href gives its destination. The words between the tags are what someone clicks. Here, the link takes us to MDN. It explains what HTML elements and CSS properties do and gives code examples. Giving the link a descriptive name helps someone know where it goes before opening it.
Save and refresh again. You should have a heading, two paragraphs, a picture, and a link. Try opening the link, then use the browser's Back button to return. Replace the interests sentence with something about yourself.
CSS
So far, the browser has chosen the default font and spacing for our HTML. We can change those by writing CSS rules in styles.css. Each rule selects part of the page and gives it a set of styles.
Open styles.css and add:
body {
  font-family: system-ui, sans-serif;
  background: #eef2ff;
  color: #172554;
  margin: 0;
  padding: 24px;
}
Here, body is the selector. It tells the browser which element the rule applies to. Inside the braces, { and }, we write a property followed by its value. For example, in color: #172554;, color is the property and #172554 is the value. The colon separates them, and the semicolon marks the end.
This rule uses a system font, gives the page a pale background, and makes the text dark blue. The values beginning with # are color codes. margin: 0 removes the body's default outside space, while padding: 24px adds space inside it. This keeps the content away from the edge of the browser window. px means CSS pixels, the units we're using for these sizes.
Save your files and refresh the browser. You should see the new colors and spacing. If the page still looks the same, check that the HTML links to styles.css and that both files are in the same folder.
We can give main its own styles as well. Add this below the first rule:
main {
  max-width: 600px;
  margin: 0 auto;
  background: white;
  padding: 24px;
  border-radius: 16px;
}
Now the content sits inside a white card. max-width stops the content area from becoming wider than 600 pixels. margin: 0 auto gives it no top or bottom margin and uses automatic left and right margins to center it when there is room. The padding creates space inside the card, and border-radius rounds its corners.
Try changing the padding in this rule from 24px to 48px. Before you refresh, think about which space should get larger. Compare the result, then change it back to 24px.
We can style the individual elements too. Add these rules below the others:
h1 {
  color: #1d4ed8;
}

img {
  border-radius: 16px;
}

a {
  color: #1d4ed8;
}
The h1 rule changes the heading's color, the img rule rounds the image's corners, and the a rule changes the link's color. Each selector affects its matching element. If you changed the color in the h1 rule, would the paragraphs change too?
Keep the supplied colors for now. The dark text is readable against the pale and white backgrounds. Light text on a light background would be harder to read.
Finding answers
Let's say we want the heading's text to be centered, but we want the paragraphs to stay as they are. We know where the heading's styles go, but we haven't learned which CSS property changes text alignment.
Search Google for CSS center text W3Schools and open a result from w3schools.com. Look for the property that controls text alignment and the value that centers it. Then add that property and value to the existing h1 rule in your CSS.
Save and refresh to see whether it worked. Only the heading's text should be centered. Compare your change with someone nearby and explain why you added it to h1. If search isn't working, use the W3Schools CSS text-align reference. You can also use the MDN text-align reference if you want a more detailed explanation.
You can use this approach whenever you need a property you haven't seen before. Start with the change you want to make, look for an example on W3Schools, and try it in your page. If you need more detail about how or why something works, check MDN. Check what the code does before adding more of it.
Common problems
When something doesn't look right, start with the last thing you changed. Fixing one thing at a time makes it easier to tell what caused the problem.
What you see | What to check |
|---|---|
Old words or colors | Save the edited file, then refresh the correct browser tab. |
Raw HTML text instead of a page | Check that the file is named `index.html`, and open it in a browser. |
Content appears, but none of the styling does | Match `href="styles.css"` to the exact filename and folder. |
A broken picture | Check that `avatar.svg` sits beside `index.html` and matches `src`. |
One CSS rule does nothing | Check its selector, colon, semicolons, and both braces. |
Strange text or links | Check that quotes and opening and closing tags are paired. |
Before next week
Save your work and keep the entire practice-page folder. Next week, we'll add a button and use JavaScript to make it respond when clicked.
If you have time left, add a section called "Something I want to build" using h2 and a paragraph. Give the heading its own CSS rule.
The completed example is available if you want to compare files or need help catching up. It includes the centered heading from the search exercise.
Resources
Start with W3Schools for examples and quick references. Use MDN when you want a more detailed explanation or additional technical information.
W3Schools
- W3Schools: HTML Introduction
- W3Schools: HTML Headings
- W3Schools: HTML Images
- W3Schools: CSS Syntax
- W3Schools: CSS Padding
- W3Schools: CSS text-align
MDN
- MDN: HTML and document structure
- MDN: Heading elements
- MDN: Images
- MDN: CSS rules and styling
- MDN: Padding
- MDN: text-align
Week 2
Last week, we used HTML and CSS to build a personal page. HTML gave us the content, and CSS let us change how it looked. If we wanted to change the text on the page, we had to edit the HTML file and refresh the browser.
JavaScript is a programming language that lets us change a page while someone is using it. For example, we can respond to a button click by showing a message. We will add that to the same page we made last week.
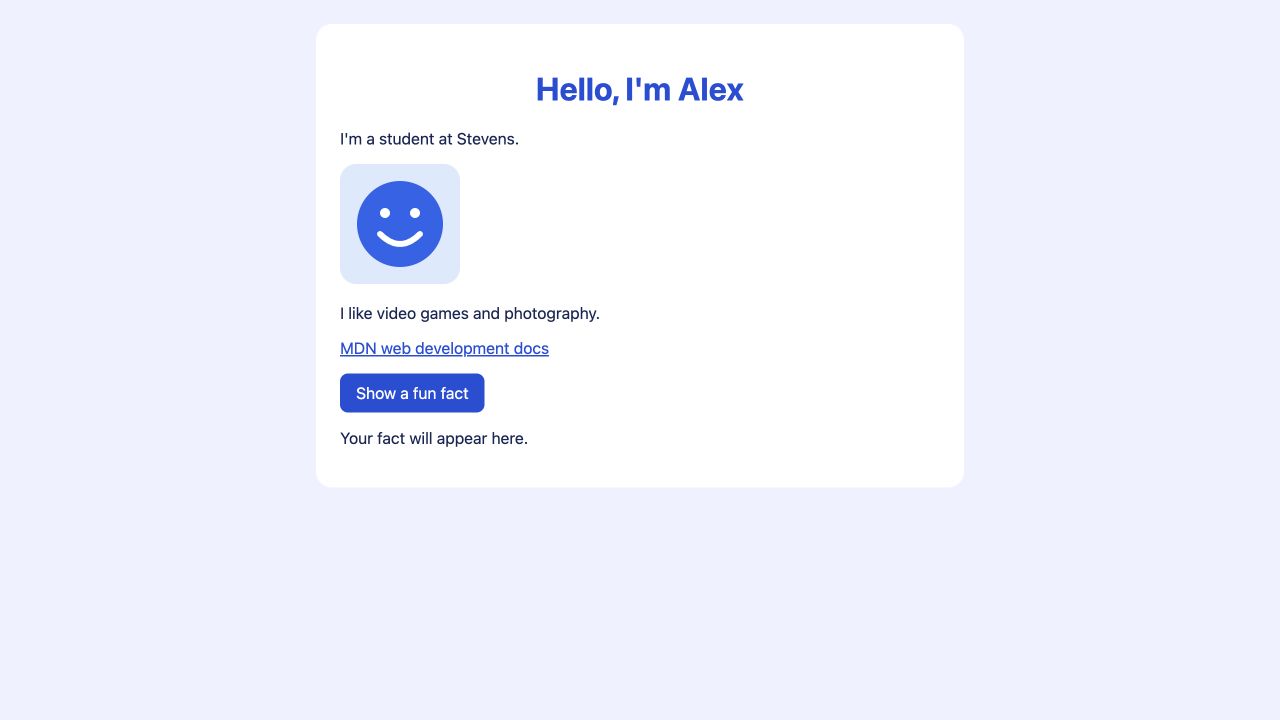
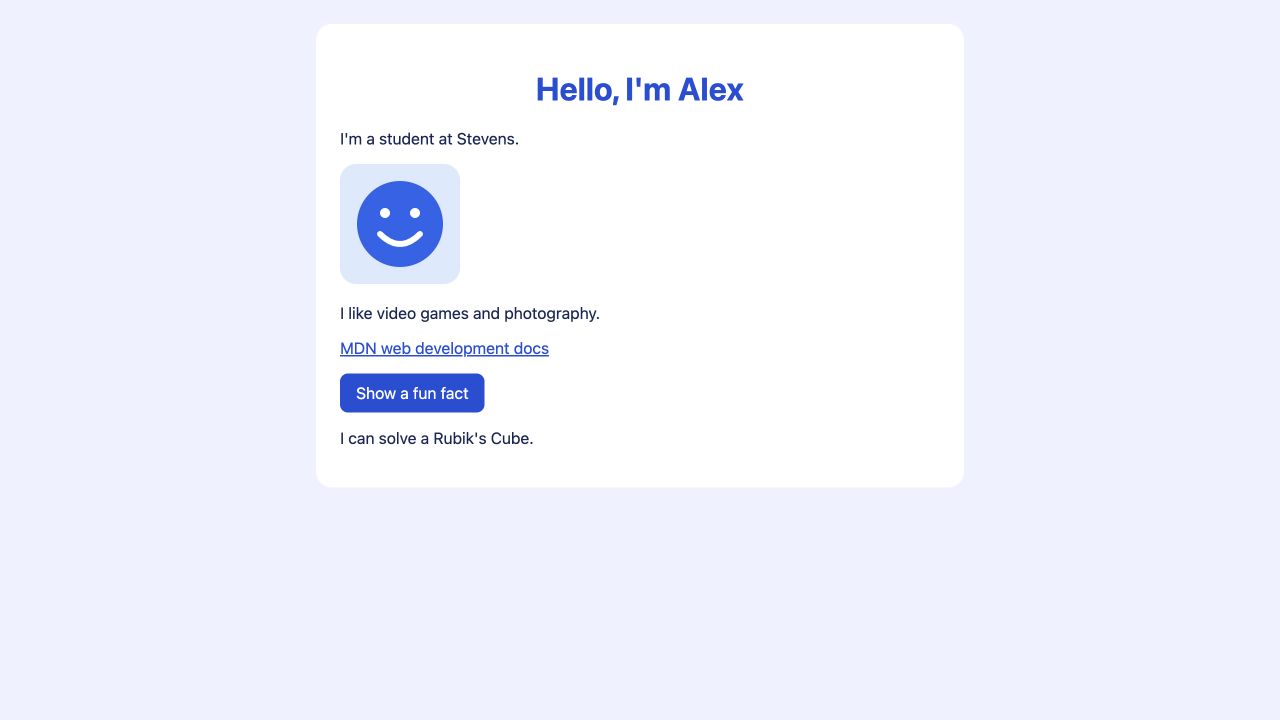
Here is what our page will look like before and after clicking the button:
Getting started
Open last week's folder in your editor and open index.html in your browser. Keep the editor and browser next to each other so you can see what happens as you work. If you missed last week or cannot find your files, ask for a copy of the Week 1 example.
Adding the button
First, we need a button to click and a paragraph where we can show the fact. Add these inside <main>, just before </main>:
<p><button id="fact-button" type="button">Show a fun fact</button></p>
<p id="fact" aria-live="polite">Your fact will appear here.</p>
The first line adds a button inside a paragraph, which keeps it on its own line. type="button" makes it a regular button. Because we used the HTML <button> element, the browser already lets someone reach it with the keyboard and activate it with Enter or Space.
The id attributes give these elements unique names on the page. Our button's ID is fact-button, and our message's ID is fact. JavaScript will use those IDs to find the right elements, so make sure each spelling matches the example.
A screen reader reads page content aloud. aria-live="polite" tells it to announce changes to the paragraph when it has finished what it is already reading. This is helpful because someone using a screen reader might otherwise miss the new message.
Save the file and refresh the page. You should see both elements, but clicking the button will not change anything yet. We still need to write the JavaScript that handles the click.
Adding JavaScript to the page
Create a file called script.js in the same folder as index.html and styles.css. The .js ending tells us this is a JavaScript file.
In index.html, add the following line just before </body>:
<script src="script.js"></script>
This tells the browser where to find our JavaScript. We put it at the end of the body so the browser reads the button and paragraph before running code that tries to find them. Save both files.
Finding elements
To change one paragraph, JavaScript needs a way to find it on the page. The browser organizes the HTML elements into the Document Object Model, usually shortened to DOM. We can use the DOM to find our paragraph and change its text.
A program works with values, such as text, numbers, or elements from a page. A variable gives a value a name so we can use it later in our code. In this example, we want names for our button and paragraph.
Add these lines to script.js:
const factButton = document.querySelector("#fact-button");
const fact = document.querySelector("#fact");
document refers to the current page. querySelector finds the first element that matches a selector. The selector tells it which element to look for. Here, # means an ID, so "#fact-button" finds the element with id="fact-button".
const creates a variable and prevents us from giving it a different value later. The = gives the name on the left the value on the right. Here, factButton refers to the button that querySelector found. The semicolon ends the instruction.
The second line does the same thing for our paragraph, using the name fact. We can now use factButton and fact throughout the file without looking up the elements again.
Compare each selector with its HTML ID. Notice that the # appears in the JavaScript selector, but not in the HTML ID itself. Also, factButton is a name we chose for our variable. It does not have to be spelled the same way as the ID.
Functions
Now that we have the paragraph, we need to describe what should happen to it. A function groups instructions under a name. Calling the function means telling it to run those instructions.
We will make a function called showFact. Add this below the two variables:
function showFact() {
  fact.textContent = "I can solve a Rubik's Cube.";
}
function tells JavaScript we are defining a function, and showFact is its name. The instructions go inside the braces, { and }. The parentheses are empty because this function does not need us to give it any inputs.
Inside the function, fact.textContent refers to the text in our paragraph. The = replaces that text with the value on the right. Text inside quotation marks is called a string. Here, our string is "I can solve a Rubik's Cube.". The browser displays the sentence without the surrounding quotation marks.
Earlier, we used const for fact. We can still change the paragraph's text because fact continues to refer to the same element. We are changing that element's content, rather than giving the variable a different element.
At this point, we have described what showFact does, but we have not called it. If you refresh the page, the starting message will still be there.
Events
An event is something that happens on a page, such as someone clicking a button. An event listener lets us run a function when a particular event happens.
We want showFact to run when someone clicks our button. Add this line below the function's closing brace:
factButton.addEventListener("click", showFact);
In this example, we add the listener to factButton. "click" is the event we want to respond to, and showFact is the function we want to run.
Notice that we wrote showFact without parentheses here. That gives the listener a function it can call later. Writing showFact() would call the function immediately while the page loads, instead of giving the listener the function to use when someone clicks.
Save both files and refresh the page. Click the button. You should now see the fact appear. Here is the complete script.js so you can compare it with your file:
const factButton = document.querySelector("#fact-button");
const fact = document.querySelector("#fact");

function showFact() {
  fact.textContent = "I can solve a Rubik's Cube.";
}

factButton.addEventListener("click", showFact);
Try clicking the button again, then refresh the page. Each click sets the same message. Refreshing brings back the starting text because our JavaScript changes the page in the browser, not the saved HTML file.
Changing the message
Replace the fact with something about yourself. Change the words inside the double quotation marks in showFact, and keep the surrounding punctuation in place. You can also change the button's visible text in index.html. Keep the button's ID the same so the selector still finds it.
The screenshots also use button styles. If you want the same appearance, copy the two rules beginning with button to the end of your styles.css. They change how the button looks, and our JavaScript works with or without them.
Debugging
Debugging means finding and fixing a problem in our code. Let's make a small mistake so we can see what the browser tells us about it.
In the first line of script.js, remove one t from fact-button:
const factButton = document.querySelector("#fact-buton");
Save, refresh, and try clicking. The button is still there, but it no longer changes the message.
Right-click the page, choose Inspect, and open the Console tab. The console shows errors from JavaScript. Look for the error connected to script.js. Its wording may vary by browser, but you may see null and addEventListener.
querySelector returns null when it cannot find a matching element. Our HTML still has id="fact-button", but our JavaScript now looks for fact-buton. As a result, factButton contains null, and the next part of our code cannot attach a listener to it.
The error points to the line where JavaScript tried to add the listener. The actual mistake is earlier, in the selector. Fix the missing t, save, and refresh. The button should work again.
If your code stops working, start with what you expected to happen and what happened instead. The console often gives you a place to look. Change one thing at a time so you can tell which change fixed the problem.
Before next week
Before that meeting, follow the Week 3 setup checklist to install Git and GitHub CLI, sign in from the VS Code terminal, and find a partner. Keep the page in its current folder. We will turn that folder into a repository and publish it together. If you cannot finish setup, come anyway, and we can figure it out.
Resources
Start with W3Schools for a short example. Use MDN for more detail.
- W3Schools: JavaScript Introduction
- W3Schools: Functions
- W3Schools: textContent
- MDN: What is JavaScript?
- MDN: querySelector
- MDN: const
- MDN: Functions
- MDN: textContent
- MDN: addEventListener
- MDN: aria-live