Week 1
Table Of Contents
- Why Kudos?
- Installations
- Git and GitHub
- Windows install
- macOS install
- Node
- Windows
- macOS
- Git and GitHub
- Making Your First Contribution!
- Step 1: Cloning the repository.
- Step 2: Creating a new branch.
- Step 3: Making the change!
- Making a commit
- Checking changes to be committed
- Committing Changes
- Pushing a Commit
- Step 4: Creating a pull request
- Approvals and Merging
- What Now?
- Project Outcomes
- Technical Skills
- Project Management Skills
Why Kudos?
At Blueprint, recognizing the contributions of our developer members is crucial for fostering a positive and productive project team environment. This tool is specifically designed to highlight the efforts of these members and gather valuable feedback. By acknowledging their hard work, especially amidst their academic and other commitments, we aim to improve their overall project team experience and prevent potential feelings of being overworked or burnt out.
Installations
For any project, it is essential to have certain 'tools' installed...
These tools go by many names:
- libraries
- environments
- packages
- dependencies
- etc.
But they all serve one broad purpose: help developers build.
So, before we begin building our project, lets first install all of the necessary tools we'll need along the way.
Git and GitHub
A key foundation of software development is collaboration.
Across industry, developers collaborate using two essential tools: Git and GitHub
Later on, we will explore these two tools, but for now lets just install them.
Windows install
- Go to the official Git website at https://git-scm.com/downloads
- The download for Windows should begin automatically.
- Once the installer finishes downloading, run the
.exefile. - Follow the prompts in the installation wizard.
- After installation, open a new terminal and type
git --versionto verify the installation.
macOS install
- The easiest way to get Git on macOS is in the terminal.
- Open your Terminal application.
- Type
git --versionand press enter. - If Git is not installed, a pop-up will appear asking you to install the command line developer tools. Click "Install" and follow the on-screen instructions.
Node
Like git, Node is a tool in the software development world that is a must-have.
Among many other things, it allows us to see the changes in our code live in our browser!
So as we add components of our app, we can ensure they look and function as we want them to.
Windows
- Go to the official Node.js website: https://nodejs.org/en/download
- Download correct verion.
- Run the installer and follow the on-screen instructions.
- Once the installation is complete, you can open the terminal and verify the installation by typing:
node -v
npm -v
These commands should return the version numbers for Node.js and npm, confirming a successful installation.
macOS
- The easiest way is to download the official
.pkginstaller from the Node.js website: https://nodejs.org/en/download - Choose the LTS version and run the installer after it downloads.
- Follow the installation steps. The installer will guide you through the process.
- After installation, open a new Terminal window and run the same commands as above to verify:
node -vandnpm -v.
Making Your First Contribution!
With git installed, we can finally write some code!
This is a guide on how to make your first contribution, with the example of adding yourself to a contributor list for this project.
Step 1: Cloning the repository.
Open a new terminal and type the git clone command followed by the GitHub repository
you want to clone.
In our case, this is: https://github.com/stevensblueprint/blueprint-kudos. This should create a new folder on your computer with the name of the repository.
git clone https://github.com/stevensblueprint/blueprint-kudos
Cloning the repository creates a local copy (a version on your computer) of all the code from the repository. This only needs to be run once.
Enter the folder where your project was created with the cd command. The folder is automatically created - and named after the project. In our case, this is:
cd blueprint-kudos
Finally, you'll know you are ready to move on when you see something that looks like this:
\Users\<your name>\blueprint-kudos
As a quick practice, and so you can play around with the project, lets run a development server to check out what the final version of kudos will look like!
This is where Node comes in - by writing the following command in your blueprint-kudos folder, you will be redirected to a development (test) version of kudos:
npm run dev
Once you have finished exploring, enter Ctrl + C to kill the development server.
Step 2: Creating a new branch.
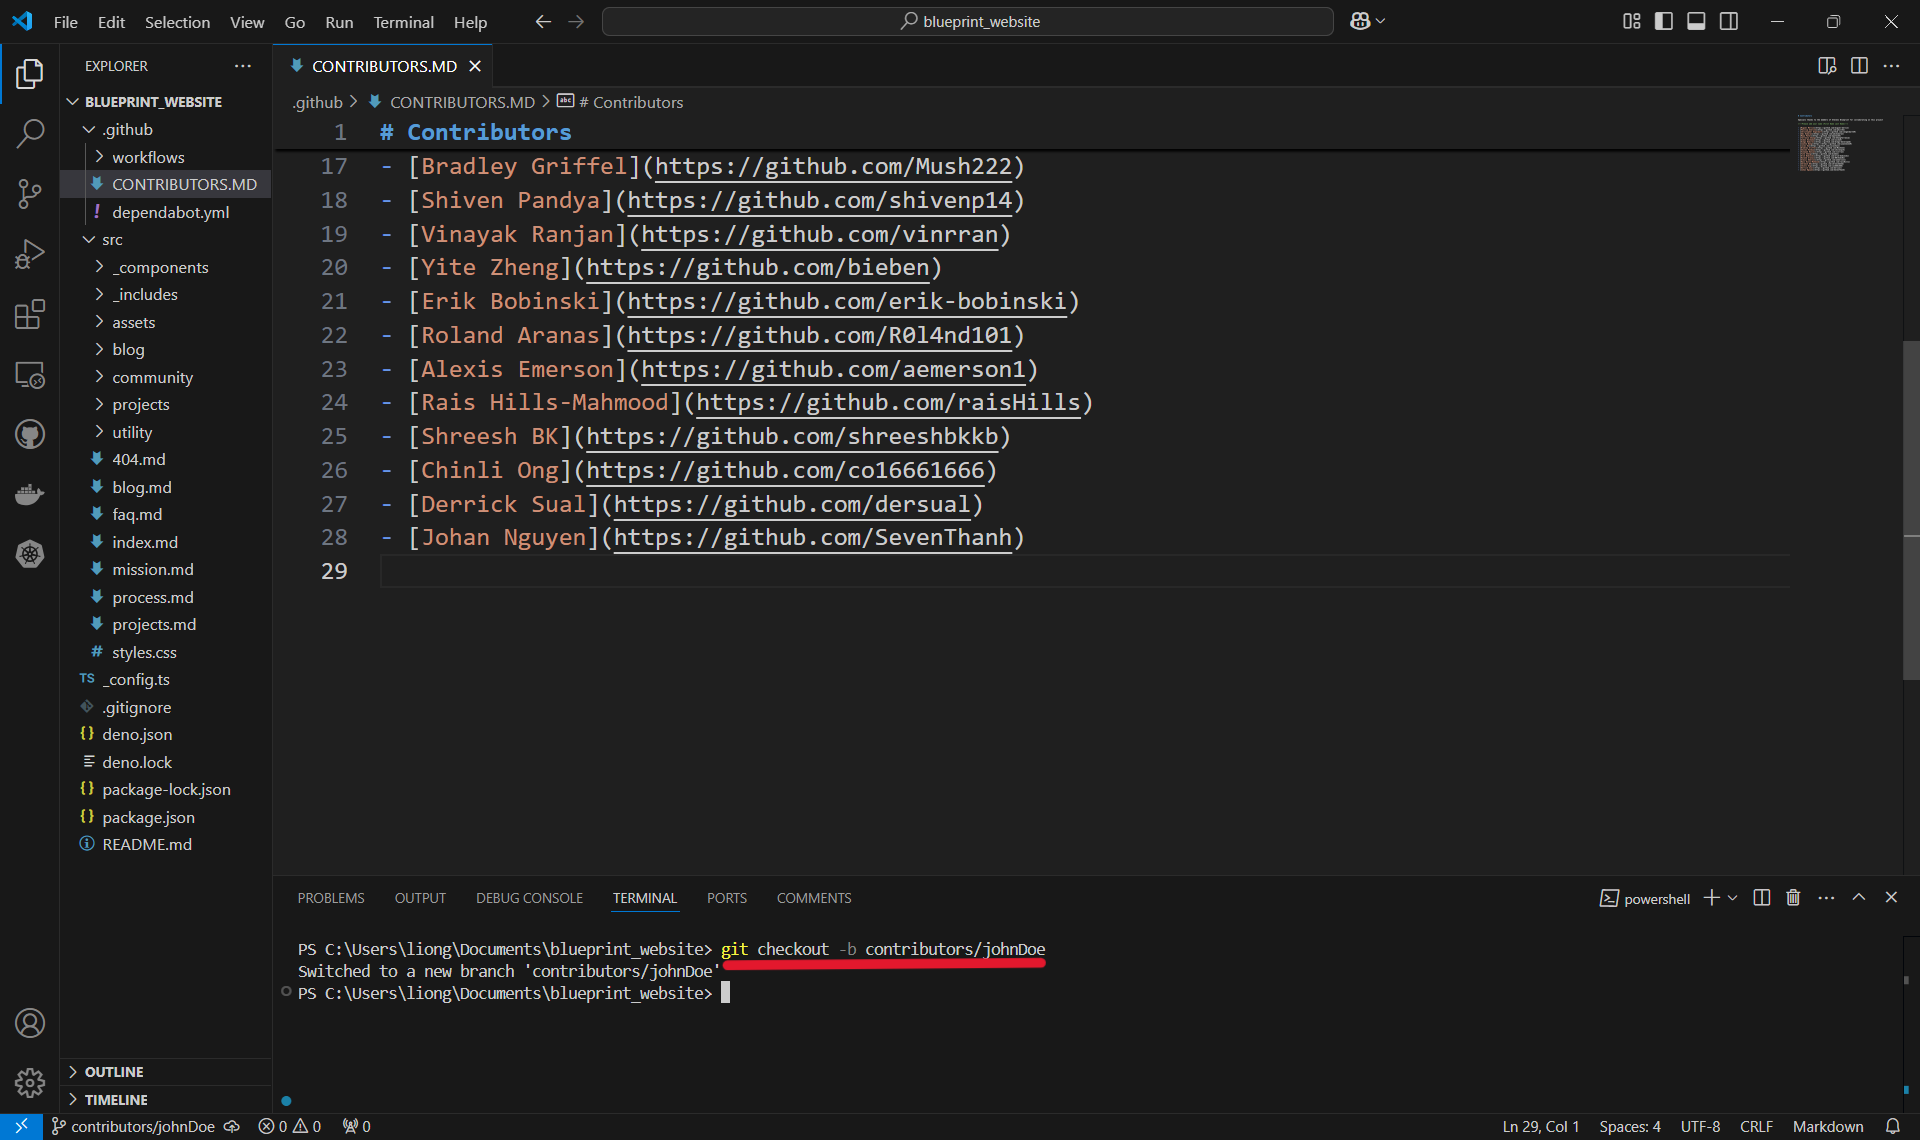
In your project folder, run the git checkout command followed by the name of the branch. When naming a branch, it's good to pick a short, descriptive name. In our case, we are adding a contributor, so we'll type:
git checkout -b contributors/<your name>
Notice the -b? That's used to create a new branch as opposed to checking out a branch that already exists.
Creating a new branch makes a new version of the code that is seperate from the main code. This means changes can be made without affecting the main code (in case something goes terribly, disastrously wrong).
Step 3: Making the change!
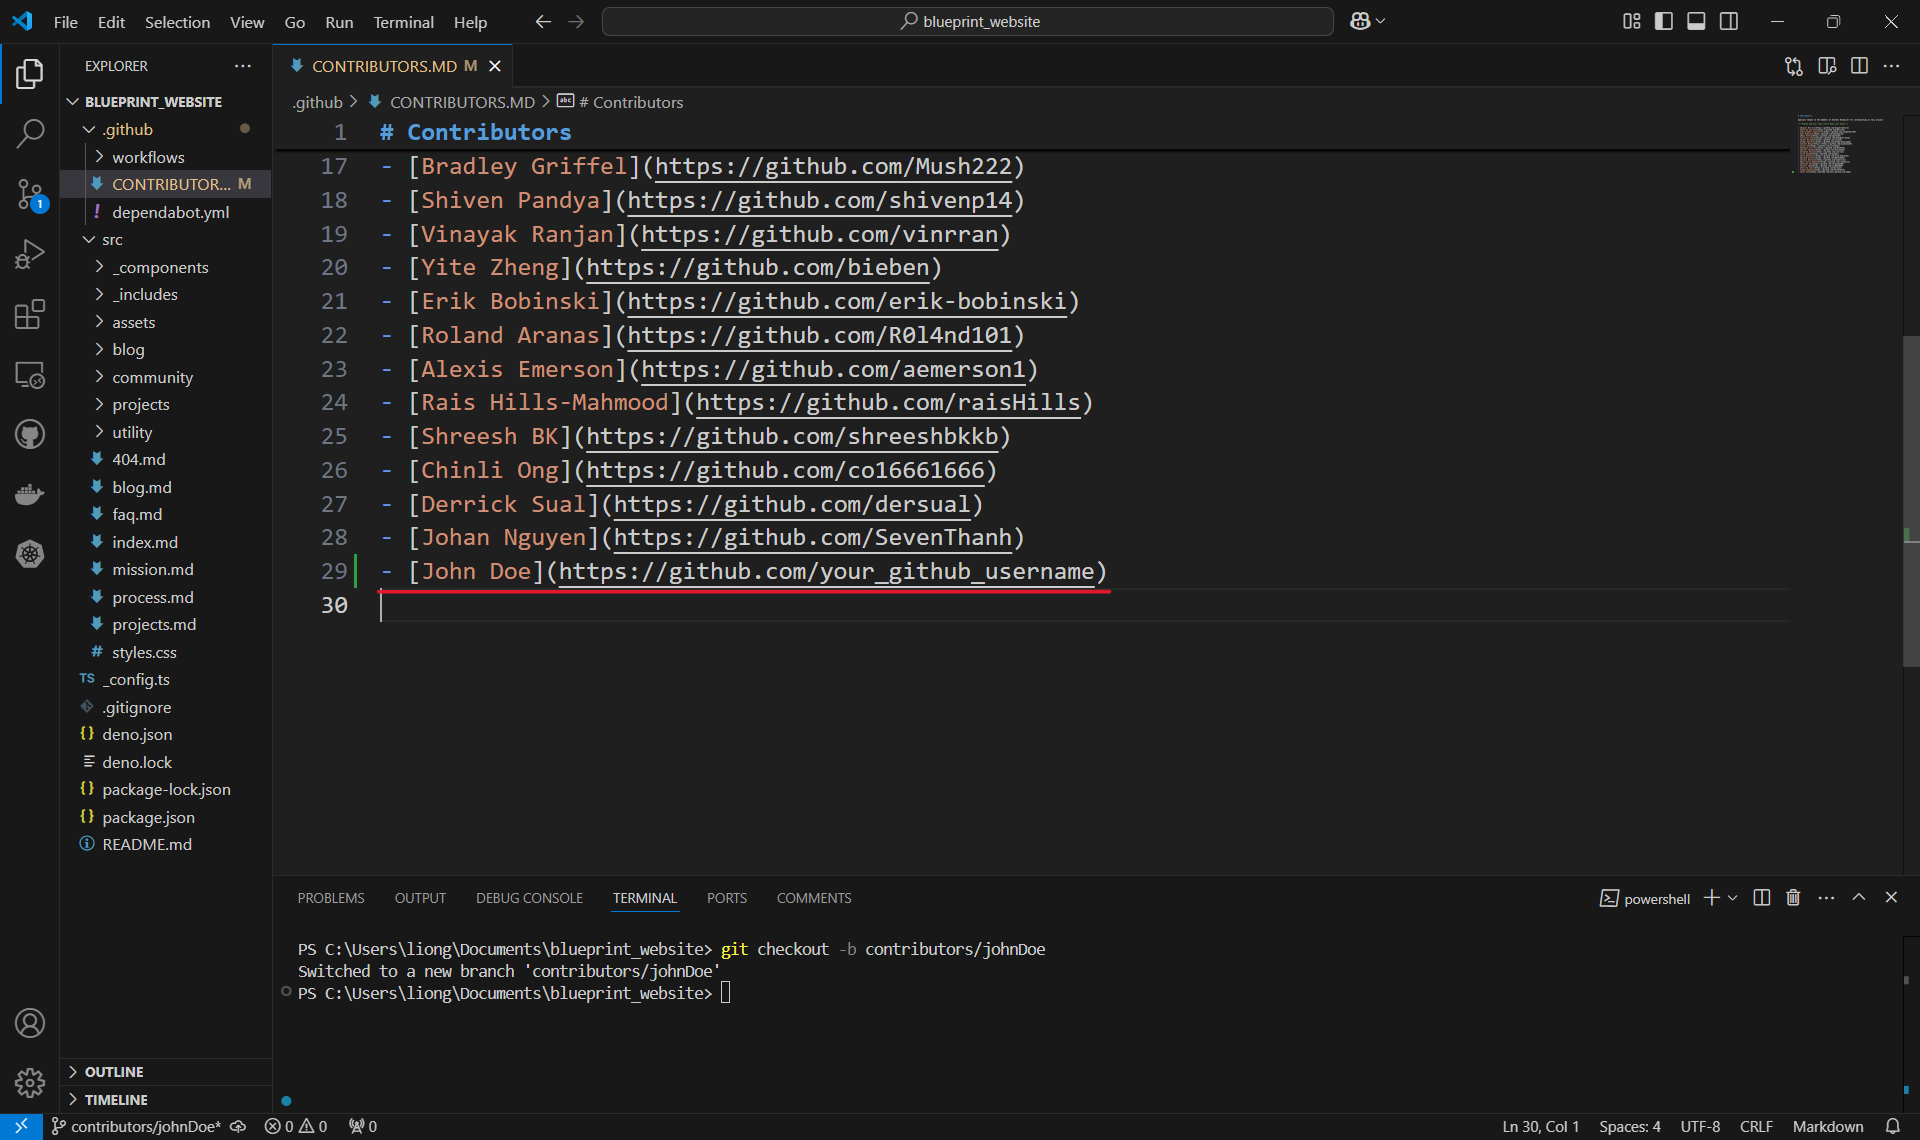
Now that you are on your own branch, you can open the file you want to edit and make the necessary changes. In our case, we will be adding John Doe to the list of contributors.
 Note: Make sure to save the file with
 cmd + s / ctrl + s!
Making a commit
Once the change is made, use the git add command in order to include or 'stage' the change them for the next commit. Commits can be thought of as checkpoints; more on that later.
In this case, we made changes to the CONTRIBUTORS.MD , so our file path is /CONTRIBUTORS.MD and we type in:
git add /CONTRIBUTORS.MD
Note: You can use git add multiple times to add as many files as you need, and another common option is to use git add . to add all files with changes.
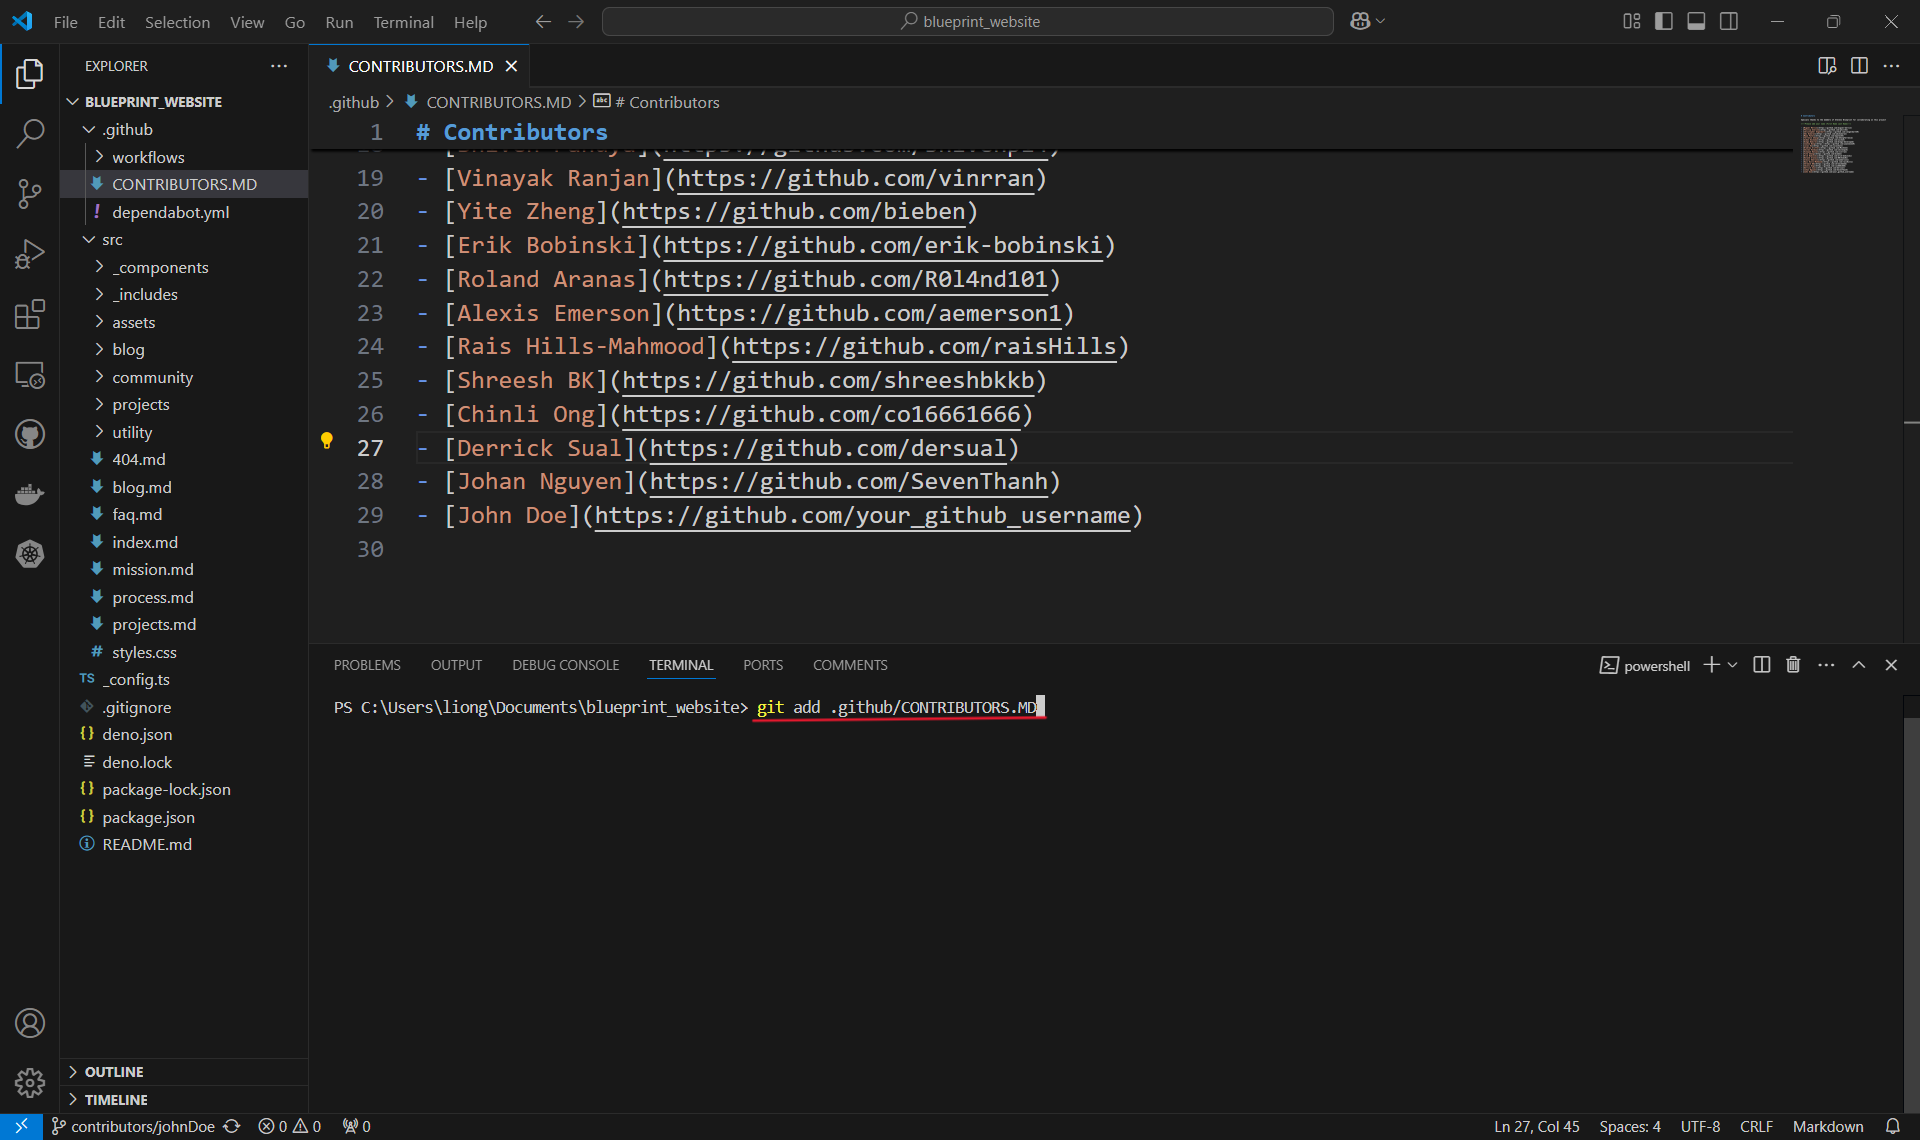 Note: The file path is case sensitive.
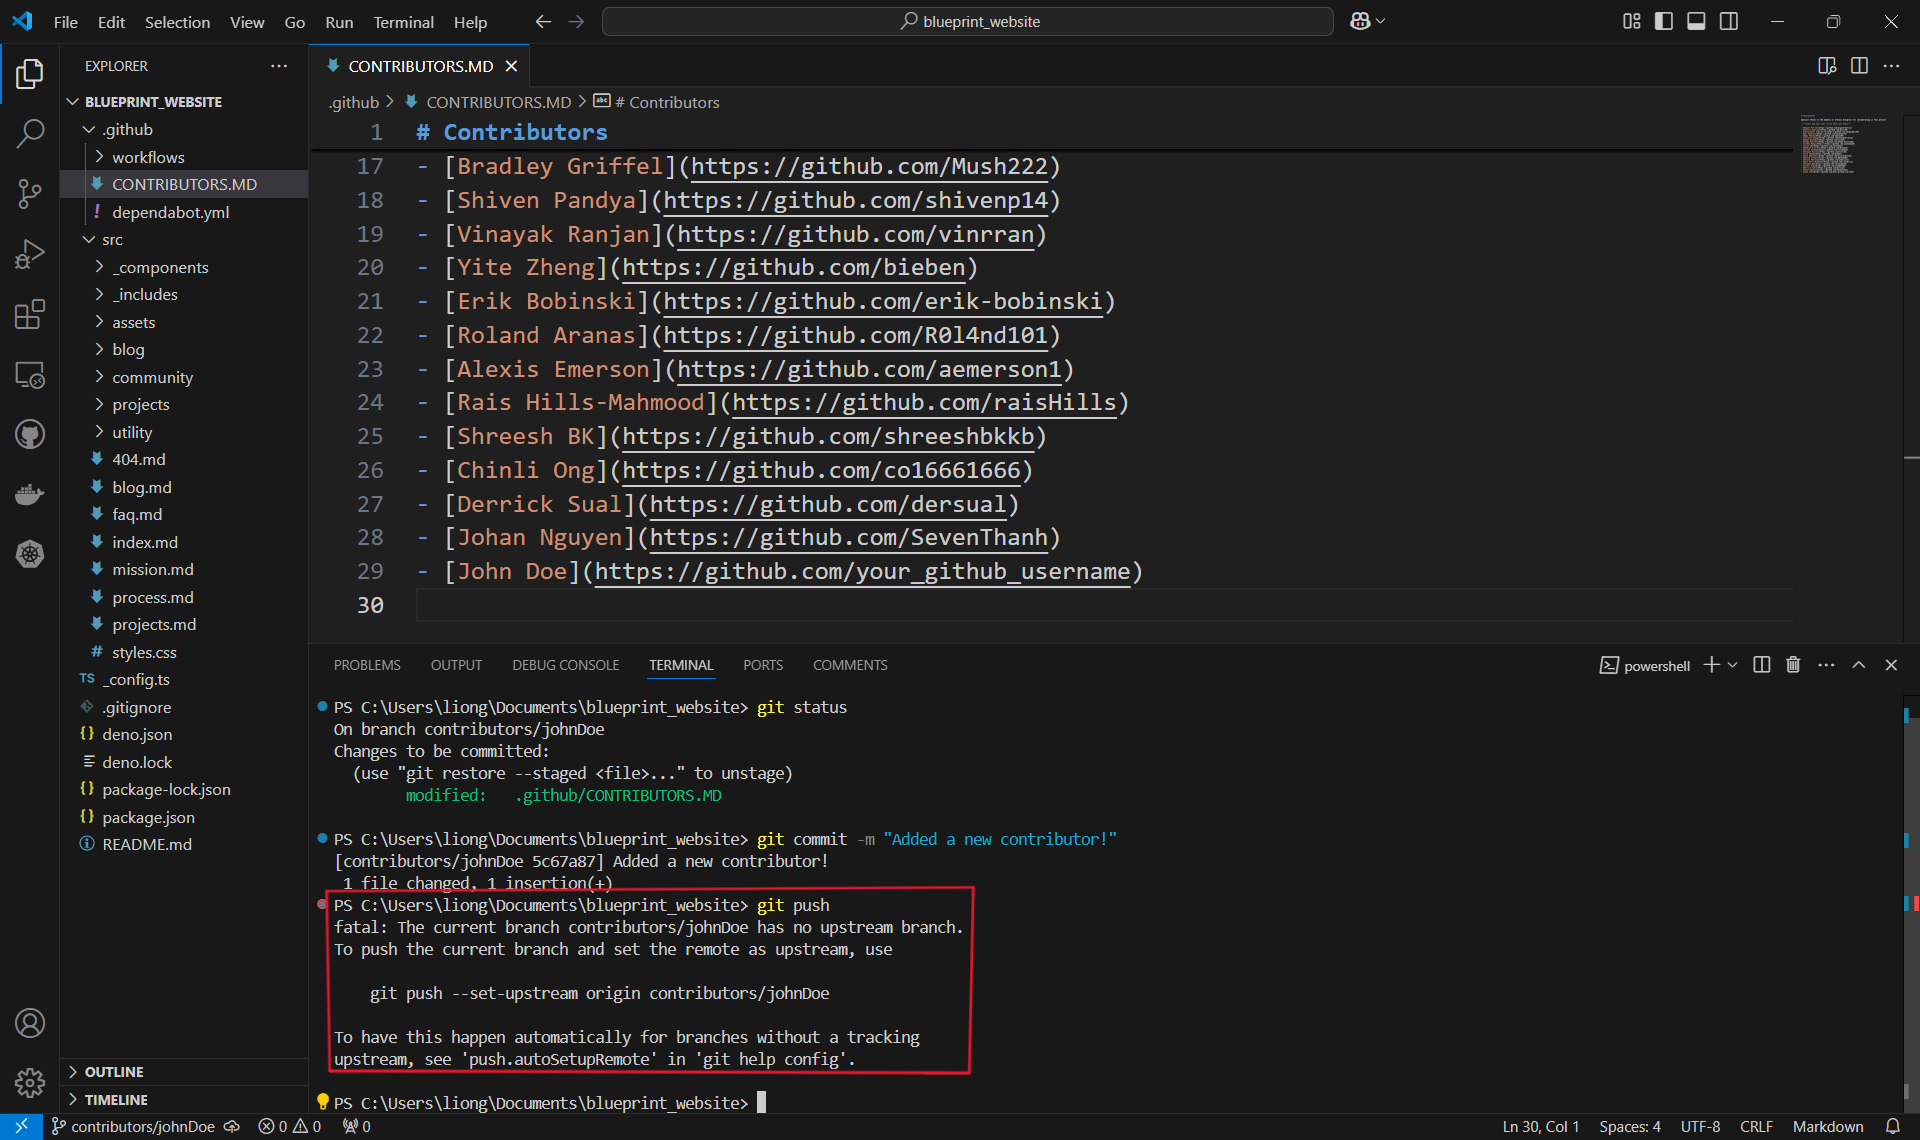
Checking changes to be committed
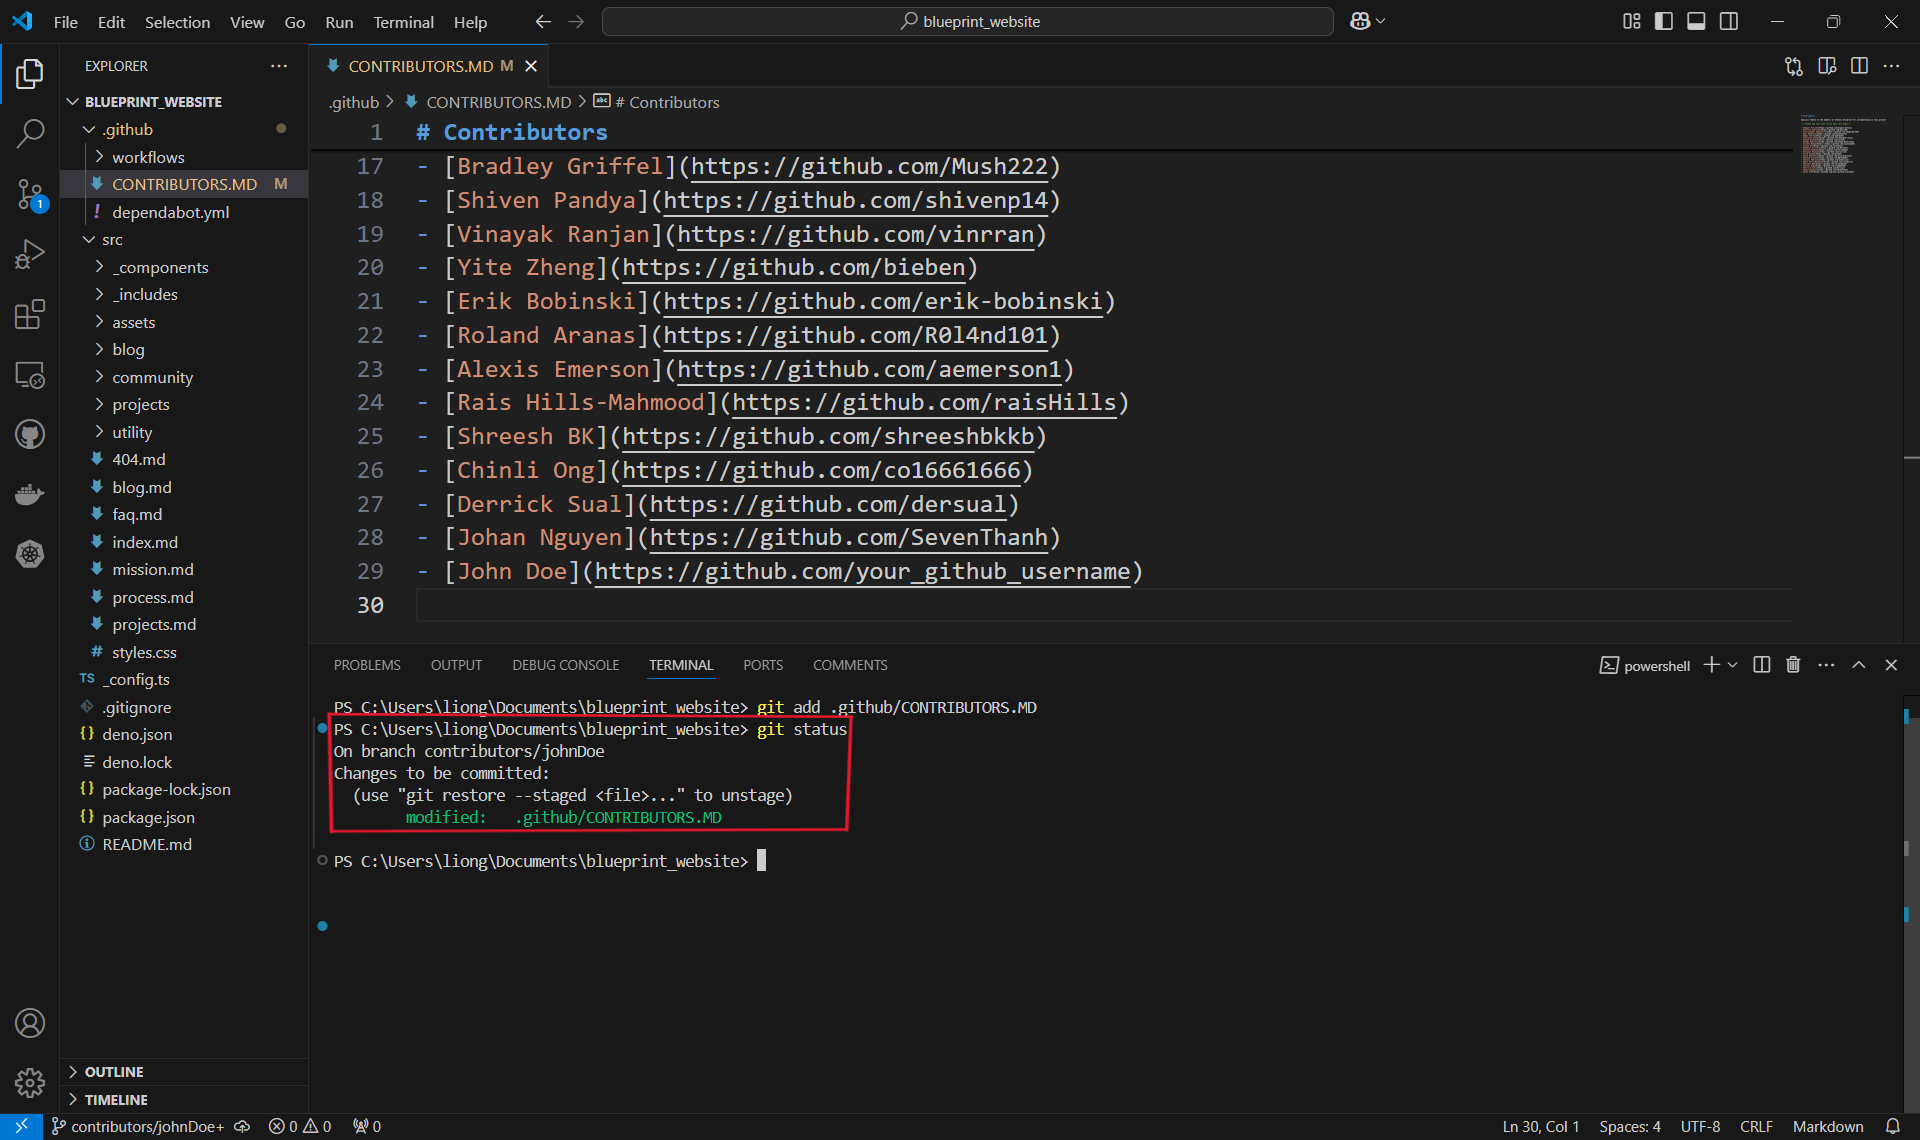
You can use the git status command to check what files have been added or "staged" for a commit to ensure you added the right things. In this case, it's only the one contributors file that we added.
 You can see here that our file is under changes to be committed and is in green text. Changes not staged for commit will be in red (if there are any).
Committing Changes
With our changes made and staged, we can create a commit which can be thought of as a checkpoint for our code. We can revert to this point if we make mistakes or need to look at the version of the code at this point in time.
It is also good practice to include a commit message by using the -m flag to describe what changes were made. For us, we will just say that we are adding a new contributor, like so:
git commit -m "Added a new contributor!"
Commit Messages: When writing a commit, it is usually good practice to follow a convention. At Blueprint, we use the Conventional Commits specification: www.conventionalcommits.org, but don't worry about that right now!
We can commit as often as we want, or when we feel it is necessary before making big changes.

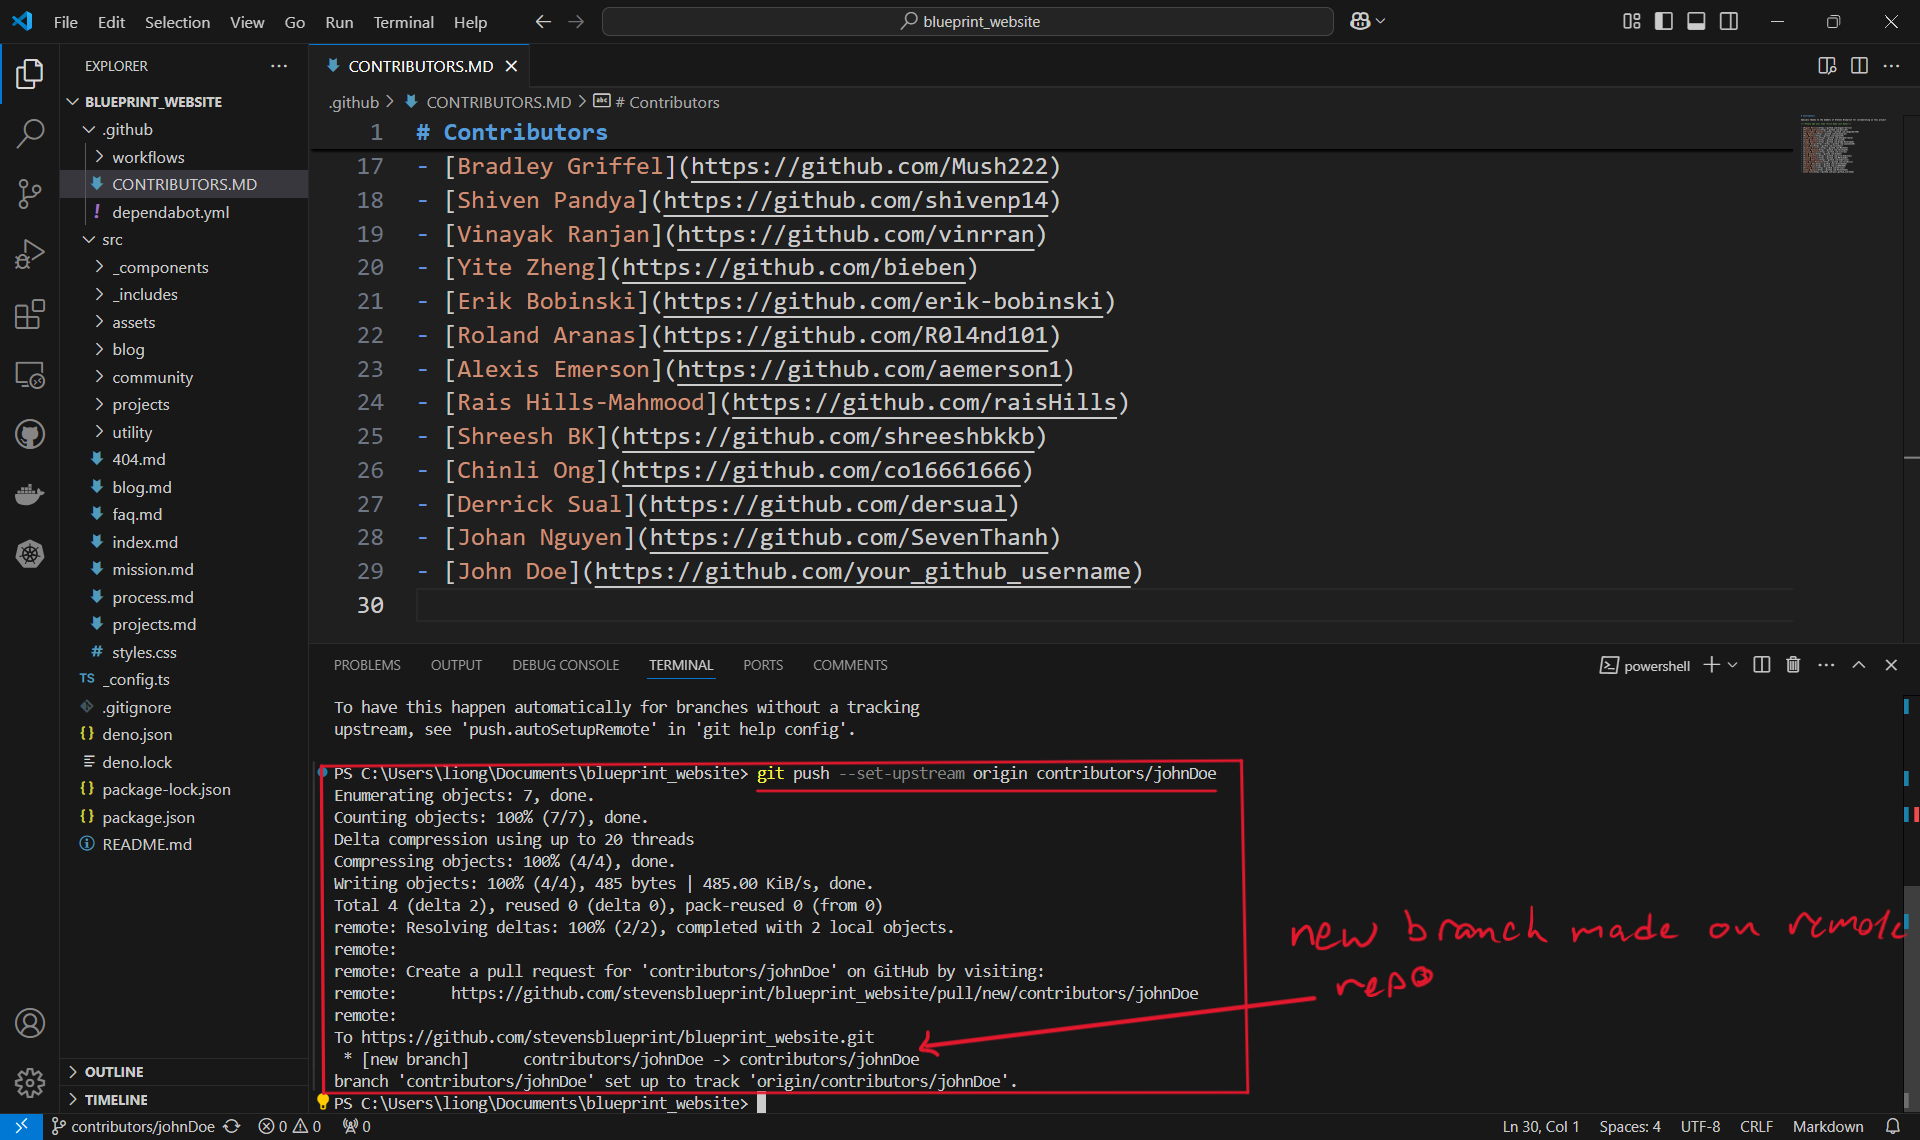
Pushing a Commit
In order for our changes to appear on the remote repository (the one on Github, which is online), we need to push our changes using the git push command. If we run it as is, however, we will encounter an error:
It is no big deal - the reason it happens is because when we create the branch contributors/johnDoe, we only created it locally and it does not exist on the Github repository.
Therefore, we must run the command shown:
git push --set-upstream origin contributors/<your name>
 Once the branch is set up remotely, or if the branch already existed remotely and was not created locally, we can simply use
 git push.
Step 4: Creating a pull request
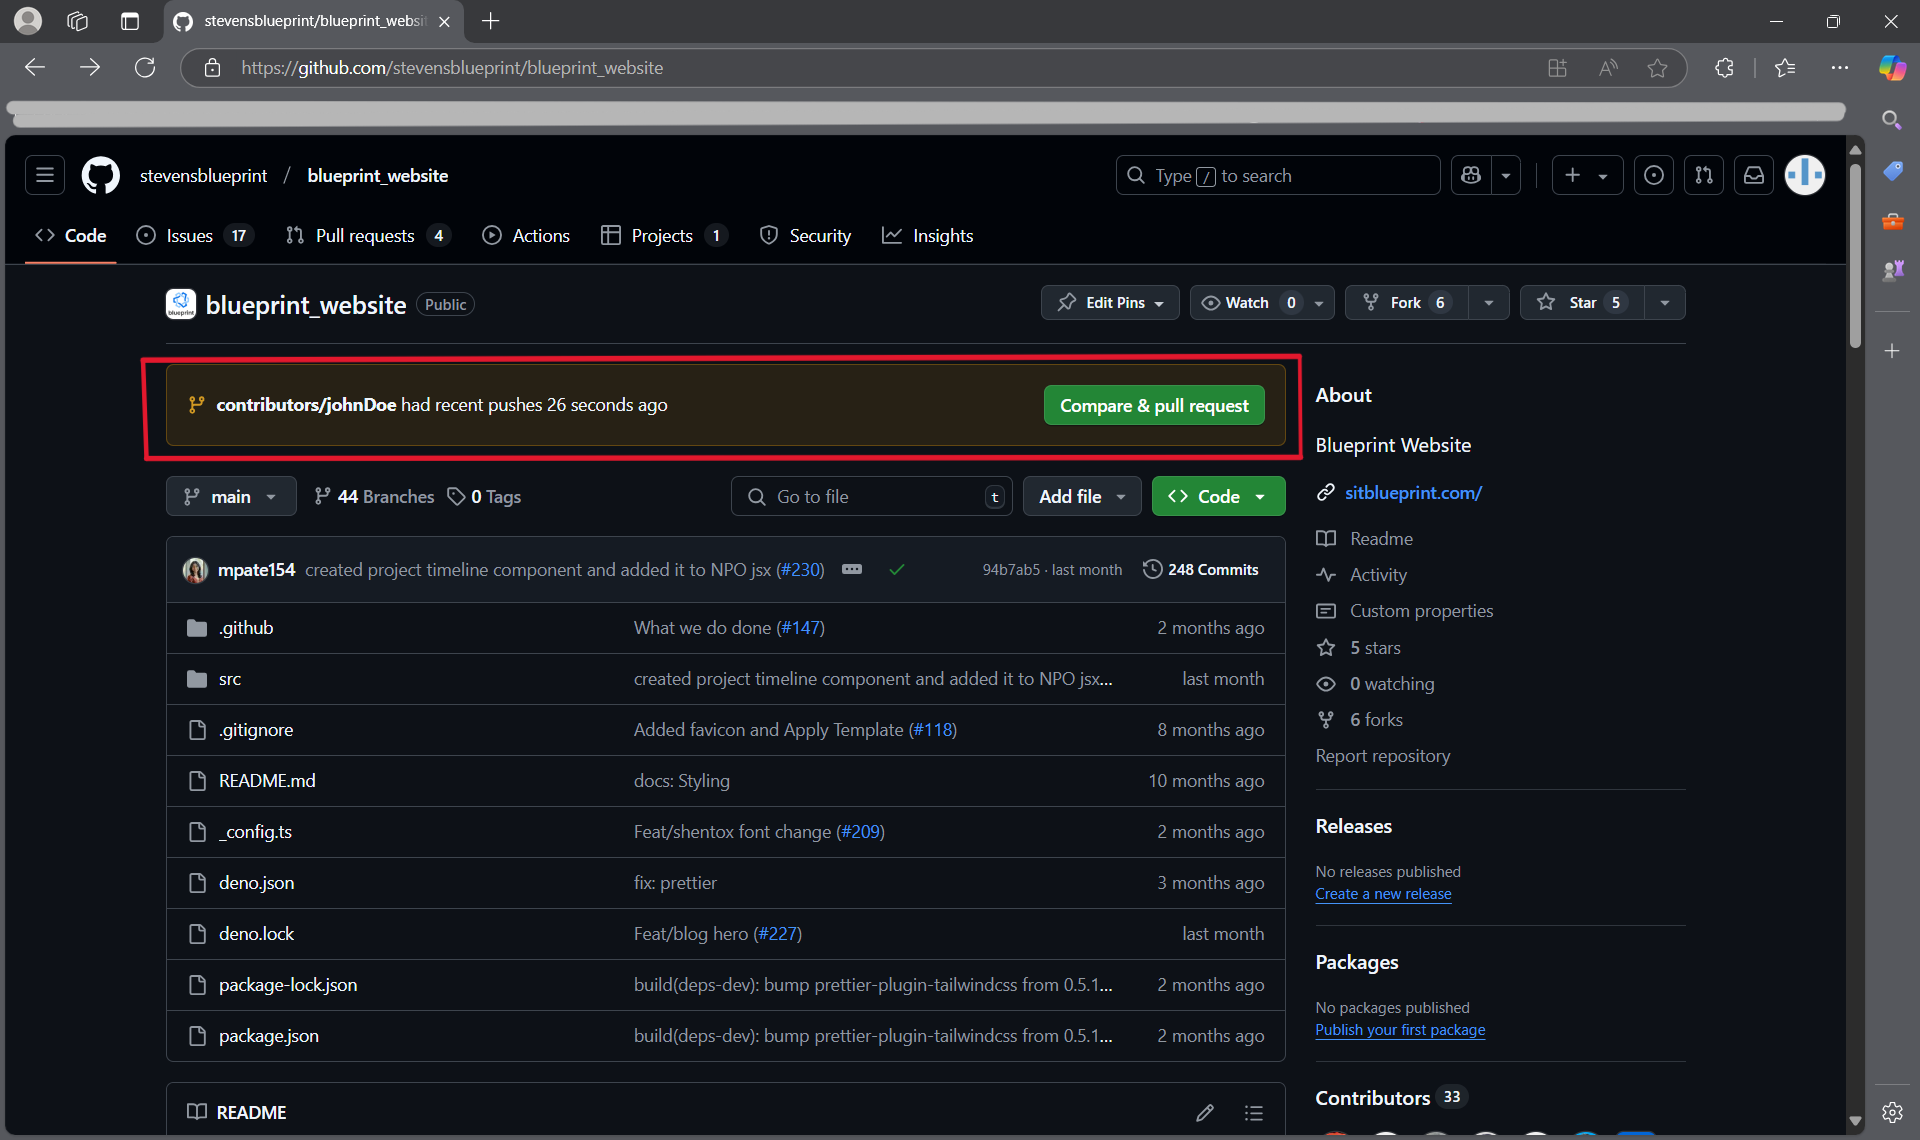
Once we have completed our task and pushed the changes, we can work on merging the changes back into the main code. To do this, we can create something called a pull request (PR for short) where we essentially propose the changes we made.
Going onto Github, you will likely see a pop-up asking if you want to create a pull request for your branch. If so, press "Compare & pull request".
 If you don't see it, you can also create a new pull request by navigating to the "Pull requests" tab and selecting "New pull request".
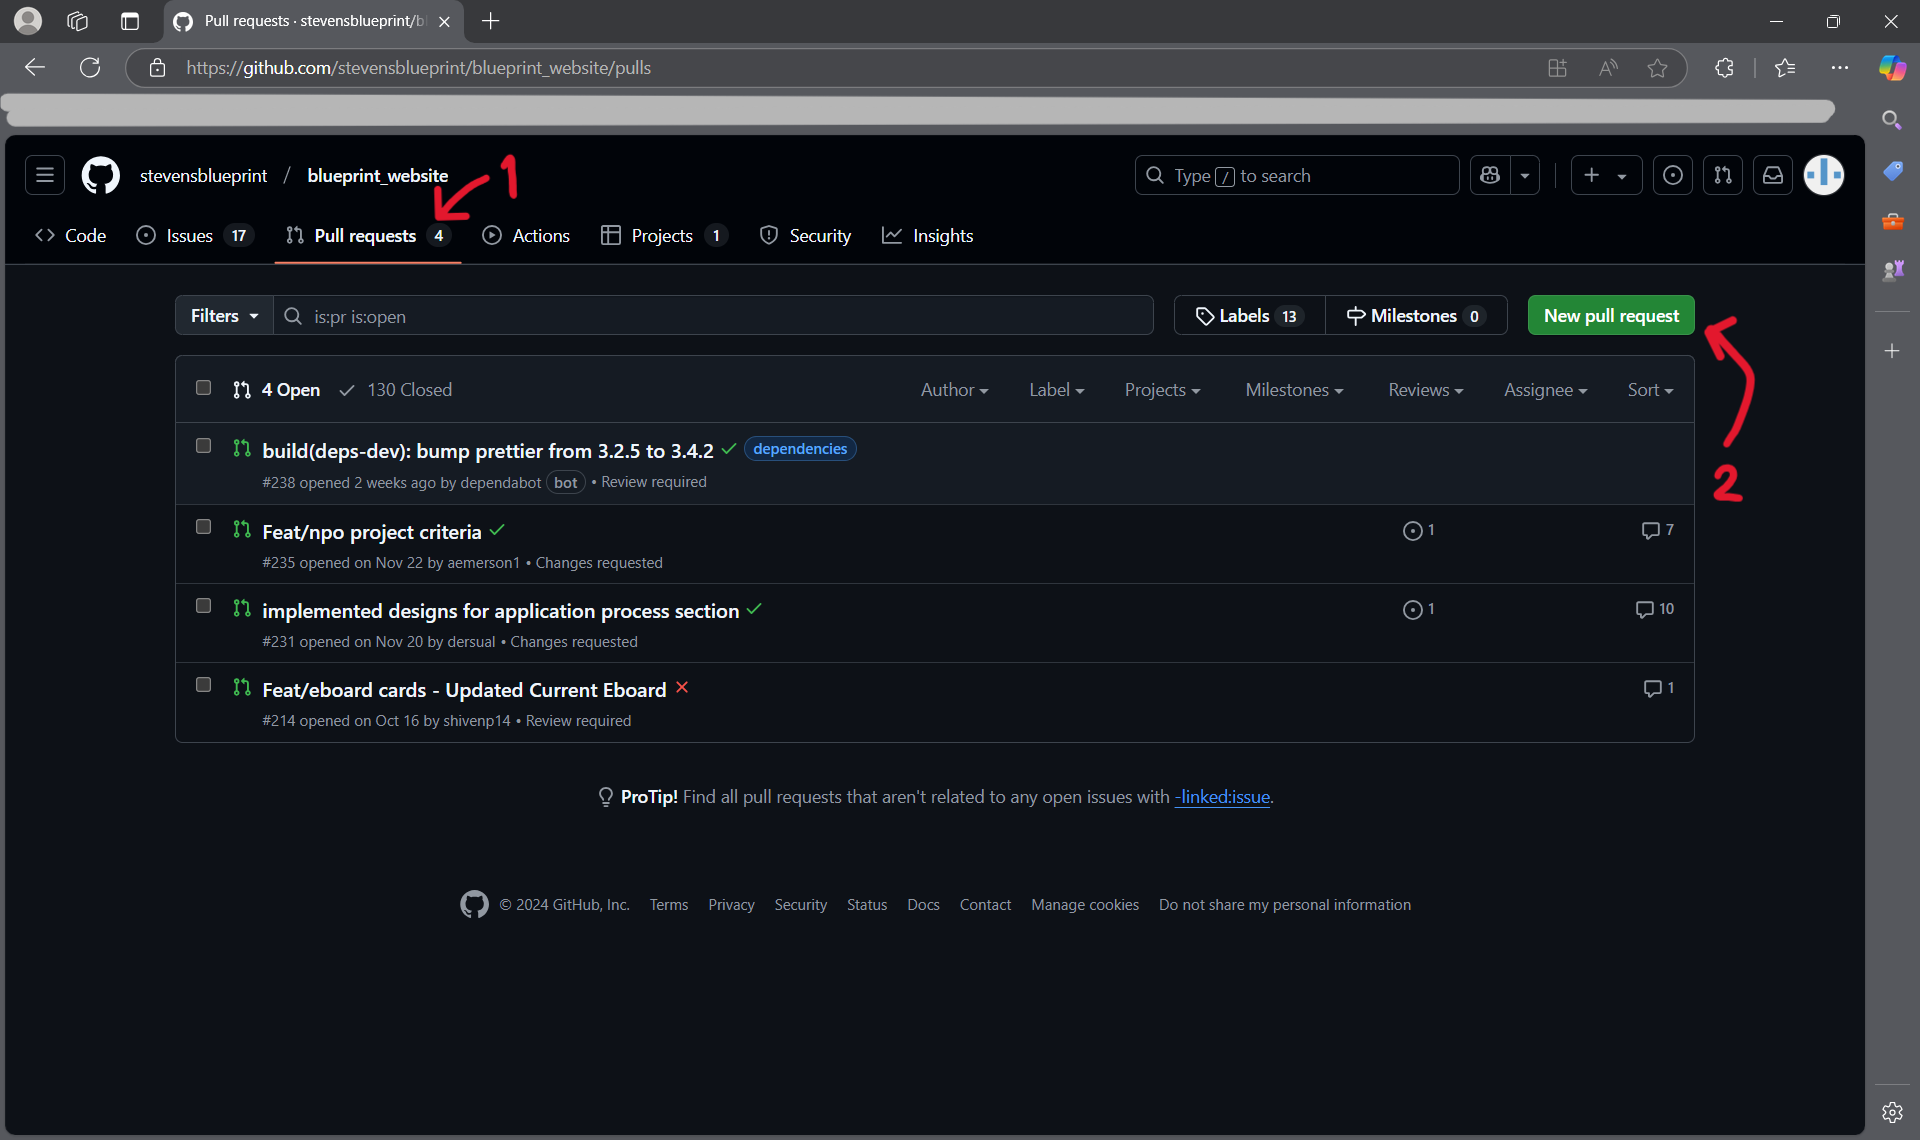
Approvals and Merging
Next, you can put in details for your pull request such as a title and detailing what changes were made on your branch.
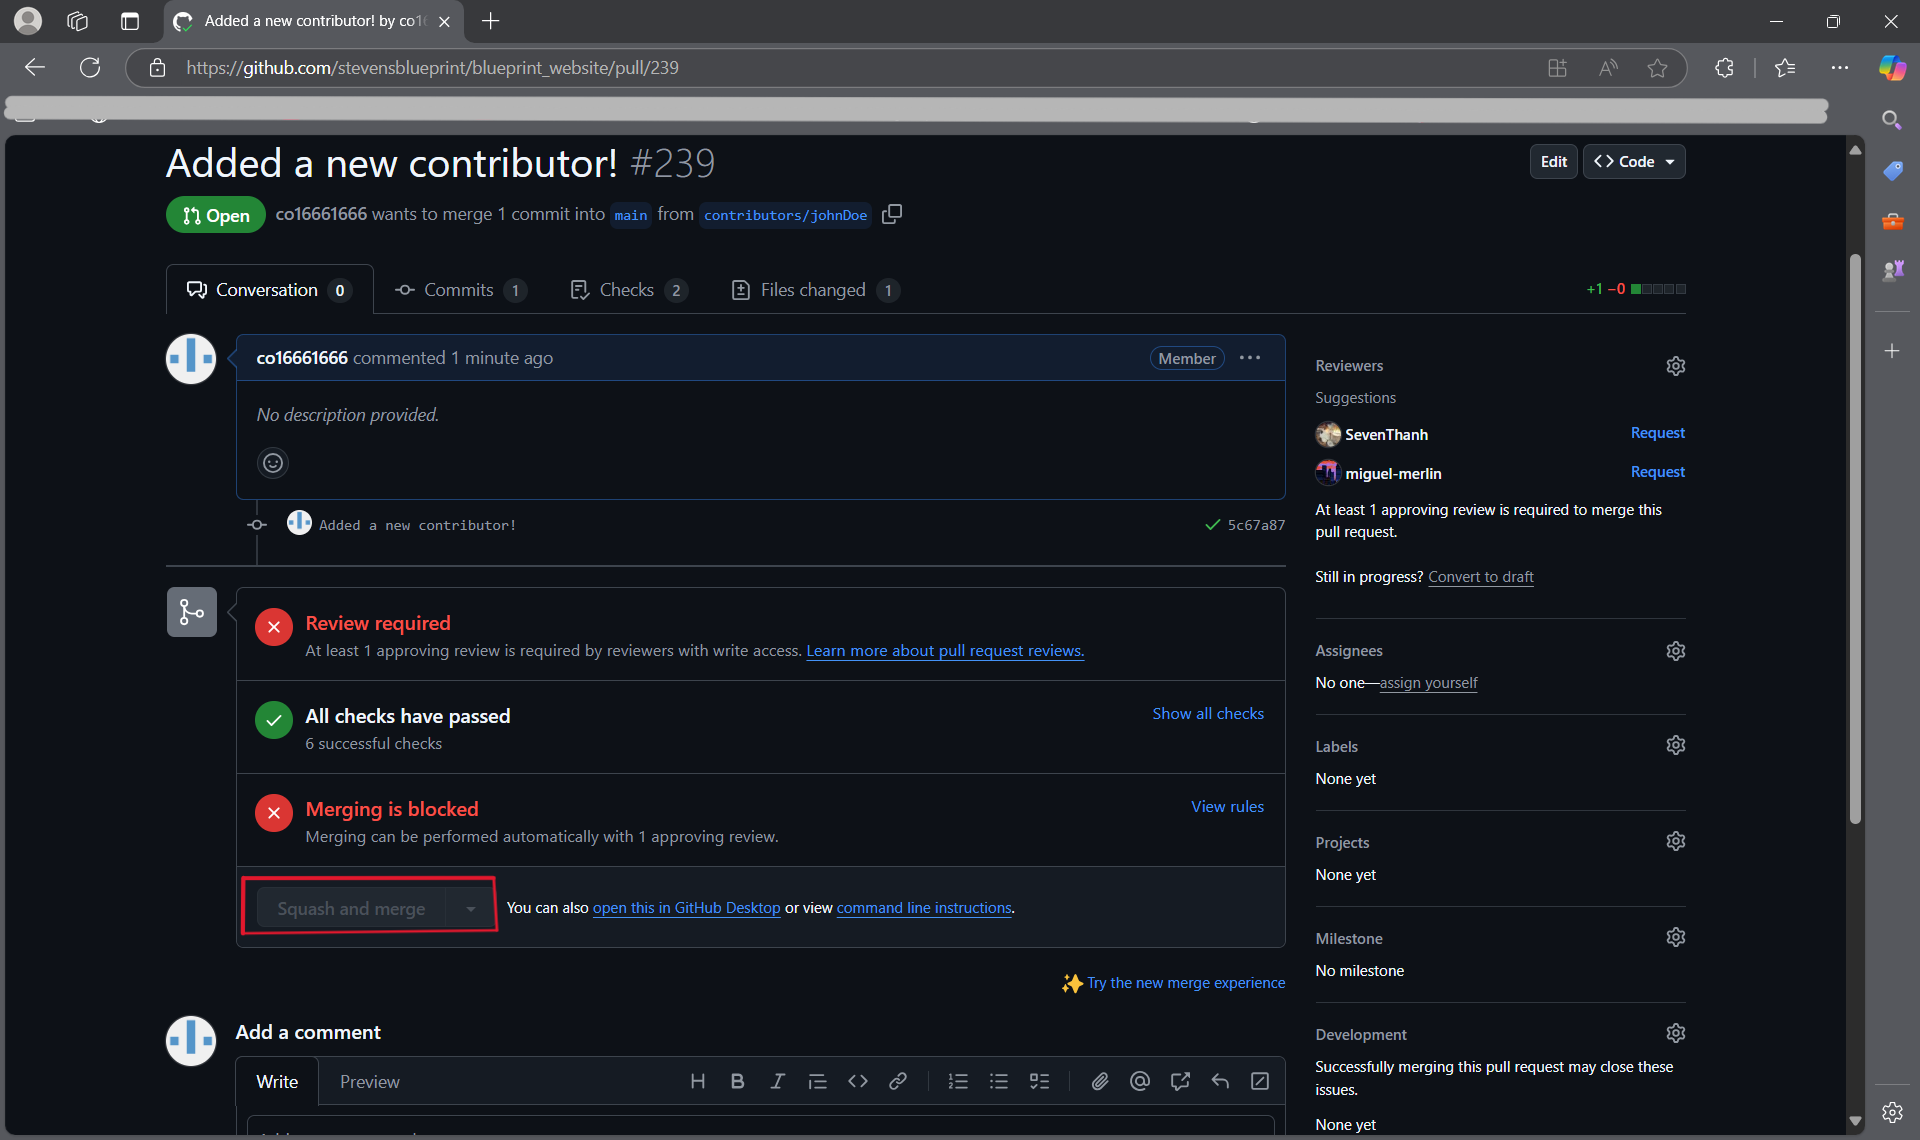
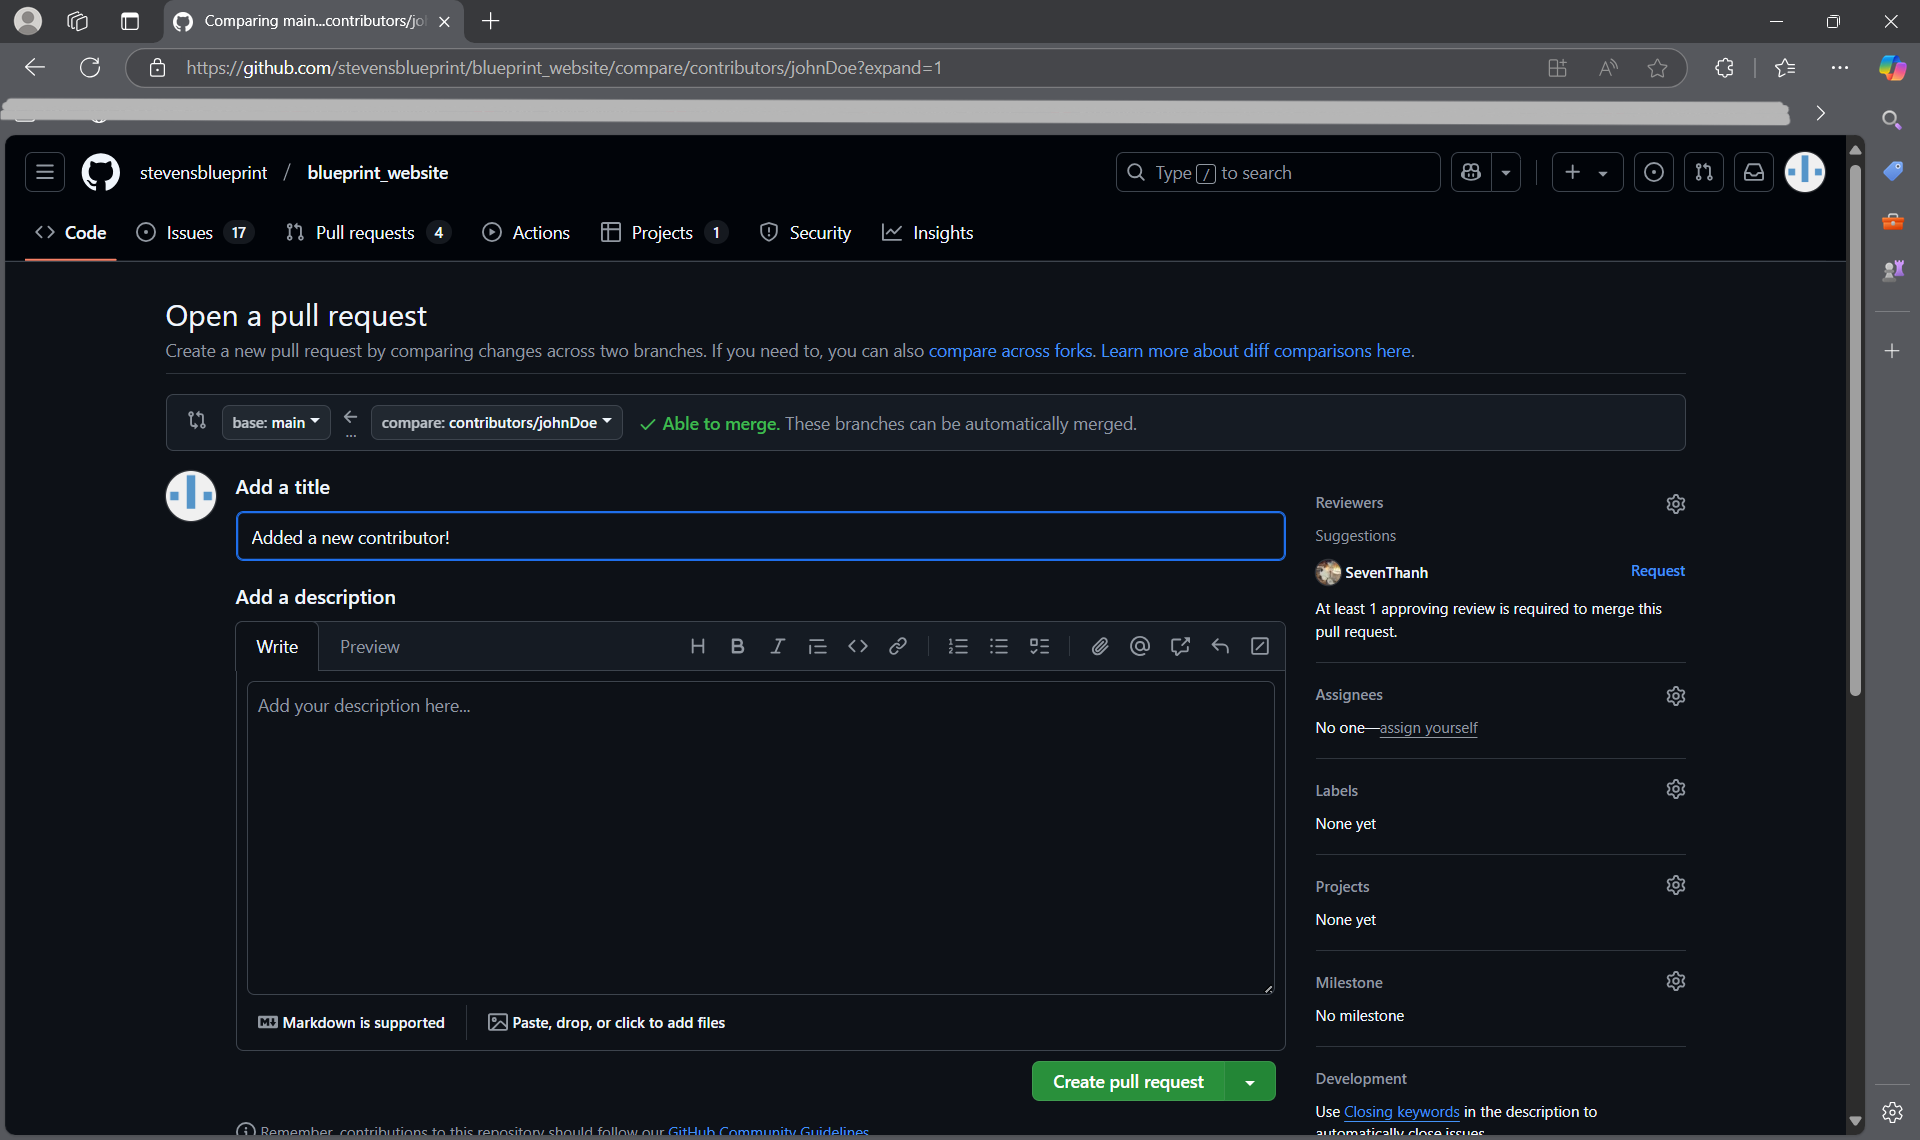 You will also see a list of approvals, some of which are run automatically. It is also necessary for at least one person to review your pull request before you can merge it with the main branch. Once your pull request is approved, hit "Squash and merge".
After that, you're done!
What Now?
In order to keep your local copy updated with the remote repository (on GitHub), you can run the git pull command. This pulls all the changes made by other people, and ensure that your local version stays up to date!
Project Outcomes
At the end of our time togther, I hope that you all improve on a two key areas of software development:
Technical Skills
- Development Patterns: Hooks, Context, functional components
- State Management: Complex state updates and data relationships
- User Experience Design: Responsive, accessible, intuitive interfaces
- Problem Solving: Handling edge cases and data integrity
Project Management Skills
- Incremental Development: Built feature by feature
- Requirements Analysis: Translated real needs into technical specifications
- Testing Strategy: Systematic verification of functionality
- Documentation: Clear code organization and commenting